Tag

WordPress

Browsing

By

See the new features and updates in the latest WordPress release.

AVIF Image Support

I’m VERY excited that WordPress 6.5 will natively support the AVIF image format.

This is THE most modern image compression format.

And all major browsers support it, so there is no need for fallback images of .jpg or .png.

That’s super important, as formats like WebP do still require fallback images, even though most major browsers support that format.

Keep in mind that when you upload an image, your theme dictates what size thumbnails to create – and there are at least 3 of them.

So, for every image you upload, there are 4 versions of it.

And if fallback images also have to be generated, you could be carrying 8 images for every one that you upload.

That takes up a LOT of disk space and makes your backups huge too.

So, you definitely want to start saving images in the AVIF format after you update to WP 6.5.

Do a Test First

NOTE: Site owners on Iridium Hosting do not need to do this test, as this host supports AVIF.

The WP dev team states that all hosts may not support AVIF images.

(And WP does not support them until after you update to 6.5.)

So, after you update, create an image in AVIF format, upload it, and then embed it on a page using various sizes offered by your theme.

Check to ensure that each one is the AVIF format.

Use Squoosh for Image Optimization

Squoosh is an online image optimizer that allows you to create the perfect display size and file size for your images prior to upload.

And it has the AVIF format available too.

I’ll be updating my Squoosh tutorial for you before I give the all clear to update to WP 6.5.

Block Improvements

WP introduced Gutenberg Blocks back in version 5.0. And let’s face it, they had zero styling features whatsoever.

We all had to use other specialty block plugins to easily add styling.

But, in the last couple of years, WP has steadily been adding more styling options to the most popular blocks.

Border and Shadow

I’m very excited about the new styling options in the Styles tab!!

In WP 6.5 there is anew Border & Shadow set of styling options for the following blocks:

  • Image
  • Columns
  • Buttons

You can add either independently. And you can set the width of the border as well as the colour.

These 2 styles are the main reason I had special CSS added to my theme and/or used a specialty block plugin. I’m delighted that I can now do both with just native WP blocks and styling.

SEE: the Border & Shadow video tutorial for how to use this new feature.

Link Dropdown Changes

When you add a link, then click to see it, all you can currently see is the URL.

In WP 6.5 you’ll be able to see the page/post title and the URL.

Auto Overlay Colour

One of the super features of the Cover Block is that you can assign an overlay to it and put text on it.

And while you could choose any colour you wanted, doing so was a nit-picky process to find just the right colour.

In WP 6.5, the overlay colour will now be auto generated based on the background colour of the image. And you can adjust it from there.

But in my tests, it chose a colour that was so close to the image that it didn’t offer enough contrast for the text to get good ADA compliance.

Maybe how well it works depends entirely on the image you are using and the predominant colour.

Block List View Improvements

I don’t really use the List view of blocks much, do you?

I honestly don’t find it that helpful just to see the name of blocks, especially with nested blocks.

Rename

WP 6.5 will now allow you to rename blocks, but only in the List view.

See Settings

And you’ll be able to alt-click (right-click for most of you) to see the settings of a block, or copy or duplicate or such.

Is this a feature you think you will use?

Dynamic Gallery

In the Gallery block, you’ll be able to set the display order to random, which will show a different order of images on every page load/refresh.

Add Favicon Via Settings

There is a new section on the General Settings page for Site Icon.

Now it’s super easy to upload it instead of doing it through your theme or via a plugin.

Fully Block Based Theme Improvements

To my knowledge, the following features will only be available on themes that have full block support (including areas outside of the content editor).

Fonts Library

Pulling in Google Fonts from Google has become a GDPR compliance issue. So, many site owners have switched to hosting their fonts locally, meaning on their own hosting.

But, getting those fonts installed for the theme to use has been a bit of a tech bear.

WP 6.5 has a new local Font Library where you can easily upload fonts for your theme to use.

You may need to check with your theme’s developer to see how to make use of it in your theme and/or if your theme has a native way to upload your fonts locally before you do it through this new WordPress feature.

FYI, I have multiple sites and on those with themes created over the last couple of years, I’ve gone back to using standard web fonts. They look just fine and I don’t have to store or bring in any font to use them.

If you designed your own theme, you most definitely want to read up on this change, as it is not without issues on some themes.

And you’ll want to know about where WP will be storing the fonts and ensure that directory can be written to.

Otherwise, you’ll have to use the plugin they suggest if you don’t know how to add them to the theme files for storing and preloading.

This is just one more case where hiring a webmaster designer is worth every penny.

Better Template and Pattern Management

You can now see all of your templates and Patterns in a grid layout.

Plugin Check

Many plugin developers make both a free and paid version of their plugin.

And, it’s customary for the free plugin to be installed for the paid version to work.

In WP 6.5, plugin devs can add a check to ensure that the free version is installed and active, else it will throw an error message to install it.

Many devs already have their own requirement check, but now they can allow WP to do that check for them, if they like.

Revisions

As you edit a post or page, WP auto saves it, and now you’ll be able to see your revision changes better.

However, smart site owners have code to do overwrites of revisions after a certain number so they don’t clog up the database with 50-100 auto saves for every post.

That will likely impact how much history you can see in this new revision feature.

Synced Patterns Improvements

Synced Patterns replaced Reusable Blocks in WP 6.4.

But with both of them, editing the individual or original one was a little tricky.

In WP 6.5 they wanted to include an overhaul of synced patterns, but ultimately decided to punt it to WP 6.6 as there are some bugs with it.

Advanced Features

There are a few improvements in WP 6.5 that will excite developers and advanced users.

Custom Fields

Gutenberg Blocks will now natively support custom field association for block attributes.

This means that 3rd party sources can provide dynamic data for that block.

And it also means that custom metadata can be added to the block as well.

A good example of this would be for a news site or one that shows the weather.

New Interactivity API

If developers wanted to add some type of dynamic interaction on their site, they had to create their on JS code.

But this lead to a LOT of inconsistency, especially among different plugins.

WP 6.5 now fully supports an Interactivity API that will do the following:

“Blocks can share data, actions, and call-backs between them. This makes communication between blocks simpler and less error-prone. For example, clicking on an “add to cart” block can seamlessly update a separate “cart” block.”

So it’s obvious that this has implications for e-comm sites.

The lightbox effect on images will also benefit from this new API.

Be sure to check the changelog on your plugins to see if they have been refactored to make use of this new API.

By

MaAnna is a geek who can still speak in plain English. She helps DIY site owners plus webmasters and designers create sites that are secure, perform well, and get noticed by search engines and readers.

Sourced from BLOG AID

By Steve Allen

Steve Allen is a niche site builder, writer, and all-around WordPress wizard. He enjoys personal development, entrepreneurship, double espressos, and making things work better than they did before.

Sourced from Niche Pursuits

By Lucija

When the world wide web first began to pick up steam, which seems like ages ago but was in fact around just 20 years ago, blogs were popping out all over the place. It was such a novelty for everyone to share their thoughts with the world. WordPress to this day has the “Hello world” default post when you start up the dashboard for the first time.

As with everything else, over time, the whole concept evolved dramatically. Nowadays, content creation, with very few successful exceptions, is a collaborative effort that might have one person at the forefront serving as the recognizable face of the business, but a whole team of people behind the scenes is cooking up the content that’s published.

The number of people within a content creation team can vary widely, depending on the scope of both the content and the company/person behind it. If we’re focusing on written content these teams will most certainly include writers, lecturers, designers (for image editing), and marketing experts, at the very least, with probably some niche positions like technical consultants in specific situations. The point is – there are a lot of people working together to get things done.

Every time you have multiple people working together, especially remotely, you need a very good system in place that brings it all together. Continuing with our example of publishing written content, through WordPress, you’ll need something that gives everyone access to the dashboard and posts, while simultaneously securing easy communication channels for all members.

Usually, you’d just combine WordPress with Google Docs and call it a day, but we’ve found that combining WordPress with Multicollab brings in much better results.

Multicollab is a Google Docs-Style collaborative editing tool designed to streamline the process of creating, editing, and publishing content, especially for teams working within WordPress. It offers features akin to Google Docs but is integrated directly into the WordPress dashboard, eliminating the need for constant tab switching. Already interested? Check out the Multicollab Website now for more!

What is Multicollab?

Multicollab is an editing tool, very similar to Google Docs making it familiar enough so everyone can quickly hit the ground running, but also features advanced functions that aren’t available with Google Docs. To put it even more simply, it will bring Google Docs features to your WordPress and in doing so remove the most annoying thing about using it with WordPress – the constant tab switching and refreshing. With Multicollab you’ll be doing all your work within WordPress, the changes, comments, suggestions, attachments, etc. will all be added in real-time for everyone to see.

A test was conducted to see how the Multicollab-WordPress combo fares against the Google Docs-WordPress combo. The same text was used with the same changes made. When the clocks stopped ticking Multicollab proved to be over 40% faster. Just imagine what that could do for your overall efficiency. If it takes less time to publish content, and you’re working a fixed number of hours you’ll be able to significantly increase your output. This in turn means more content, more advertising opportunities, and more chances to attract visitors.

Multicollab in WordPress

Because WordPress uses the block-based Gutenberg editor as the default solution for creating posts it comes as no surprise that Multicollab is fully functional with said editor. Everything you’re doing is through the same interface with just the added features.

We’ll get into more detail about the post features, but first, we want to mention everything you’ll get to use before you start writing your posts.

As this is a team collaboration tool, probably the first thing you’ll want to do is assign custom permissions to all your members. We’ve already stated that a content team consists of many individuals, each doing their own thing to get the job done and as such, not everyone needs to have access to everything.

The process is extremely straightforward where you’ll just have to tick and untick the corresponding boxes on the various activities you want to enable or disable for a team member.

Now that everyone has a role assigned to them, it’s a good idea to set up Slack notifications so you and everyone else will always know when an “event” has taken place. This can range from added new added comments, to mentions and everything else in between. The process is the same as with permissions – simply check and uncheck the appropriate box for each notification.

Finally, we come to the reports and activity section which enables you to follow up on everyone’s comments, tasks, suggestions, etc. in one place. It’s site-wide, so the initial data might be too incomprehensive, but there are a couple of filters that will enable you to narrow it down to what you really need. Although probably not equally important to each member, an overview like this is essential for team leaders who need to keep everything running smoothly.

Main Features & Pricing

  1. Inline Comment: Allows users to add inline comments to any text or media in their blog post for review by others.
  2. Real-Time Collaboration (Beta Version): Real-Time Co-editing in WordPress is possible now. It is still in the early beta stage. So, for now, you can only test it on our server. Click here to experience Real-Time Collaboration in WordPress.
  3. Team Collaboration: Offers reply, resolve, and mention commenting options for collaborative work during the publishing process.
  4. Email Notifications: Sends instant notifications when edits are made or comments assigned, facilitating team collaboration.
  5. Suggestion Mode: Tracks the content creation process and highlights modifications in posts or pages.
  6. Guest Collaboration: Enables inviting guest collaborators without creating WordPress user accounts.
  7. Slack Notifications: Integrates with Slack to provide real-time updates on mentions, replies, and other comment activities.
  8. Attach a Document to a Comment: Users can attach images or documents to their comments and replies.
  9. Reports and Activity: Advanced Dashboard functionality provides insights into editorial workflow and tracks progress across all pages and posts.
  10. Custom Permissions: Allows for management of who has access to add a comment, resolve comments, disable comments, or accept/reject suggestions.
  11. Multilingual: Offers support in six languages – German, Chinese, Hindi, Spanish, French, and Bengali.
  12. Premium Support: Email support is available anytime, with a promise of assistance within 24 hours for premium edition users.

Check out the Multicollab Pricing Page for more info now!

This also includes a 14-Day free trial offer with a 100% money-back guarantee. Multicollab is a product by Multidots, a full-service WordPress Agency and WordPress VIP Gold Agency Partner. They also offer Real-Time Feature Demo. Check it out and try this tool by yourself, it will surely fit your needs.

Multicollab

Creating a post

The real essence of Multicollab is seen when you start writing a new post. As we’ve mentioned, it’s completely Gutenberg-ready, so if you’ve used the interface already, you’ll feel right at home. So, once you start writing you’ll notice the main body in the centre is your default editor. Within that editor, however, you’ll now have added options that enable team members to communicate.

Inline comments

Inline comment

When you have multiple people working on the same text each of them needs to be able to leave comments. Once the initial text draft is complete everyone can chime in with their thoughts. Simply highlight the part of the text you wish to comment on and write your comment. It is then visible to everybody on the right-hand side. All members can comment on comments to the point when a full-blown discussion appears. We recommend that you keep it short, however, so it doesn’t get too cluttered.

If you’re looking to single out a member, for whatever reason, you can tag them. A notification is then sent to that member that ensures the action keeps going. Notifications can be Slack notifications, which we’ve already mentioned, as well as email notifications, depending on your preferences.

Suggestions

Suggestion mode

Leaving comments is all well and good, but sometimes you’ll really need to emphasize a comment which is where suggestions come in. They’re essentially comments themselves, only highlighted. You’ll get to see the differences in the way they format the text. Suggestions color the text in various ways, so even with a glance, you can see what to focus on.

As you would guess, suggestions, unlike comments, almost always require some sort of reply and/or feedback. Suggestions aren’t just added in a void, they’re directed toward someone to make the appropriate changes to the text. Once the changes are done, you’ll want to leave a reply that will potentially progress the suggestion conversation further.

Guest collaboration

Guest CollaboratorMore and more blogs/sites are working regularly with guest authors nowadays. It’s therefore important to know that even guests, i.e. people not on your members list that have assigned permissions can work on posts. You’ll need to create a guest profile and invite them to work on the post.

These quests don’t necessarily need to be writers, you can bring in outside lecturers, SEO specialists, marketing experts, etc. all with the common goal of boosting and upgrading the content you’re putting out. Guests can be assigned two roles – viewer and commenter, both of which are self-explanatory.

Custom Permissions

For those who need custom permissions, administrators have the opportunity to manage custom user permissions of both individual collaborators & groups of collaborators within the Multicollab Settings Menu.

Those include adding, resolving, and disabling comments, as well as adding, accepting, or rejecting, and disabling suggestions.

Attaching documents

attach document

When a comment and/or suggestion aren’t enough you can attach a document that will help relate better. Things like an already published article as a reference or an image that needs to be edited and added to the post are done with a simple click. If an attachment is added to the comment, the familiar paperclip icon will be visible, making it instantly recognizable to everyone.

Reports

reports

We’ve already touched on the overall reports and activity section – one that encompasses the entire site. Well, you can access the same information, minimized to the post you currently have opened. Go through the summary which shows all the stats, or follow up on the activities list in detail, going through it one by one. You’ll never feel out of place because there’s a handy counter that numbers all the new activities since you last checked, if there are any, of course.

Settings

It seems rather counterintuitive, but there is also the settings tab that lets you hide both comments and suggestions. You’ll still be able to write your own, but all others will be invisible. We assume this is the author’s “don’t disturb” sign, where he can exercise the creative freedom, he’s been given.

Conclusion

It’s essential to let go of the one-man show routine once your content gets too big for you alone to handle. Yes, you’ll have a little less freedom than you had when it was just you, but collaboration with other people can only benefit your content. Whether it’s just in service to your writing (lecturing, marketing, etc.), or if you’re ready to work with other authors on your posts, it’s important to keep evolving and always striving to get bigger and better. Multicollab is the perfect tool that will let you achieve just that – a steady workflow in an already familiar environment.

Take out: Key benefits of Multicollab include:

  1. Real-time Collaboration: It enables team members to make changes, leave comments, or add attachments in real time, ensuring everyone is on the same page.
  2. Customizable Permissions: You can assign different roles and permissions to each team member, providing control and security over who can access and edit the content.
  3. Integrated Communication: With in-built features for comments, suggestions, and notifications, Multicollab keeps all your team’s communication within the same platform.
  4. Efficiency: In tests, Multicollab has proven to be over 40% faster than using Google Docs in conjunction with WordPress, boosting productivity.
  5. Guest Collaboration: Multicollab even allows guest authors or consultants to participate in the editing process, expanding the range of potential contributors.
  6. Reporting: It offers comprehensive reporting tools for tracking comments, tasks, and suggestions, making it easy to manage and monitor progress.

In short, Multicollab enhances team collaboration, increases efficiency, and provides a seamless and integrated platform for managing content within WordPress.

Don’t wait any longer – start collaborating with your team today! Give it a Try from here (14 Days – 100% No-Risk Money Back Guarantee!).

The article was originally written by Lucija

Sourced from wp archives

By Amanda Pressner Kreuser

Whether it’s showcasing your company’s work, building your reputation as an industry thought leader, or trying to create demand for your products, a blog is one of the most important marketing tools a brand can leverage.

Posting about your brand on social media has become an essential part of any business marketing plan. But if you’ve let your blog lapse because longer-form content seems like too much of a commitment, you’re missing out on a major opportunity to connect with your audience — and convert them into customers.

At the content marketing agency I co-founded, I’ve seen just how incredibly powerful (and successful) blogging has been for clients like OXO and Nutanix that incorporate it into their business strategies. In fact, 68 percent of marketers find blogging more effective than it ever has been, according to data tracking tool Databox; brands that post content on blogs produce about 67 percent more leads than those that don’t. That’s because blogging can be one of the best ways to drive visitors to your site, whether it’s through organic search or the call to action you include in your posts on another platform — I like to think of both of those as free digital foot traffic.

If the idea of having to write blog posts regularly feels overwhelming, keep in mind that one of the best parts about blog content is it can be repurposed in so many ways. You can rework blog articles into social media posts, LinkedIn thought-leadership pieces, and editorial-style newsletters, helping to fill several channels at once and reach different audiences. Even if you don’t have the time to post very often, as long as you do it with some regularity, you’ll build a body of work that serves to tell your brand’s story and lets customers feel more connected to you.

There are lots of excellent blogging platforms out there, and they serve different needs. These are five of my favourites.

1. WordPress

This might be the first site you think of when it comes to blogging. That’s because WordPress made a name for itself in the early days of self-published websites and blogs. Now, 43 percent of all websites are built using the platform.

WordPress has ready-made themes and layouts but also has a treasure trove of customization options. It’s easy to manage and maintain, thanks to the number of tutorials, and also has plug-ins that can help you drive sales, create newsletters, and more. The platform supports various types of media, so if you want to spice up your blog posts with images and videos, WordPress can handle it. Another plus is that most creators already know how to use the platform, so if you’re thinking of hiring someone to help write your blog posts, they’ll most likely be able to jump right in–no training required.

WordPress is best for those who want heavy customization, greater control over the function of the blog, and search engine optimization features. You can set up a site for free if you don’t mind the “.wordpress.org” tacked on to your URL. If you’d prefer your own domain name, you can do that starting at $4 a month.

2. Wix

If you’re not too concerned with customization, Wix is the platform for you. The drag-and-drop builder plus the ready-made layouts mean you’ll soon be able to get down to writing. The platform is optimized for mobile, so once you get your feet wet, if an idea for a post strikes you, you can write and publish even when you’re on the go.

Though Wix wasn’t always known for good SEO tools, a recent update means you can now optimize your blog posts. The paid plan is free for the first year and $22 per month thereafter. So you can play around and get up to speed at no cost, and once the paid plan actually kicks in, you may already be seeing the ROI.

Squarespace is the place for e-commerce businesses that want to leverage content to help them reach potential new customers and boost sales. And Squarespace is one of the best platforms for e-commerce functionality. With its easy-to-use platform (like Wix, it is drag and drop) and e-commerce features (including integrated shopping carts and product pages), Squarespace is ideal for that combination of selling products while sharing your brand story. Prices start at $16 a month, but the platform does have a free trial, so you can give it a test drive before committing.

4. LinkedIn

You may be surprised to see a career platform on a list about blogging, but you can easily create “article” pages from your own personal account or business page. It’s as simple as typing up your article, choosing a header image to go with it (always a best practice to include an image!), and clicking publish.

I personally use LinkedIn as my blogging platform because it has the best engagement with our client base at Masthead Media and has allowed me to build a stronger connection between the LinkedIn community and my company. I highly recommend it if you already have a large following and if SEO isn’t your top priority.

5. Medium

If writing is something of a passion for you, and you like to share insights and opinions about your industry, Medium is your platform. Unlike WordPress and Wix, Medium won’t give your company a homepage with a unique URL, but it comes with an already-engaged audience who receive a daily email promoting the best new stories posted to the site. You simply write your piece and publish it, and it has the potential to be shared with millions of readers.

The platform has also rolled out a new payment model whereby popular pieces can earn you money. So if your blogging objective is to share your thought leadership with a broad audience, check out Medium.

Feature Image Credit: Getty Images

By Amanda Pressner Kreuser

Co-founder and managing partner, Masthead Media@mastheadmedia

Sourced from Inc.

By Brad Anderson

In today’s digital landscape, choosing the right platform for building and managing your online presence is crucial for success. Two popular options that often come up in discussions are Kajabi and WordPress.

While both platforms offer a range of features and tools to help you create and maintain your website, it’s important to understand their differences and capabilities to determine which one best suits your needs. In this article, we will delve deep into the Kajabi versus WordPress debate, comparing their features, pricing, ease of use, and more, ultimately guiding you in making an informed decision for your online endeavors.

So, whether you’re an entrepreneur, blogger, or business owner, join us as we explore the ins and outs of these two powerful and versatile platforms.

What is Kajabi

Kajabi is an all-in-one online platform that allows entrepreneurs and businesses to create, market, and sell courses, digital products, and memberships.

Kajabi Logo

By providing various tools for website building, marketing automation, and analytics, Kajabi streamlines the process of building and maintaining an online business. Users can easily customize the platform to suit their individual needs without any coding experience.

What is WordPress

WordPress is an open-source content management system (CMS) used for creating websites and blogs. It is known for its user-friendly interface, allowing even non-technical individuals to build and manage their websites.

Graphics & Logos – WordPress.org

With numerous themes and plugins available, WordPress enables customization and added functionality to fit various needs.

Why Use?

Kajabi and WordPress are both popular platforms with various use-cases, catering to the needs of businesses and individuals alike.

Here are some example use-cases for both platforms:

Kajabi Use-Cases:

1. Online Course Creation: Kajabi is an all-in-one platform for creating, marketing, and selling online courses. It offers tools for course creators to design and structure their content, create quizzes, and offer certifications. Instructors can use Kajabi to sell individual courses or bundle them together for a comprehensive learning experience.

Kajabi: Create and sell online courses, coaching, and memberships

2. Membership Sites: Kajabi allows users to create membership sites, allowing them to offer exclusive content and resources to their subscribers. This helps in building a community of loyal followers and generating recurring revenue.

3. Digital Products: Kajabi is suitable for entrepreneurs looking to sell digital products like e-books, webinars, or templates. The platform provides an integrated shopping cart and payment processing system, making it easy to handle transactions and deliver the digital products to customers.

4. Coaching and Consulting: Professionals like life coaches, business consultants, and fitness trainers can leverage Kajabi to host live events, workshops, and group coaching sessions, all while keeping track of attendees and interactions.

5. Email Marketing: Kajabi comes with built-in email marketing tools, enabling users to launch campaigns, create email sequences, segment their audience, and track email performance.

WordPress Use-Cases:

1. Blogging: WordPress initially started as a blogging platform and remains a popular choice for setting up personal and professional blogs. It offers an extensive range of themes, plugins, and customization options to create unique and engaging content.

2. Corporate Websites: WordPress is widely used by small to large enterprises to create their official websites, showcasing their products, services, and company information. The platform provides a library of themes and plugins that cater to various industries and niches.

3. Online Stores: With the help of plugins like WooCommerce, WordPress can be transformed into a fully functional e-commerce platform. Users can create product catalogues, manage inventory, handle payments, and process shipments.

4. Portfolio Websites: Freelancers, artists, and creative professionals can use WordPress to create beautiful portfolio websites to showcase their work and attract new clients or customers.

5. Forums and Community Websites: WordPress allows users to create forums, Q&A sites, and online communities with the help of plugins like bbPress and BuddyPress. These platforms can help in knowledge-sharing and fostering a strong sense of community among the users.

6. Event Management: By leveraging event management plugins, WordPress can be used to create, promote, and manage events. Users can sell event tickets, create event calendars, and set up registration forms.

What is WordPress? | WordPress 101 Tutorials

In summary, while Kajabi is focused primarily on online courses and membership sites, WordPress is a versatile platform that can cater to a broad range of website needs, from personal blogs to corporate sites and e-commerce stores.

Features

Kajabi is an all-in-one platform designed to assist businesses, marketers, course creators, and influencers in streamlining their online presence through creating and selling online courses, coaching programs, and digital products. Kajabi’s integrative system offers a wide range of features that make it easy for users to build their websites, create marketing campaigns, and sell content to target audiences.

The main features of Kajabi include:

1. Website Builder: Kajabi provides a customizable and easy-to-use website builder, allowing users to create a professional-looking and responsive website with no coding knowledge required. This includes pre-built themes, templates, and drag-and-drop functionality to design pages that match the specific brand style.

2. Course Creation: Kajabi offers extensive tools and resources to create, manage, and sell online courses. Users can create comprehensive and engaging courses with options for various content formats, including video, text, images, quizzes, and downloadable resources. The platform makes it simple for creators to upload and organize their course content through a centralized dashboard while providing a seamless experience for learners.

3. Marketing and Sales: Kajabi offers a wide range of marketing features to promote digital products and boost sales. This includes built-in email marketing tools, effective landing pages, and sales funnels to generate leads. Additionally, the platform integrates with popular marketing services, such as Google Analytics and Facebook Pixels, to analyze performance and optimize campaigns.

4. E-commerce: Kajabi’s e-commerce capabilities enable creators to sell their digital products with ease. Users can set custom pricing, create different product packages, and integrate with payment processing services (Stripe and PayPal). The platform also offers features for creating upsells, downsells, and one-time offers to maximize revenue.

5. Membership Management: With Kajabi, users can create and manage membership sites for exclusive content access. This includes options for different membership levels, subscription plans, and access to specific courses, allowing creators to build a recurring revenue stream and nurture their community.

Kajabi hero testimonial

WordPress, on the other hand, is an open-source content management system (CMS) widely used to create websites, blogs, and digital applications. It offers flexibility, extended functionality, and a massive library of themes and plugins, making it one of the most popular and versatile platforms for website creation.

The main features of WordPress include:

1. Customizable Themes: WordPress offers a vast array of themes, both free and premium, that cater to various website styles and genres. These themes come with customizable layouts, color schemes, and typography, allowing users to create a visually appealing website that aligns with their brand identity.

WordPress | Center for Integrated Professional Development - Illinois State

2. Plugins: WordPress features a large library of plugins designed to extend the core functionalities of the platform. These plugins facilitate additional features such as e-commerce tools, SEO optimization, social media integration, and more. This helps users to create a tailored website with added functionality, without the need for coding expertise.

3. Wide-ranging Compatibility: WordPress is compatible with various hosting providers, which allows website owners to choose a hosting service that meets their requirements and budget. WordPress also supports integrations with numerous services and tools such as MailChimp, Google Analytics, and Yoast SEO, enhancing the functionality of WordPress-based websites.

4. User Management and Multi-user Access: WordPress allows for multiple user roles and permissions, which makes it easy to manage and organize a team’s access to the website’s backend. Users can be assigned different roles such as administrator, editor, author, and contributor, ensuring streamlined workflow and content management.

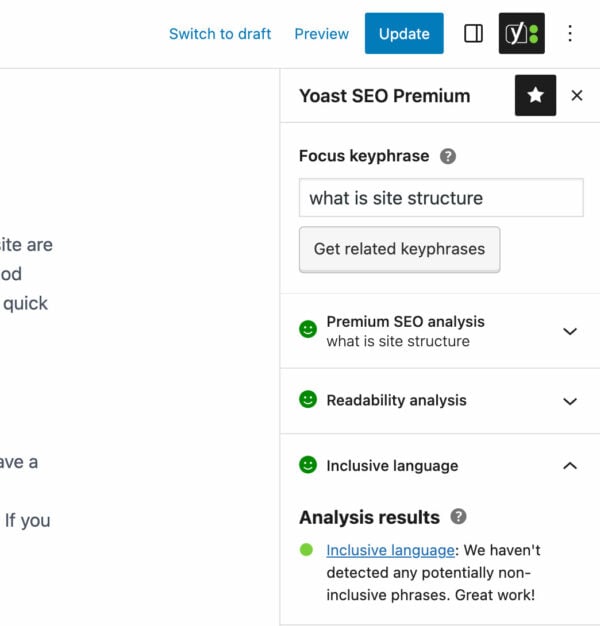
5. SEO-friendly: WordPress is renowned for its SEO-friendly features that enable website creators to optimize their content for search engines. This includes features like creating clean permalinks, modifying meta titles and descriptions, optimizing images, and integrating with advanced SEO plugins, which significantly enhance a website’s chances of ranking higher in search engine results.

By understanding the key features of both Kajabi and WordPress, users can determine which platform best suits their specific needs and objectives in terms of creating, managing, and promoting their online presence.

Featured Partner


Learn More

on Kajabi’s website


  • Free Version: 14-day Free Trial

  • Starting Price: $149 / monthly

  • Integrations: Zapier, Mailchimp, ClickFunnels, Google Analytics, Stripe, PayPal

Pros n Cons

Kajabi Pros:

1. All-in-one platform:

  • Kajabi offers a complete package of tools to build, market, and sell online courses and memberships, saving you from using different platforms.

2. User-friendly:

  • It has a drag-and-drop editor for site design and course creation, requiring little technical knowledge.

3. Marketing tools:

  • It includes built-in email marketing and automation, landing pages, and sales funnels for efficient promotion and lead generation.

Kajabi: Create and sell online courses, coaching, and memberships

4. Integration:

  • Kajabi supports third-party integrations like Zapier, ClickFunnels, and MailChimp, as well as offering its own native integrations such as Kajabi Email and Kajabi Analytics.

5. Customer support:

  • The platform provides 24/7 customer support and a rich library of resources, tutorials, and webinars to help users.

Kajabi Cons:

1. Pricing:

  • Kajabi’s pricing plans are relatively high compared to competitors, making it less suitable for small businesses or individuals on a tight budget.

2. Limited free trial:

  • Its 14-day trial period is shorter than that of many competitors.

3. Content management:

  • While its content management system (CMS) is easy to use, it may be limiting for those requiring advanced customization.

4. Lack of third-party plugins:

  • Kajabi offers in-built functionalities, but there are fewer third-party plugins, potentially limiting specific requirements.

WordPress Pros:

1. Open-source and flexible:

  • WordPress provides users with access to its source code, making it highly customizable and adaptable to various needs.

2. Extensive library of themes & plugins:

  • The platform offers a vast range of themes and plugins, both free and paid, allowing users to tailor their websites.

3. Large community:

  • WordPress has a considerable user community which contributes to its growth, development, and extensive knowledge base.

4. SEO-friendly:

  • Its built-in features and SEO plugins, such as Yoast SEO, make search engine optimization easier.

5. Affordability:

  • WordPress itself is free, but users pay for domains, hosting, and premium themes/plugins – still offering scalability for different budgets.

The beginner's guide to Yoast SEO • Yoast

WordPress Cons:

1. Requires technical knowledge:

  • WordPress setup and customization can be challenging for those with limited coding expertise or technical knowledge.

2. Security vulnerabilities:

  • Being open-source, it can be susceptible to hacking attacks. Regular updates and security plugins are needed to maintain safety.

3. Time-consuming and complex:

  • Compared to all-in-one platforms, you have to manage multiple aspects, such as hosting, themes, plugins, and updates.

4. Limited support:

  • Although there is community support, official support options may be limited or only available through third-party hosting providers and paid plugins/themes.

5. Need for regular updates:

  • Manual updates are often required for themes, plugins, and even the core platform, which can be time-consuming and risk breaking the site if not done correctly.
How to setup Kajabi

Step 1: Sign up for a Kajabi account

  1. Visit Kajab’s website at https://www.kajabi.com/.
  2. Click on the “Get Started” or “Start Free Trial” button.
  3. Fill out the required information, including your name, email address, and password.
  4. Click “Create your Kajabi account” to complete the registration process.

Step 2: Choose a plan

  1. Review Kajabi’s pricing options to determine which plan best suits your needs.
  2. Select a plan, which can be changed at any time, by clicking on the “Choose Plan” button below your preferred option.
  3. Fill out your payment details to activate the plan.

Step 3: Customize your site

  1. Log in to your Kajabi dashboard.
  2. Click “Website” in the left-hand menu and then “Design Your Site.”
  3. Choose a theme for your site and adjust colors, fonts, and other visual elements to match your brand.
  4. Create and customize pages (such as Home, About, Contact, etc.) by clicking “Pages” in the left-hand menu, and then “Add New Page.”

Step 4: Create online courses or products

  1. Click “Products” in the left-hand menu of your dashboard.
  2. Click “Create a new product” and choose a product template (such as mini-course, online course, or community).
  3. Provide a name and description for your product and click on “Create a Product.”
  4. Customize your product’s content by adding sections, lectures, and other materials.
  5. Configure your product’s settings, including pricing, access rules, and integrations with other tools.

Step 5: Set up payment and marketing options

  1. Click “Settings” in the left-hand menu and then “Payments” to connect Kajabi to your preferred payment gateway (e.g., Stripe, PayPal).
  2. Customize your checkout settings, such as currency, taxes, and legal agreements.
  3. Set up email marketing, if desired, by clicking “Email” in the left-hand menu and connecting Kajabi to an email service provider such as Mailchimp or ActiveCampaign.
  4. Create and customize marketing funnels, also known as pipelines, to automate your sales process by clicking “Pipelines” in the left-hand menu and then “Create New Pipeline.”

After completing the steps above, your Kajabi site will be ready to launch. Share the link to your site with your audience, promote your courses, and watch your online business grow!

How to setup WordPress

Setting up WordPress involves a few steps, starting with purchasing a domain, obtaining web hosting, and then installing and configuring WordPress itself. The steps below will guide you through the process.

1. Purchase a Domain Name:

  1. First, choose a domain name for your website, which will be your website’s address (e.g. yourwebsite.com). You can purchase a domain from domain registrars like GoDaddy, Namecheap, or Google Domains.
  2. Once you’ve chosen a domain name and registered it, remember to renew it annually to maintain ownership.

2. Choose a Web Hosting Provider:

  1. WordPress requires a web hosting service to store your website files and make your site accessible online. Some popular web hosting providers are Bluehost, SiteGround, and HostGator. Choose a hosting plan that suits your needs and budget.
  2. Sign up with your chosen provider, and you’ll receive hosting account information and credentials.

3. Install WordPress:

  1. Many web hosting providers offer a one-click WordPress installation feature using Softaculous or a similar software. Log in to your web hosting dashboard using the provided credentials, and look for the option to install WordPress.
  2. Click ‘Install’ and enter the necessary information, such as the domain name, site name, and an admin account (username and password) for your WordPress site.

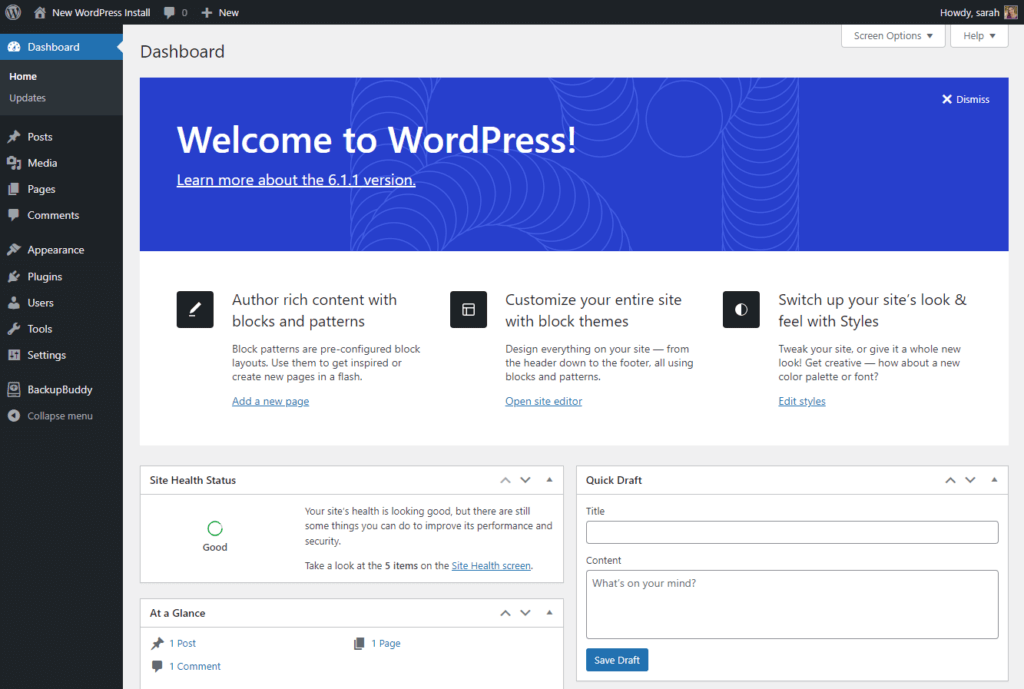
4. Configure WordPress:

  1. After installation, access your WordPress admin dashboard by visiting ‘yourwebsite.com/wp-admin’ and entering your admin account credentials.
  2. You’ll be greeted with the WordPress dashboard, where you can customize your site, create pages and blog posts, and manage other settings.
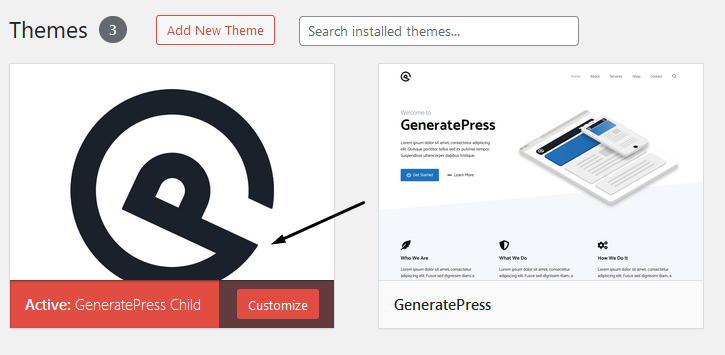
5. Choose a Theme:

  1. WordPress uses themes to determine the design and layout of your website. Go to ‘Appearance > Themes’ in the dashboard and click ‘Add New’ to browse the available themes.
  2. Choose a theme that suits your needs, and then click ‘Install’ and ‘Activate’. You can further customize the theme’s appearance and settings.

6. Install Plugins:

  1. Plugins extend the functionality of your website by adding features like social sharing buttons, contact forms, or an e-commerce store. Browse the WordPress Plugin Directory to find plugins that best suit your needs.
  2. To install a plugin, go to ‘Plugins > Add New’ in the dashboard, search for the desired plugin, and click ‘Install’ and ‘Activate’.

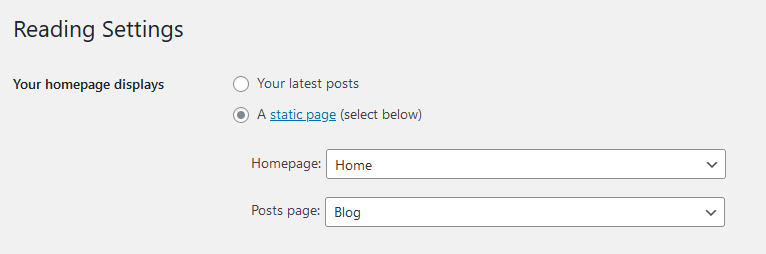
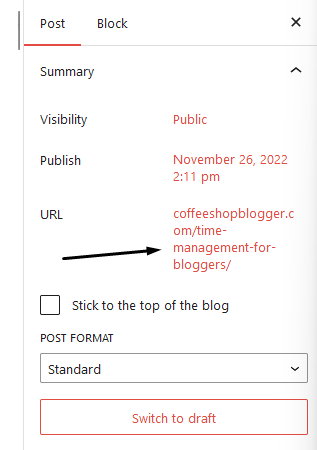
7. Create Pages and Posts:

  1. To add content to your site, create pages (such as Home, About or Contact) and blog posts.
  2. To create a new page, go to ‘Pages > Add New’ and enter the page title and content.
  3. To create a blog post, go to ‘Posts > Add New’. You can add text, images, and media to your pages and posts using the WordPress Gutenberg editor or your theme’s page builder (if available).

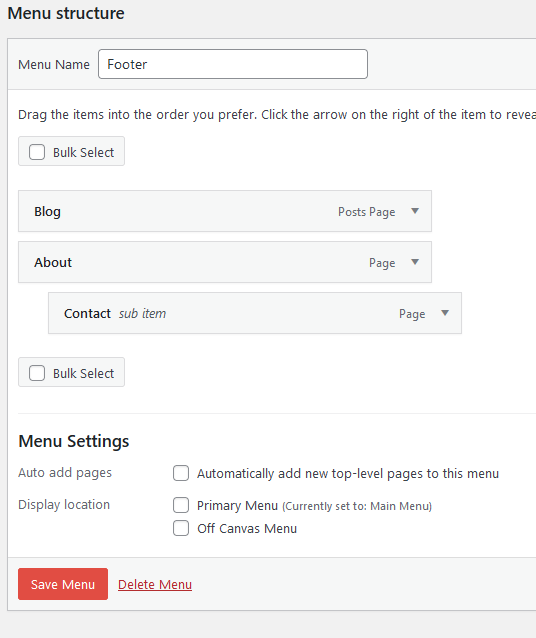
8. Set up a Menu and Widgets:

  1. To create a menu, go to ‘Appearance > Menus’ and click ‘Create a New Menu’.
  2. Add pages, links, or categories to your menu, and assign the menu to a location on your site (such as the header).
  3. Widgets are small content blocks that can be placed in various areas of your website, such as the sidebar or footer.
  4. Configure them under ‘Appearance > Widgets’.

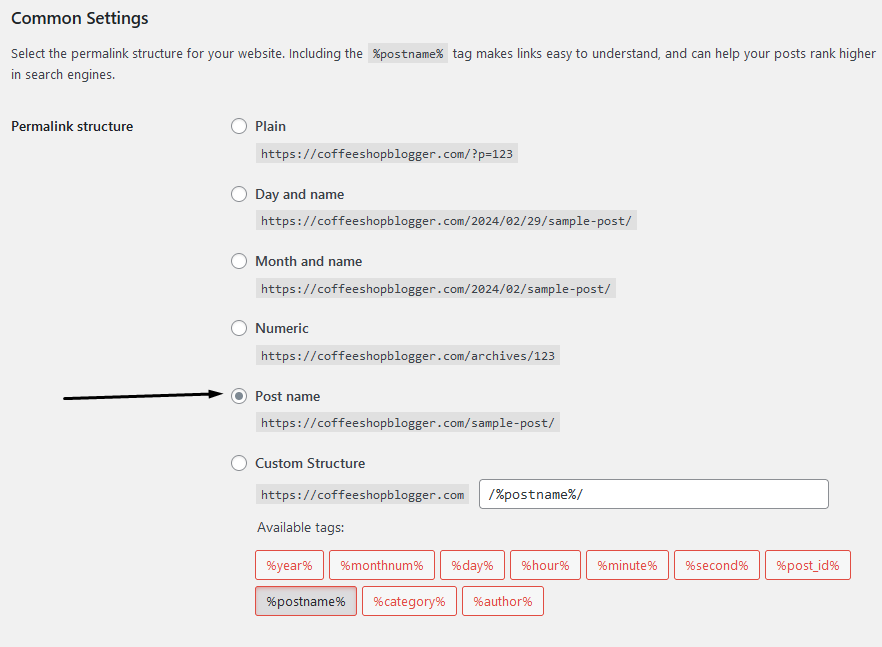
9. Optimize for Search Engines:

  1. Install an SEO plugin, such as Yoast SEO, to help your website rank higher in search engine results. Follow the plugin’s recommendations to optimize your content, metadata, and permalinks.

After completing these steps, your WordPress website is ready to go. Explore the vast array of features and settings within WordPress to further tailor your site to your specific needs, preferences, and goals. Remember to regularly update your site and its plugins, and perform backups to ensure security and stability.

Main Differences

Kajabi and WordPress are both popular platforms for building and managing websites, but they cater to different needs and target audiences.

Kajabi vs WordPress | Detailed Comparison 2023

Kajabi is an all-in-one solution specifically designed for online courses, membership sites, and digital products creation. It offers a range of built-in features tailored to meet the needs of online entrepreneurs and content creators, including course creation tools, membership site management, inbuilt payment processing, and email marketing.

On the other hand, WordPress is a powerful content management system (CMS) that powers nearly one-third of all websites and offers unmatched flexibility and scalability. Suitable for any type of website, WordPress provides its users a plethora of plugins and themes to customize and extend their site’s functionality.

Kajabi simplifies the process of designing, hosting, and selling digital products with its user-friendly interface and integration of multiple functions under one roof. It excels in providing features for content hosting, marketing automations, pipelines, and landing page templates.

Furthermore, Kajabi possesses superior user-experience management tools, enabling creators to understand their audience and improve engagement and retention rates.

WordPress, however, relies on third-party plugins to incorporate e-commerce capabilities, learning management systems, and email marketing. While this offers greater customization options, it may require more maintenance and supervision, as the integration of various plugins might not be seamless and may necessitate technical know-how.

When it comes to pricing, Kajabi follows a monthly subscription model with three tiers offering varying levels of access to its features and functionalities. Although one might consider it relatively costly, the comprehensive solutions it provides may offset the price and prove cost-effective in the long run. WordPress, on the other hand, is an open source platform that is free to use for the basic CMS.

However, users need to pay for hosting, domain names, and possible premium plugins and themes to enhance their site’s functionality.

Ultimately, making a choice between Kajabi and WordPress largely depends on the individual’s requirements, technical expertise, and available resources.

Pricing Comparison

Kajabi and WordPress are two different platforms serving different purposes, so a direct comparison of pricing might not be accurate. However, I’ll provide a brief overview of the pricing for both platforms:

Kajabi’s Pricing Plans:

  • Basic Plan:
    • $149 per month (billed annually) or $199 per month (billed monthly)
    • 3 products and 3 pipelines
    • 1,000 active members
    • 1 website and 1 admin user
    • 0% transaction fees
    • Unlimited landing pages and marketing emails
    • Webinars and events, chat support, and more
  • Growth Plan:
    • $199 per month (billed annually) or $299 per month (billed monthly)
    • 15 products and 15 pipelines
    • 10,000 active members
    • 1 website and up to 10 admin users
    • 0% transaction fees
    • Unlimited landing pages and marketing emails
    • Advanced features like 24/7 chat support, automated webinars, and more
  • Pro Plan
    • $399 per month (billed annually) or $499 per month (billed monthly)
    • 100 products and 100 pipelines
    • 20,000 active members
    • 1 website and up to 25 admin users
    • 0% transaction fees
    • Unlimited landing pages and marketing emails
    • Premium features like 24/7 phone support, affiliate program, and more

Thinkific vs Kajabi 2022: The Ultimate Guide

WordPress Pricing Plans:

WordPress is a free, open-source content management system (CMS) used to create websites and blogs. However, the costs associated with WordPress come from the additional elements needed to create a functional website:

  • Web hosting:
    • Varies depending on the hosting provider, ranging from $3 to $30 per month for shared hosting and up to $300 per month for managed WordPress hosting.
  • Domain name:
    • Approximately $10-$15 per year.
  • Themes:
    • Free basic themes are available; premium themes can range from $30 to $100 for a one-time purchase.
  • Plugins:
    • Many free plugins are available, but premium plugins may cost anywhere from $20 to $200 per year, depending on the plugin. If you wish to create an online course or membership website with WordPress, you will likely need to invest in additional plugins or themes tailored for that purpose.

WordPress Full Site Editing: A Beginner's Guide

In summary, Kajabi offers an all-inclusive pricing structure with features specifically for online course and membership site creators, while WordPress is a highly customizable platform with varied costs based on the additional services and tools you integrate to achieve your goals.

Frequently Asked Questions

Q: What is the main difference between Kajabi and WordPress?

A: Kajabi is an all-in-one online platform designed specifically for selling and marketing digital products, online courses, and memberships. WordPress, on the other hand, is an open-source content management system that can be used for a wide range of website types, from blogs to e-commerce sites.

Q: Can I use both Kajabi and WordPress together?

A: Yes, it is possible to integrate Kajabi with your WordPress site through various plugins and tools. This combination allows you to leverage the best features of both platforms, such as Kajabi’s robust e-commerce and marketing tools with WordPress’s flexibility and vast plugin ecosystem.

Q: Is one platform easier to use than the other?

A: Kajabi is often considered more user-friendly because it involves a simple drag-and-drop interface with ready-to-use templates specifically designed for online course and product sales. WordPress can have a steeper learning curve, especially for users who are not familiar with web development or design.

Q: Which platform offers better customer support?

A: Kajabi provides dedicated customer support through email, live chat, and phone, as well as a comprehensive knowledge base. WordPress, being open-source, relies mostly on community support via forums, but premium support is available if you purchase themes or plugins from specific developers.

Q: What is the cost difference between Kajabi and WordPress?

A: Kajabi offers three pricing tiers, starting at $149/month, which includes most of the features needed for online sales and marketing. WordPress itself is free but requires additional costs for web hosting, domain, and premium themes or plugins. The cost of a WordPress site can vary greatly depending on your requirements and chosen add-ons.

Q: Which platform offers better customization options?

A: WordPress is known for its extensive customization options, thanks to countless themes and plugins available. Kajabi also offers customization, but its options are more limited compared to WordPress, focusing mainly on e-commerce and online course features.

Q: How secure are Kajabi and WordPress platforms?

A: Kajabi manages security on its platform and includes SSL certificates, secure hosting, and constant monitoring. For WordPress, security is the responsibility of the website owner. You need to ensure regular updates, use reputable plugins, and follow security best practices to keep your site secure.

Q: Which platform has better SEO capabilities?

A: WordPress is widely praised for its SEO capabilities, with numerous plugins available for optimization, like Yoast SEO. Kajabi also offers built-in SEO features, but its primary focus is online sales rather than content creation and optimization.

Q: Can I migrate my content between Kajabi and WordPress?

A: Migrating content between Kajabi and WordPress may require manual work or the use of paid plugins, as there is no official migration tool offered by either platform. You may also need to reformat your content to ensure it displays correctly on the new platform.

Conclusion

In conclusion, Kajabi and WordPress are two powerful platforms, each with their own unique sets of features and benefits for individuals and businesses seeking to establish a robust online presence. While Kajabi excels in its ability to deliver a seamless end-to-end experience for creating and managing online courses and memberships, WordPress offers unmatched flexibility and customization options for a wide variety of website types.

Ultimately, the choice between Kajabi and WordPress largely depends on your specific needs and goals. If your primary focus lies in creating and selling online courses or memberships with minimal hassle, Kajabi emerges as an excellent choice. However, if you prioritize flexibility, versatility, and long-term scalability for your website, WordPress is undoubtedly the more suitable option.

As you ponder the decision, it’s crucial to carefully consider your requirements, budget, and skillset to make an informed choice.

Taking the time to explore and understand both platforms’ distinct capabilities will enable you to harness their full potential and set the stage for your online success ─ be it in the realm of education or any other digital space.

Discover more Kajabi comparisons:

By Brad Anderson

Editor In Chief at ReadWrite

Brad is the editor overseeing contributed content at ReadWrite.com. He previously worked as an editor at PayPal and Crunchbase. You can reach him at brad at readwrite.com.

Sourced from readwrite

If you want to set your blog up for success, install these WordPress plugins.

WordPress powers millions of blogs worldwide, and the service—particularly WordPress.org—has some of the best customization options you’ll find on the web. You can choose from numerous themes to make your website look how you want it to, and you can install several plugins to enhance the site’s functionalities.

You can use WordPress plugins to make your website compliant with local regulations, stop spam, and improve your marketing campaigns. You’ll find plugins for numerous other purposes as well, and we’ll reveal a dozen of the best options today.

1. CookieYes

CookieYes Plugin on a Website

If your blog operates within the EU or EEA, you must comply with the General Data Protection Regulation (GDPR). Part of these regulations requires you to give users consent before you store cookies in their browsers.

CookieYes is a free plugin that allows you to embed a consent banner on your website. Users can alter and adjust their preferences however they want. After installing the plugin, you can sign up for a CookieYes account and set everything up on your blog.

2. Cookiebot

CookieBot User Consent Plugged In

An alternative to CookieYes is Cookiebot, which helps your site remain compliant with the GDPR. You can also use the tool to comply with the California Privacy Rights Act (CPRA), which has been in effect since January 2023.

You can use your Cookiebot banner in more than 40 languages, and the plugin is free for 50 subpages. If you need something more comprehensive as you grow your blog, you can opt for one of the various paid plans.

3. Yoast SEO

Image of the Yoast SEO WordPress Plugin

Search engine optimization (SEO) is crucial if you want others to find your blog on Google, Bing, and so on. Yoast is one of the most effective SEO plugins, and the free version is perfect for beginner bloggers.

The Yoast SEO plugin lets you choose a focus keyword, and you’ll also receive scores for your posts. If you need to fill in some gaps, the tool will give you a list of suggestions—such as adding external links. Moreover, you’ll receive a readability score.

Learning about SEO will take time and experimentation. You can speed up the process with proactive learning, and we’ve got a full guide on how to become an SEO expert.

4. Jetpack

Jetpack Plugin in WordPress

Website performance is just as important as high-quality content for building an audience, and Jetpack is probably the best WordPress plugin for helping in this respect. Jetpack has round-the-clock security features to keep your site safe from external threats, and you can automatically back up your blog.

Jetpack also makes it easier for you to move your blog to a new host later if you want to. You can get analytics tools, too, along with lots of other niceties. If you’re good at coding, you can use various JavaScript tips to optimize your performance.

5. MonsterInsights

Image showing MonsterInsights Overview in WP

MonsterInsights lets you monitor your web traffic more closely. You can look at your conversion rate, average order value, and which devices users are accessing your blog from.

Other metrics you can measure with MonsterInsights include how long people tend to stay on your blog and your total number of sessions. To use MonsterInsights, you’ll need to sign up for Google Analytics.

6. Akismet Anti-Spam

Spam comments are an unfortunate reality for online blogs, but you can minimize the risk by using anti-spam software. Akismet is one way that you can protect your blog from comments that fall into this category.

Akismet uses machine learning to determine what is spam and what isn’t, and you can integrate the service with Jetpack and other tools for your WordPress site. The basic version operates on a pay-what-you-can model, whereas more premium options have fixed pricing.

7. Creative Mail

All artists, including writers, should start an online newsletter for audience engagement, selling opportunities, and various other benefits. Creative Mail is a WordPress-designed option for creating email newsletters, and the plugin is free to use.

After integrating CreativeMail, you can go to it whenever you want from your main WordPress page. You can sync blog posts and use the feature with WooCommerce, and it also integrates with Jetpack. Creative Mail has numerous stock images that you can use to grow your newsletter as well.

8. Classic Editor

WordPress has moved toward the same block editing solutions that you’ll see on sites like Squarespace and Wix, but you can always revert to the previous editing version with the Classic Editor plugin. The Classic Editor lets you determine who is the default editor for each page or blog, and you’ll also get the old layout.

The Classic Editor plugin will continue to receive support and updates until at least 2024.

9. Elementor

Removing as much friction as possible will help you stay consistent in publishing blog posts, and Elementor does that by making editing much easier. The plugin lets you drag and drop elements like you would on some of the other most popular website builders, and you can use more than 90 widgets.

Elementor has support in over 50 languages, and the tool was designed to ensure that your blog continues to perform at an optimal speed. The service has a selection of paid plans, and you can get WooCommerce integration as well.

10. WooCommerce

Your blog probably won’t immediately make money, but you should think about monetization as soon as possible. Listing products you want to sell is one way to do that, and WooCommerce is an open-source plugin that gives you more control over your blog’s e-commerce aspects.

WooCommerce allows you to customize your product pages and choose your preferred payment methods. You can also sell both one-time purchases and subscriptions.

11. UpdraftPlus

UpdraftPlus Plugin on WordPress

You should take every step possible to stop your website content from getting deleted. But if the worst happens, knowing that you have a backup option helps—and UpdraftPlus lets you blog with more confidence by backing up your posts.

UpdraftPlus allows you to schedule your backups, and you can anonymize personal data with the service. It has free and premium versions.

12. Mailchimp4WordPress (MC4W)

Mailchimp is one of the most popular email marketing platforms, and you can integrate the service with your WordPress site via MC4W. MC4W is an unofficial plugin with more than two million active installations as of May 2023, and you can easily connect your account to your site. On top of that, you can design signup forms that can help you grow your mailing list.

Mailchimp4WordPress integrates with WooCommerce, WPForms, and several other plugins. You can manage the service from your dashboard.

Install These Plugins to Give Your WordPress Blog the Best Chance of Growing

You don’t need a perfect website when you launch your blog, but you should, at the very least, have the most essential plugins to set yourself up for long-term success. It’s also smart to think ahead and set up your monetization systems early on, which can save time later.

These plugins will help you measure website performance, stick with regulatory requirements, stop spam, and much more. So, why not integrate them with your site today?

By Danny Maiorca

Sourced from MUO 

By Edwin Toonen

We’ve said this time and time again: a fast website is necessary for SEO. In a sea of similarly good (or not-so-good) results, Google will favour fast pages that can deliver a good user experience to searchers. If your goal is to attain higher rankings and drive organic traffic from Google, you need to speed up your WordPress website. In this post, we’ll discuss tips to help you improve your website performance to get that spot in the search results!

Fast websites perform better on Google

Fast websites tend to outperform slow ones on Google because of one good reason – good user experience, and this aligns with Google’s mission. Google wants to deliver the best results and the best experience for their users. Hence, they want to show users web pages that will answer their search queries and provide a good experience. That’s also why page experience is now a ranking factor in Google.

This makes perfect sense when you put it in context. We’ve all had moments where we click on a link only to hit the back button because it takes so long for the page to load. And when we leave a page (or bounce off a page) like that, we’re way less likely to visit the website again because we know there are better, faster pages to browse. So website performance not only affects user experience but also greatly shapes how visitors judge the quality of your business.

That’s why speeding up your WordPress website is beneficial in many ways. A fast site makes your users happy, they’ll engage and buy more on your site. Ultimately, that’ll make you happy. Apart from that, It also makes search engines happy because it’s easier for them to crawl and index your site, thus reducing the resources and electricity they need to spend on those processes.

Don’t I need to focus on Core Web Vitals for SEO?

Yes, we hear you! It’s true that Core Web Vitals is an important part of the page experience ranking factor, and passing Core Web Vitals is essential for higher rankings. Metrics in Core Web Vitals directly measure your page speed, so improving your Core Web Vital scores may result in higher rankings, provided that you have good content already.

While metrics in Core Web Vitals measure the performance of a page, they don’t tell the whole story about your website performance. And Core Web Vitals only measure performance on a page level. So on a site level, you may have pages that pass Core Web Vitals and slower ones in the mix.

By making various improvements to your website performance, you can ensure that your visitors will get the most out of your website regardless of the page they land on. Besides, adopting website optimization best practices also directly benefits your Core Web Vitals and helps to reduce the time spent optimizing pages for speed.

This post is about general guidelines and best practices that will help you speed up your WordPress website. But if you specifically care about getting better CWV scores, check out 5 tips to improve your Core Web Vitals. You will also find a few similar pieces of advice in this post.

How to speed up your WordPress website

Now, WordPress is a simple platform at a first glance, but it’s quite complex under the hood. There are lots of different moving parts, with lots of databases to pull data from when you need to show a page to a user. And when you add lots of pages, media content and install lots of plugins and widgets, your site performance might start to drop.

Fortunately, WordPress is very versatile so there are many things you can do to optimize your performance. Let’s go over some of the tips to help you speed up your site.

1. Choose a great hosting provider and a good hosting plan

Let’s start from the top, having a good hosting provider is crucial for ensuring your website performance. That’s because all your files and databases are stored on their server, which will be called upon when a user requests a page.

We have a dedicated guide on choosing the right host for your WordPress site. Check it out if you want a more comprehensive read. But we’ll mention some important points in this section.

A good host will have fast and stable servers. Stable means they have good “uptime”, which essentially means their server is always up and running, ensuring that your website is always accessible. On the other hand, a “fast” server refers to the specification of the computers/machine on which your website lives.

Good hosting providers also offer scalability to handle traffic spikes. A good host will have the resources to accommodate the increased load and ensure that your website remains up and running.

Next to that, customer support quality is another important factor to consider when choosing a host. A good host should provide technical support, which can be invaluable when you encounter any issues with your website. A knowledgeable support team can also help you resolve problems quickly, so you can get back to business as usual.

Another thing to consider is the server location relative to your users. If the server is fast, but it’s located far away from your users, then they might still experience slow-loading pages.

If you’re looking for the best fit when it comes to hostings, we’ve vetted some top-notch hosting companies to help you out.

2. Update your PHP to a newer version

Updating your PHP to a new version is a simple thing to do that often gets overlooked. PHP, or Hypertext Preprocessor, is a popular open-source server-side scripting language widely used for creating dynamic and interactive websites. By using PHP, web developers can build robust, feature-rich websites that can dynamically change based on user interactions, database information, and more

Updating your PHP to the newest version will greatly increase your website performance. You will get:

  • Improved performance, resulting in faster processing time and reduced resource usage.
  • Better memory management, which can reduce the amount of memory needed to run your WordPress site, resulting in faster page load times.
  • Faster request processing, as new versions of PHP are able to process requests more quickly, leading to faster page load times.
  • Some newer versions of PHP also have improved caching capabilities, allowing for faster page load times and reduced server resource usage.

You can check out endoflife.date to see which PHP version is in development and which version isn’t supported anymore.

Since it’s a server-side scripting language, many hosting providers offer PHP support as part of their hosting packages. If you’re looking to update your PHP, check with your host to see if they can help you with that.

It is important to note that updating PHP can cause compatibility issues with your WordPress plugins and themes. A compatibility issue can cause the website to break, so it is important to make a backup before updating and to test the website after updating to make sure everything works as expected.

3. Update your WordPress version is an easy fix

Advice as old as time! But it does work so we can’t go without mentioning it. You can gain a nice speed boost just by updating your WordPress website to a newer version. You get the latest performance improvements and lots of other optimizations. What’s not to like about that!

WordPress 6.1, for instance, got a bunch of performance improvements under the hood, such as better database performance and better handling of media delivery. On the front end, this results in faster load time for both new and returning visitors.

Additionally, updating to a new WordPress version allows you to run a newer version of PHP, which also gives you all the more performance improvements.

To be cautious, one piece of advice we have is to test an update on a staging environment before you update your live website. See if the update causes issues, check if there are any plugin conflicts, and make sure everything works as intended. You can check the WordPress.org forum or Twitter to see if the update causes issues for others.

4. Implement a caching solution

Caching is an important part of the performance equation. It’s a simple solution that can speed up your WordPress website and make your pages load faster, especially for returning visitors.

Caching refers to the process of storing frequently accessed data in a temporary storage area. Rather than being fetched from the server each time the data is requested, it can be quickly retrieved from the cache when needed.

This helps to reduce the amount of data that needs to be transferred between the server and your visitor’s browser, resulting in faster page load times and improved overall website performance. So every time a visitor access a recently-viewed page, the page will be served from the cache instead of having to request all the elements like HTML and images from various databases.

You can rely on caching plugins to do the work for you. For the most part, they’re quite easy to use. Be careful when installing multiple caching or optimization plugins though. They can get in each other’s way, and slow down your site!

Some of our recommendations for caching plugins:

  • WP Rocket – Very powerful, and one of the best options to make your site faster. Designed to be simple. No free option.
  • W3 Total Cache – Extremely powerful, and extremely flexible. Designed to be comprehensive. Hundreds of checkboxes and options.
  • NitroPack – Full page caching with some really clever, cutting-edge performance optimization techniques. Tons of impressive bells and whistles, though the pricing model scales with pageviews.
  • WP-Optimize – A good middle ground, with basic full-page caching, and some sophisticated database + media optimization tools.
  • WP Super Cache – A basic solution that offers full page caching, but lacks other/advanced optimization techniques.

These plugin suggestions are derived from our top WordPress plugin recommendations post. There are a lot of good resources to help you build a better WordPress website on that page, so do check it out!

5. Use a lightweight theme

The theme you use greatly impacts how fast your pages load for users. Although WordPress offers a huge selection of themes to play around with, not all themes are created equally.

Some themes are better coded than others. Themes with inefficient or poorly optimized code can slow down page load times and cause you headaches along the way.

Some themes are much leaner than others. You might be drawn to themes with lots of bells and whistles, but be careful. Themes with many images, scripts, and other assets can increase the size of a page and make it slower to load. Sometimes, all you need is simplicity!

For the most part, our advice is to pick a fast and lean theme that’s well-reviewed by the community. They’re your best bet in a sea of choices. Always check the ratings and reviews to see if you’re making the right choice. Even though you can change theme later on, it’s better to just stick with one for a while. That’ll save you troubles that may arise from switching themes.

Apart from themes, many people like to use a page builder to design websites. It’s a great tool for beginners and experienced WordPress users alike. We have the same advice as with theme, that is to choose a popular and well-reviewed one. Some page builders are much lighter and more optimized for speed than others. Elementor, for instance, has done a bunch of work recently to speed up their builder.

6. Deactivate and remove unused plugins

WordPress is a wonderful platform thanks to its plugins and widgets, making it possible to extend a website in many ways. But it can be tempting to install a plugin for every little functionality that you want.

Although plugins can make your life easier, using too many of them is bad for your performance. Since there are more functionalities to load, they make your page load slower.

Really take a look at your plugin collection and assess which ones you need and which you don’t. And instead of using a plugin for every small functionality, use more versatile ones that can do multiple things you need.

For the ones that you don’t need, don’t forget to deactivate and delete them from your site. That’ll remove the additional codes they add to your website. This is an easy fix that may be ignored by some. Besides, unused plugins can cause conflicts with other plugins, themes, and core WordPress functionality. By removing them, you reduce the risk of compatibility issues, which can improve the stability and performance of your site.

7. Optimize your images: a quick fix to speed up your pages

We’ve said this many times, heavy images are detrimental to your page speed. Although eye-catching, high-definition images are a joy to look at, they make your pages much heavier. This means there are more things to process and load, resulting in a slower load time. For instance, having a large, unoptimized hero image above the fold will definitely lead to a low LCP score in Core Web Vitals.

You don’t actually need those high-resolution images. They only need to be sharp enough for everyone to easily make out what’s in them. There’s also a point of diminishing return where higher resolution doesn’t translate to better picture quality. The key is to find a sweet spot between resolution and quality.

Before uploading images to your website, make sure to compress them to reduce the file size. This is especially important if you’re displaying many images on your website or if you’re running an ecommerce website with lots of product images.

We recommend Compress JPEG & PNG images or Optimole to compress, optimize and manage your images. Squoosh.app is another great tool that we use to compress the social image of our posts, which is shown when our posts are shared on social media.

Want to go in-depth into image optimization? Check out our comprehensive image SEO guide!

8. Optimize your media delivery

The way you serve media content to end users can greatly impact your page speed, too. It’s crucial that you optimize and make tweaks to how your website delivers media content.

Lazy-loading is a popular technique that a lot of websites implement. It tells your user’s browser to load images only when they are needed, rather than loading them all at once when a page loads. Luckily WordPress does this natively so you can use that feature right out of the box. In addition, WordPress 6.1 also received a nice media delivery improvement, which is great for websites with lots of images. But even with all these features available, it’s still best to only add images when they are necessary.

As for videos, they can be useful in driving search traffic to your website. But we strongly advise you not to host videos directly on your server. They are heavy and can take up a lot of your server storage. Self-hosted videos will also make pages load slower, which is not what you want for SEO.

A better choice is to host videos on a video hosting platform like Youtube or Wistia and embed a link on your page. Next to that, make sure to use a process to show a preview image, and only load the video on interaction.

We also have a solution for optimizing videos for SEO – our Yoast Video SEO plugin! It adds the necessary structured data to videos on your website so Google can show them in rich snippets. The plugin will also supercharge your videos so they load more efficiently. If videos are an important part of your website and your SEO strategy, you need to use Yoast Video SEO!

9. Use a content delivery network

Content delivery networks (CDNs) won’t let you down when it comes to speeding up your WordPress website. It is incredibly important if you serve overseas users or those who live far away from your original web server.

A CDN is an interconnected network of servers working together to deliver content to your end users. They make copies of your static content like images or HTML files and distribute them on all the servers within the network. So instead of serving images or HTML files directly from your original servers, those files will be sent from the server closets to your users.

On the left: traffic to your site lands on a single server. On the right, a CDN sends visitors to the server nearest to their location. Image: Wikipedia

As we explain in our guide to CDNs, the same ‘do your own research’ principles apply here, too. You’ll need to find the best mix of performance, features, and price.

We’re huge fans of Cloudflare at Yoast (which we use to power all sorts of our own ecosystems), but it may not be the perfect fit for you.

When you’re choosing a CDN for WordPress, it’s worth making sure that they have a good plugin integration, so that page and resource caches are automatically updated or purged as you write or update your content (like the Cloudflare WordPress plugin).

10. Use fewer external scripts and optimize your JavasScript

A note before we go further: this section is a bit more advanced compared to the other advice in this post. It’s best not to tamper with any JavaScript if you’re new to website building, or if you don’t have any development experience. Instead, play it safe and ask an experienced developer to help you out with JavaScript tweaks and optimizations.

With that said, JavaScript is a wonderful language and allows us to do a lot of things on websites. It makes websites more dynamic and enjoyable for end users to use.

When you see animations on a website, like when you click a button and something pops up, that’s most likely thanks to JavaScript. For website owners, it allows them to add analytics tools like Google Analytics or Hotjar and do cool things like A/B testing or personalization.

But using too much JavaScript and external scripts makes a page load much slower. Loading external scripts can slow down the performance of your website, as the browser has to make additional requests to retrieve the scripts. We often see this on web pages with many external ads, which can be frustrating at times. By minimizing the number of external scripts, you can reduce the amount of data that needs to be loaded and improve page load times.

Too much JavaScript can also affect your crawl budget. That’s because Google needs to render these files while indexing, which takes up resources. The more resources Google needs to spend on processing those files, the less they have to come back and crawl other pages on your site.

There are many ways to reduce the amount of JavaScript you use, which greatly depends on your website and the type of scripts. Start by finding out what’s loading. Then you can decide to not load it, or change how it loads to make it load more efficiently by implementing defer or async loading.

Avoid loading stuff from external domains, like Google Fonts or resources from CDNs, and load local copies instead. Also, ask yourself if you can get the same result by using a different method than using a script. For example, you can use CSS instead of a script for animation.

11. Reduce files size

We mentioned that you can compress your images to reduce their file size. You can do the same with your HTML, CSS, and JavaScript files, too.

Although the number of bytes and kilobytes you shaved off these files doesn’t sound like much, they can add up. One way to reduce file size is to reduce the redundant spacing or lines in your code. You can also combine multiple files into a single file, compress it and still serve that file without breaking your site.

Tampering with codes never sounds like a great idea, especially if you’re not a developer. But thankfully we have plugins to help us out. You can check out:

  • Autoptimize, which has some really clever JavaScript, CSS, and HTML optimization.
  • WP Minify, which also allows you to combine and compress JavaScript, CSS, and HTML files.

12. Reduce HTTP requests to your server

Every time a user clicks on a link to visit your website, their browser has to make multiple HTTP requests to your web server asking for various files and data. The server has to process these requests and send back all the necessary files so the browser can render them and show the page to the user.

Reducing the amount of HTTP requests here basically means reducing the number of files the server has to retrieve and send to your user’s browser. That will help with decreasing the amount of data transferred and decreasing the load on your server, as well as making it easier for the browser to render and construct a page.

If you’ve already implemented all the tips we mentioned above, then you’re already removing quite a bit of unnecessary HTTP requests. That involves using fewer plugins and scripts, including fewer media files, implementing a caching solution, and using a CDN to serve static content.

Wrapping up

Congratulations on making this far into the post! We hope this post will be useful in helping you speed up your WordPress website. We know there’s a lot of information here, so do take some time to process and digest it.

By implementing the techniques and best practices we suggest, you’ll be on your way to building a fast and snappy website! Don’t forget to document the changes you make and evaluate the impact on your website’s search presence, organic traffic, as well as overall website performance.

When every millisecond can make the difference between a visitor buying or leaving, there’s always more room for performance optimization. We regularly review the setup and configuration of our hosting, CDN, plugins, and theme – and so should you.

Got a great recommendation for speeding up WordPress or other site speed tools? Let us know in the comments!

More resources to help you speed up your WordPress website

These articles and documentation can provide more information on website speed optimization. Have a read!

Last but not least, an incredible source of information: Jono’s slide deck on site speed from a talk at SMXL Milan.

By Edwin Toonen

Edwin is a strategic content specialist. Before joining Yoast, he spent years honing his skill at The Netherlands’ leading web design magazine.

Sourced from yoast

By Ashley Simpson

Helping your audience to find your best content is crucial to lengthening the time spent on your site. You want people to be able to find your most important content quickly and easily, which is where a featured post section can help.

Featured posts allow you to show people where your most helpful and popular content is at a quick glance. This section can be used regardless of what theme you use for your WordPress website.

If you want to add a featured post to your blog posts or sidebar, we’ll cover 3 easy ways to do just that. It’s so easy even beginners to the platform will be able to make their website more robust with this section of featured posts.

Let’s dive in and see why featured posts matter and how you can implement them quickly.

A featured posts list allows your audience to find your most important content quickly. Even if they don’t know what to look for on your site, you’ll be directing them right to your most valuable content. This is a great way to capture their interest, engage them with your top blog post, and hopefully establish yourself as an authority in your niche.

For website owners who have been blogging for a while, you might have so much information that it’s overwhelming for people to wade through.

With a featured post, you’re telling them where to start. It might be a timely piece, pillar content, or your most-visited blog post.

Once they find what they’re looking for, they might spend even more time perusing the rest of your featured post list. This can help with website trust signals, indicating that you should rank higher in the SERPs.

You can easily add a featured post or two to your website in one of 3 ways:

  • Adding a new list block
  • Adding featured posts to the sidebar
  • Using a plugin to display featured posts in WordPress

1. Add a New List Block to Your WordPress Website

Perhaps the easiest way to add featured content to your website is to simply add a new block. This will provide you with a list of featured content within the confines of another blog post. In the article where you want to add featured posts, you will need to follow these steps:

  • Click the “+” to add a new block.
  • In the menu of options, click “list.” You may need to click “browse all” to see the WordPress sidebar to get to the list block.
  • Simply type in the name of the posts that you want to link. You can even use only one post, if you want. The number you select is up to you.
  • Highlight the post title and press CTRL+K (Command+K if you’re a Mac user). In the box, enter the URL of the featured post you want to link.

Here is an example of what the finished product will look like:

Creating a Reusable Block

If you want to use this block easily in several pages on your site, you might want to consider taking a few extra steps to create reusable blocks for your featured post section.

Once your list is made and hyperlinked, you can modify the block as a whole. Click the three dots to the right of the sidebar while in the block with your featured post list. This will open a new menu and you can select “Create Reusable Blocks.” Give it a name that you can remember.

From here, you’ll be able to add your reusable block anywhere you want featured posts to appear. Simply add a new block, scroll to the menu of options, and type in the name that you selected.

With this saved, you will be able to insert your new list with the featured post without having to hyperlink and type it out each time. This can be a huge timesaver, freeing you up for more important website modifications.

Adding featured posts to a WordPress sidebar is another great way to keep these posts front of mind for your audience. It takes a few more steps, but it can be worth it if you want it to be visible on each and every page of your site.

  • Head to Appearance on the left-hand sidebar of your WordPress dashboard. Select “Widgets” from the drop-down menu.
  • Choose where you would like your list to appear (right sidebar, left sidebar, etc.).
  • Click the “+” icon and add a list, similar to how you did in the last method.
  • Type in the name of the feature post you want to include.
  • Highlight the text (most likely your post title), press CTRL+K or Command+K to enter the URL of your WordPress post you want to include. Alternatively, you can click the link icon.
  • When finished, click the “Update” button in the upper right screen.

This will create a very simple text-only list of your featured posts. If you want more options like displaying a featured image with your titles, then you can opt for a paid subscription to a plugin like MonsterInsights.

3. Add a Featured Post with a Free WordPress Plugin

If you want something a little bit sleeker for your featured post section, then you might want to use a plugin. This requires just a few extra steps, but even beginners to the WordPress platform can learn to use it. In this post, we recommend using the free Display Posts plugin.

Here is how to add featured posts with this easy-to-use plugin:

  • On the lefthand sidebar, go to “Plugins” and “Add New.” Type “Display Posts” in the search bar to the right.
  • When it comes up, click “Install.” Wait for it to download, and then click “Activate.”
  • Under each article that you want to feature, add it to a “featured” category. You may have to create this category. (From the page editor of your blog, click the gear icon in the upper right corner. Scroll down to categories, add new, and label it “featured.”)
  • With the featured posts selected, you can now insert the shortcode to your pages. Click the “+” icon to add a new block. Click “Browse All” and search for “shortcode.” This will bring up a box where you can enter the code for your new plugin.
  • Type in [display-post tag=”featured”].

Alternatively, you can add featured posts with images using the same method. The only difference is the code that will be used in the shortcode box. To do this, you will enter the following text: [display-posts include_excerpt=”true” image_size=”thumbnail”]

The finished examples of the featured posts will look like this:

Adding Shortcode to a Sidebar

If you want to display featured posts in a sidebar, you can do so with a text widget using this plugin:

  • Head into your “Appearance” and “Widgets” area again.
  • Insert a “text” widget in the area where you would like your featured content to appear.
  • From here, you will follow similar steps to the above. Insert shortcode the same way with the same text.
  • Click “Update” to save your changes to the page.

Keep in mind that you will need to keep categorizing each new post if you want it to show up as a featured post in this section. How many posts you categorize this way is totally up to you, but you’ll need to refine these categories over time as you write more posts.

What to Include in Featured Post Sections

If you want people to find specific posts on your page, you need to know what to include. Generally speaking, there are a few types of content that you might include in this important featured post section of your website:

  • Time-sensitive material that involves a current event or news story
  • Your most important content that tells people how to connect with you
  • Answers to the frequently asked questions about your product or service
  • Most popular content

If there is a post that you want more people to engage with, it belongs in a featured posts section. Make sure that anything you include here is a decent length (usually recommended is 2,100 to 2,400 words but you can learn more in our article about how long should a blog post be) and is one of your best content pieces. It should engage your audience with relevant and useful details.

Final Thoughts: Adding a Featured Post Section

If you’re committed to giving your audience quick and easy-to-find content on your site, then you need to add featured posts. This allows visitors to engage more easily with your most popular or important content. Take some time to organize content to easily add it to your site.

It may require a one-time investment of your time and energy, but it will have far-reaching positive effects on your site navigation.

By Ashley Simpson

Ashley is an experienced freelance writer with an enthusiasm for finding creative ways to earn money online. She uses her passion for words to share what she has learned with the world.

She spends most of her time blogging for a multitude of websites and consuming everything she can get her hands on in relation to personal finance and side hustles.

Sourced from NICHE PURSUITS

By Steve Allen

Want to add Google Search Console to WordPress and need the exact steps?

You’re in luck.

In this post, we cover every method there is to verify your WordPress site with Google Search Console (formerly known as Google Webmaster tools).

You’ll also learn:

  • The difference between verification methods
  • How to view Search Console reports inside WordPress
  • How to add a sitemap
  • The benefits of adding Google Search Console
  • And much more…

There are a few ways to verify your WordPress website in Google Search Console.

Each method may provide different search data, depending on which one you choose or the URL you target.

Let’s take a look at each method now and follow the steps to add Google Search Console to WordPress.

1. Newest Method: Domain Verification

Domain verification is the most recommended verification method because it covers all subdomains and URLs, including www and non-www versions.

This method doesn’t even require you to do anything with WordPress. That’s because you verify through your domain.

It also includes all HTTP variations, which is good for ensuring your site is redirecting to its HTTPS version.

Follow these steps to use this verification method.

First, log in to Search Console and add a property by clicking on the list of properties drop-down box and clicking Add property:

add Google Search Console to WordPress

Next, in the popup box, under Domain, type your domain name without the HTTPS or www and click CONTINUE:

add Google Search Console to WordPress

Now go to your domain registrar account to add a new DNS record.

I’m adding mine in Namecheap, but it’s similar to most registrars.

Use the following settings when adding a DNS record:

  • Under DNS type, choose A Record
  • For Host, use the @ symbol or leave it blank for some registrars
  • Copy and paste the text provided by Search Console in the Value field
  • For TTL, choose the lowest number

After you’ve added the record, go back to Search Console and click on VERIFY.

It can take anywhere between a few minutes to several hours for the verification to be recognized.

However, once your domain is verified in Google Search Console, it will start collecting search data and display it within a few days.

2. Older Method: Site Verification Through Meta Tag or HTML File

These verification methods allow you to target a specific page or area of a website.

For example, if you only want to collect the data of a specific blog post, product category, or subdomain.

This is helpful if you want to monitor sections of your site’s data separately from the rest of the site.

The first way requires you to upload an HTML file to your web hosting account, and the other is to add a meta tag to WordPress.

Verify Google Search Console with HTML File

First, log in to Search Console and add a property by clicking on the list of properties drop-down box and clicking Add property:

Next, in the popup box, under URL Prefix, type the URL exactly how it displays in Google’s search results and for the data you want to track:

To verify with an HTML file, click the Download the file button and upload it to the root directory of your WordPress installation.

You can do this by connecting through an FTP program. Then go back to Search Console and click on VERIFY.

Verify Google Search Console with Meta Tag

The other method is using the meta tag which you can add to your WordPress theme.

Instead of choosing the above option, select the HTML tag under “Other verification methods” and copy the code:

You can add the code manually or use a plugin. To add the code manually, follow these steps:

Inside your WordPress admin, go to Appearance > Theme Editor and choose the header.php file.

Just make sure the header.php file you edit is a child theme and not the main theme. Otherwise, it will get overwritten when the theme updates.

Paste the code after the HEAD tag:

If you want to add the code with a plugin, here are several plugins that support it:

To add the HTML tag with an SEO plugin, some will only need the characters between the content quotations, whereas others require you to paste the entire code in:

Once added, go back to Search Console and click on VERIFY.

Your search data will start showing up after a few days. Note that you’ll need to keep the HTML file or meta tag in place to keep verification active.

3. Alternative methods: Google Analytics or Google Tag Manager

These methods are fairly straightforward if you’ve already added Google Analytics or Google Tag Manager to your WordPress site.

That’s because you’ll get a verified popup for the respective Google service when you add your property to Search Console.

If you want to verify Google Search Console this way, here’s how to add the code in WordPress.

For Google Analytics 4, navigate to your Web Stream details and view the tag instructions. You see your code like this:

Copy the code and paste it directly after the HEAD tag in your WordPress theme:

Again, make sure you’re editing a child theme and not the main theme.

You can install a child theme easily by using a WordPress plugin called Child Theme Configurator.

If you prefer using Google Tag Manager, here’s how you can add the code manually.

Add your property in Tag Manager, and you’ll see this popup:

Copy the first box and paste that directly below HEAD the tag. Then paste the code from the second box below the BODY tag.

You’ll now see the verification boxes above when you add your property in Search Console.

How to View Search Console Data Inside WordPress

If you want to see Search Console data inside your WordPress admin, then you’ll need a plugin for that.

The best we have come across is Rank Math, which lets you see up to 90 days of Search Console data for free.

But you’ll need the pro version if you want more data, like a keywords report overview.

What if you’re using a different SEO plugin, like YoastSEO? If you really want to see Search Console data in WordPress, then we recommend MonsterInsights.

MonsterInsights isn’t free, but it means you’ll be able to use it with Yoast.

The other option would be to change SEO plugins to Rank Math, just make sure you know what you’re doing. Otherwise, you can change how your metadata is displayed.

Why Add Google Search Console to WordPress?

The main reason you would add Google Search Console to your website is to measure organic search performance.

Other benefits include:

  • Adding an XML sitemap
  • Check which pages are indexed
  • Monitor Core Web Vitals

Here’s what you’re able to track regarding Google search rankings

  1. Google search impressions and rank positions
  2. Search clicks
  3. Google search CTR
  4. Ranking keywords

Google search impressions show how many times your website is seen in Google search results. The average position is the overall position your entire site shows up at.

You can see the average impressions and position for individual pages under the pages tab:

Total clicks are the number of times people click through to your website from search results:

Average CTR is the percentage of clicks compared to the number of impressions. So if you get 100 impressions and 10 clicks, your CTR would be 10%.

Ranking keywords are the terms your website has shown up for when people have searched for those terms in Google.

You can get an overview of all the keywords or select a specific page from the pages tab, then go back to the Queries tab.

Keeping track of this data every month will help you make improvements to your site’s search engine optimization.

How to Add an XML Sitemap to Google Search Console

Adding an XML sitemap to Google Search Console helps Google find all the pages and articles on your website.

To add your sitemap, you must install a plugin that automatically generates one.

Most SEO plugins will do this. For this example, I’ll show you how to do it with RankMath.

Search for, install, and activate the RankMath plugin from your WordPress admin:

Once you’ve configured the RankMath settings, go to the Sitemap settings option and copy the sitemap URL:

Then head back to Google Search Console and navigate to Sitemaps under Indexing:

Then, type or paste the sitemap slug in the URL field and click on SUBMIT:

You’ll see a box with some details of when it was submitted, the status, and the number of discovered URLs:

Google bots will crawl the sitemap each time you add new content to your site, which will help keep your Search Console data up to date.

How to Associate Google Search Console Data with Google Analytics 4

When you connect Google Search Console with Google Analytics, you can access the Search Console data inside your Google Analytics account.

Here’s how to do it.

In your Google Search Console account, go to the Settings page in the sidebar and click Associations:

Then click the ASSOCIATE button where it says “Connect a Google Analytics property to this property”.

You’ll see a popup with all of your available Google Analytics accounts. Choose the one that matches the GSC property, click CONTINUE and follow the prompts.

Next, go to your GA4 property and navigate to Reports > Library:

Then in the Search Console box, click on the 3 dots and click on Publish:

A Search Console option will appear left sidebar menu with links to display your search queries and Google organic search traffic inside Google Analytics:

Conclusion: Add Google Search Console to WordPress

As you can see from this post, adding Google Search Console is fairly straightforward when you know how.

Now you know how to add Google Search Console to WordPress, make sure you read our article titled, What Does Google Search Console Do?

And you’ll also be interested to learn how to increase organic traffic, once you know how to use Search Console.

By Steve Allen

Sourced from Niche Pursuits

Sourced from wpbeginner

Do you want to curate content in WordPress automatically?

Content curation allows you to share content from third-party sources on your WordPress website.

In this article, we’ll show you how to curate content in WordPress automatically.

What Is Content Curation and How Can You Do It Correctly?

Content curation simply means collecting and sharing select content from different sources.

This lets users see the best content on a specific topic in one location.

For instance, if you run a membership website, then you can curate a section where users see industry news from third-party sources.

Or perhaps you just want to show the top sports highlights from various social media accounts on your site.

Another scenario could be a WordPress multisite where you want to curate content from all the different sites on the network.

A lot of websites are made specifically for content curation using auto-blogging tools.

Curating Content While Avoiding Copyright Infringements and SEO Penalties

Content curation is done with the intent of sharing content. It does so by giving credit to the original source and not stealing the entire copy of their work.

Basically, you can share an article with a small excerpt and an image. It should link to the original source where users can read the full article.

On the other hand, if you decide to publish an entire article with no attribution to original source, then that would be considered stealing content.

Search engines may decide not to rank your website or consider it low quality due to a lack of original content.

Sources you copy from may file a copyright infringement complaint and get those articles removed from search engines.

It may also lead to serious legal troubles, which may cost you financially.

The Internet is full of spam blogs that use content curation tools to set up auto-blogs and make money through ads. That’s not a great idea considering the potential financial and legal costs, and how unsustainable it is in the long run.

That being said, let’s take a look at how to properly set up automatic content curation in WordPress while avoiding copyright and SEO issues.

Properly Setting up Automatic Content Curation in WordPress

The easiest way to curate content on your WordPress website is to simply use the RSS feeds block.

To use this method, start by editing a post or page where you want to display curated content and adding the RSS block to your content area.

Add RSS feed

In the block settings, you need to enter the RSS feed URL of the content source that you want to display.

WordPress will then fetch that feed and display it on screen. You can use block settings to change its style, display excerpt, author, and date information.

RSS block settings

The downside of this method is that you’ll have to add RSS feed for each source separately.

It will be time-consuming and doesn’t look very pretty to the users.

What if you could automate the whole process, combine different sources, and even categorize / sort them?

Let’s take a look at how to properly automate the whole content curation process.

Using RSS Feeds to Automatically Curate Content in WordPress

First, you need to install and activate the Feedzy plugin. For more details, see our step by step guide on how to install a WordPress plugin.

There’s also a premium version of Feedzy with more features, but for the sake of this tutorial, we will use the free version.

Once the plugin is activated, you need to visit Feedzy » Feed Categories page and click on the Add Feed Category button at the top.

Add feed category

One the next screen, you need to provide a title for this category.

Below that, add the URLs of RSS feeds that you want to include. Use commas between each URL to separate them.

Add feed URLs

After that, click on the Publish button to store your feed category.

Repeat the process if you need to create more categories.

Import Curated Content From Feeds to Your WordPress Website

Feedzy can import blog posts from the feeds to your WordPress blog posts.

This way they will be stored in your WordPress database like regular posts and give you flexibility to do different things with the curated content.

However, if you don’t want to import them to your WordPress website, then you can skip this step.

To import blog posts, simply visit the Feedzy » Import Posts page and click on the New Import button at the top.

Importing posts

First, you need to provide a name for this import. This could be anything that helps you identify this import.

Below that, you can add individual RSS Feeds, or choose one of the feed categories you created earlier.

Prepare to import feeds

Next, scroll down a little to the ‘Map Content’ section.

From here, you can map RSS feed items to WordPress blog post settings.

Map content

For instance, you can choose which category to assign for all imported posts.

You can click on the Insert Tag button to map a Feed element to post element. For instance, you can set Item Description to be used as Post content.

Use item tags to map post settings

Next, scroll down to the General Settings section.

From here, you can choose how many posts you want to import.

General import settings

Finally, click on the Save & Activate Importing button to save your changes.

You will now be redirected to the imports page where you will see the import you just created. Simply click on the Run Now button to start importing posts.

Run import

The plugin will now fetch and import posts and add them to your WordPress website in the background.

Once finished, you’ll need to refresh the page to see the import stats.

Import Finished

Feedzy will now automatically fetch new posts from your content sources and import them to your WordPress website.

Displaying Curated Content in WordPress

Now that you have set up and automated import mechanism for the content you want to curate, the next step is to display it on your website.

There are different ways to display curated content in WordPress via Feedzy feeds.

Method 1. Fetch Content via Feedzy RSS Feeds Block

This method is recommended if you decided not to import content to your WordPress website.

Simply edit the post or page where you want to display the curated content and add the Feedzy RSS Feeds block to your content area.

Display Feedzy RSS Feeds

You can then enter a feed URL that you want to display or choose one of the feed categories you created earlier.

You can then use the block settings panel to choose the number of items, style, and other settings for the feed.

Feedzy feeds block settings

Once you are finished, don’t forget to Save or Publish the post and page.

You can now preview it to see your curated content in action.

Feedzy Feeds block preview

Method 2. Display Imported Content in WordPress

This method is more flexible but would only work if you decided to import content directly into your WordPress website.

Simply edit the post or page where you want to display the curated content. On the post edit screen, add the Latest Posts block to your content area.

Add latest posts block

By default, the block will display your most recent articles in a plain list. You can change that under block settings.

From here, you can choose to show excerpt, featured image, number of items, and more.

Latest Posts block settings

You can also switch from list to gallery view, choose number of columns, or only display posts from a specific category.

For instance, let’s say you mapped all imported content to be added to ‘Industry News’ category. Now you can just display that particular category as your curated content.

Style and sort curated content

Once you are finished, you can Save or Publish your post/page and preview it in a new browser tab.

Here is how it looked on our demo website.

Curated content in gallery view

Using either of these methods will automatically display latest posts from your content sources.

Social Media Content Curation in WordPress

What if you wanted to curate content from social media platforms like YouTube, Twitter, Instagram, and Facebook?

The easiest way to curate social media content in WordPress is by using Smash Balloon.

Smash Balloon is the best social media plugin for WordPress. It allows you to display social media feeds on your WordPress website beautifully.

First, you need to install and activate the Smash Balloon plugin. For more details, see our step by step guide on how to install a WordPress plugin.

Smash Balloon comes with separate plugins for different social media feeds.

You can also buy the ‘All Access Bundle’, which includes all their plugins + social wall plugin that can combine different social feeds into one.

Upon activation, you can go ahead and start connecting your social media accounts and setting up feeds you would like to display.

Adding social feeds

Follow the on-screen instructions to set up each feed.

You can connect to your social media profiles, third-party sources, search terms, hashtags, playlists, and more.

Depending on what you are trying to fetch, you may be asked to connect to your social media account and give Smash Balloon permission to access your data.

Connect social media profile

Once you have set up your social media feed, you can copy the shortcode from the feeds page.

Copy shortcode

Next, you need to add the shortcode to a post, page, or sidebar widget.

You can now visit your website to see your social feed in action.

Single feed displayed

You can also create a social wall to combine different feeds and display them as one.

Simply go to the Smash Balloon » Create a Social Wall page and copy the shortcode shown on screen.

Copy the social wall shortcode

You can now add this shortcode to any WordPress post, page, or sidebar widget where you want to display your curated social feed.

Here is how it looked on our test website.

Combined social wall preview

For more details, see our tutorial on how to add social media feeds in WordPress.

We hope this article helped you learn how to curate content in WordPress. You may also want to see our guide on ways to make money online from your curated content blog or see our WordPress SEO guide to optimize your website.

If you liked this article, then please subscribe to our YouTube Channel for WordPress video tutorials. You can also find us on Twitter and Facebook.

Sourced from wpbeginner