A 2021 study (which has been corroborated several times over the last decade) found that men interrupt women twice as often as women interrupt men.
The hardest thing for me about transitioning to remote work was how awkward it can be to hold a conversation over Zoom. I have this habit of verbally agreeing with what someone is saying as they’re saying it — sometimes nodding my head isn’t enough, and I need to add a “mmhm” or a “yes!”
On Zoom, it’s easy for that to turn into: “Oh, sorry, what were you saying?”
It’s awkward.
A recent Medium story helped me understand what’s going on here. The author reframes interrupting as — depending on the context — “cooperative overlapping.” Here’s the gist, citing research from linguistics professor Deborah Tannen:
Overlapping “can be a way of showing enthusiastic engagement with what the speaker is saying.” […] Tannen relates a story of how she transcribed a conversation she was part of, at a dinner party between people from New York, people from California, and a person from London.
Tannen and the other New Yorkers talked over one another in a way that is meant to encourage more talking within the group.
The individuals from California and London said they were waiting for pauses during which they could enter the conversation, suggesting that getting a word in edgewise would have required “a crowbar.”
What I love about this story is that it reframes something often viewed negatively (interrupting) in a positive way. This story also does something so many great stories do: It names something that was previously just a vague nameless feeling.
It can be really difficult to understand a behaviour without giving it a name. This is the principle driving the popularity of everything from Myers-Briggs to astrology to the use of the enneagram in startups. Labels can jumpstart thinking, and even if they’re over-generalized, they’re a place to start.
What else we’re reading
A misplaced “Log in” button on a web page meant for collecting endorsements led a bunch of unsuspecting Icelanders to accidentally run for President (!). Content designer
analyses the misleading user interface and draws a few cautionary lessons for designers everywhere:
— Be wary of generic buttons.
— Use visual hierarchy and clear headings to break a page into scannable sections, because scanning is what people do first.
is at Trump’s criminal trial in Manhattan (she’s sitting in the press spillover room and watching it via split-screen CCTV). He is on trial for allegedly falsifying business records during the 2016 campaign to conceal a $130,000 payment to porn star Stormy Daniels to ensure she wouldn’t go public about their purported affair. Donnelly doesn’t give us a play-by-play of the trial itself; instead, she helps us understand what it’s like to be there: “Everyone was so nice and it felt a little like a weird community. People — cops and journalists — greeted each other as if they had become friends, returning each day.”
Want to learn how to start affiliate marketing with no money? You’re in the right place.
In this beginner’s guide to affiliate marketing, we’ll show you how anyone can become a successful affiliate marketer, even if you’re starting with literally no funds whatsoever.
First, we’ll talk about what affiliate marketing is, how it works, and the benefits it offers. Then, we’ll share a step-by-step walkthrough of the initial steps you’ll need to do to get started.
After that, we’ll share 9 ways to do affiliate marketing for free. Zero investment needed.
And finally, we’ll share a couple of bonus tips for ways you can drive even better results with a little spending, in case you want to reinvest some of your earnings.
What is affiliate marketing?
Affiliate marketing is a type of marketing arrangement in which a company pays its affiliate partners (that’s you) to promote its products or services.
It works like this:
A retailer creates an affiliate program
You sign up for that affiliate program and get access to special, unique links that point to the company’s product pages
You promote the company’s products/services by sharing those links with your audience. In doing so, you drive targeted traffic to the company’s website.
When a customer clicks one of your links, a cookie is stored on their computer for a set duration of time (e.g. 30 days), which tells the company that you referred them. This is called the cookie window.
If that customer goes on to purchase the product/service from the company within the cookie window, you’ll be paid a commission. Commission rates vary from program to program, but are typically around 10%-20% of the sale.
The benefits of affiliate marketing
There are lots of benefits to becoming an affiliate marketer. Here are some of the main ones:
High earning potential. The global affiliate marketing industry is estimated to reach a market size of over $27 billion by 2027. So naturally, there’s a lot of money on the table if you know what you’re doing. The average affiliate marketer makes over $54,000/year, and the top performers make millions.
Potential for passive income. Affiliate marketing takes a lot of work at the start. But once you’ve built your audience and got a steady stream of traffic coming in, it can become a completely passive income source. At that point, you can take a step back and just collect your paychecks every month.
Scalability. Once you’re making a good amount of money from one affiliate marketing venture, you can scale up your operations, sign up for more programs, and promote more products to increase your revenues.
It’s easy to do. There are fewer headaches involved in affiliate marketing compared to running your own business. The retailers you partner with do all the hard stuff like creating the product and managing the business. All you do is promote their products and collect your paycheck.
Low barrier to entry. You don’t necessarily need any money whatsoever to start affiliate marketing. And if you do want to invest in your success, as little as 50 bucks will get you on the right path.
Low risk. Because the only thing you really have to invest in affiliate marketing is your own time, it’s very low-risk. If it doesn’t work out, you can stop where you’re at and you won’t have lost anything.
Getting started
Before you can start promoting affiliate products and earning commissions, there are a few preliminary steps to take first. Here’s what you need to do.
Step 1: Choose a niche
The first step is to choose what niche you want to focus on.
Ideally, the niche you choose should meet three criteria:
It should be something you’re interested in or knowledgeable about
It should be easy to find affiliate programs offering high commission rates in your niche
You should be able to promote products in your niche effectively
Obviously, if you already have an existing audience, you should choose a niche that aligns with that audience. For example, if you’re an influencer in the fitness space, you’re going to want to focus on affiliate programs involving health and fitness products. That’s a no-brainer.
But if you’re starting from scratch, you can really go down any route you choose. That said, here are some niches we’d recommend:
SaaS (software as a service). Affiliate programs in which you promote SaaS products tend to pay big commissions (often up to 50%). The reason for this is that businesses that sell digital products like software have low overheads and high margins, so they can afford to invest more heavily in marketing.
Finance. Again, this is another niche where you’ll find plenty of opportunities to earn high commission rates, particularly if you promote things like crypto exchanges, banking products, credit cards, personal finance tools, etc.
Health & fitness. This is a big market with lots of interesting products to promote. You might sell gym equipment, supplements, fitness clothes, personal training services, memberships, or anything else.
Step 2: Sign up for an affiliate program
Once you know what niche you want to focus on, the next step is to find an affiliate program worth signing up for in your niche.
And the easiest way to do this is to go through an affiliate network. Affiliate networks are the middlemen that connect businesses with affiliate partners.
The biggest networks contain thousands of affiliate programs from different brands in all sorts of niches. These are all listed on their site alongside details like each program’s commission rate, payout structure, cookie window duration, etc.
You can browse through them until you find one you like and sign up in a couple of clicks.
Pin
ShareASale is one of our go-to affiliate networks and it covers a huge number of niches, so that’s a good place to start. For more options, check out our roundup of the best affiliate platforms and networks.
Step 3. Pick a marketing channel
At this point, you should have already signed up for an affiliate program and grabbed your referral links.
Now, all you need to do is drive targeted traffic to those referral links to start earning.
There are lots of different channels you can drive traffic from, but it’s best to focus on just one at first.
That might be your website, blog, YouTube channel, podcast, social media, email list, etc.
The best way to promote affiliates is to start a blog that gets organic traffic from search engines, but there are some startup costs involved.
If you have zero money to invest whatsoever, social media is probably your best bet, as you only really need to invest your time. But you’ll still need to choose a specific social media platform (i.e. Facebook, Instagram, Twitter, TikTok, LinkedIn, etc.). Some are better suited to certain types of affiliate promotions than others.
If you already have a big audience on a certain network, you’re going to want to focus on that. But if you’re building an audience from scratch, choose whichever platform that suits your skills, interests, and target customers.
We’ll talk more about all the different affiliate marketing channels you might want to use next, and how to drive traffic on each of them for free.
How to start affiliate marketing with no money: 9 strategies
Here are 9 strategies/methods you can use to drive targeted traffic to your affiliate links for free.
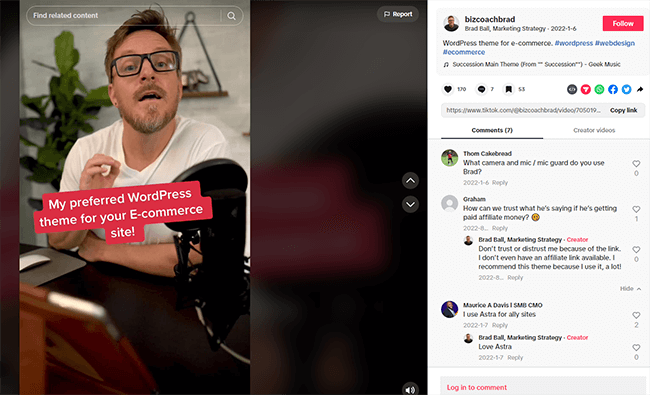
1. Share promotional videos on TikTok
Pin
TikTok is the fastest-growing social media network in the world, and it’s free to use. So naturally, it’s a great place to promote your affiliates. Gen-z are the biggest users of TikTok, so it’s particularly good for affiliate marketers who are promoting products aimed at younger consumers.
How to get started:
Start by creating a TikTok business account (it needs to be a business account so that you can share links)
Upload engaging short videos designed to attract viewers and grow your followers (don’t worry about promoting your affiliates yet). Use trending sounds and formats to maximize your reach.
Once you have 1,000 followers, you’ll be able to add a link to your TikTok bio. Use a link-in-bio tool like Shorby to create a custom landing page to house all your affiliate links, then link to that page in your TikTok bio.
Start sharing trending videos related to your affiliate products to subtly promote them. Be careful not to be overly salesy, and prioritize engagement.
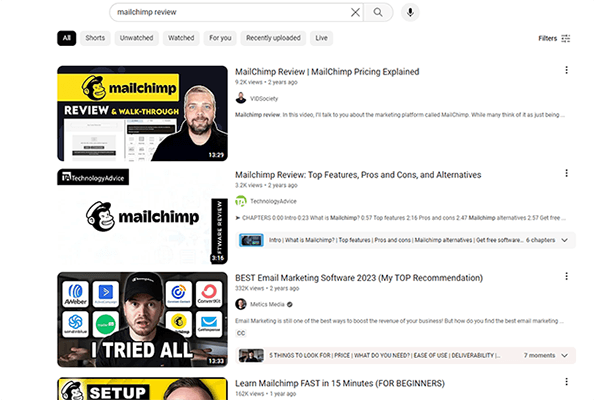
YouTube is another great free channel for driving affiliate traffic. It won’t cost you anything to sign up and post videos to promote your affiliate products.
A great way to approach affiliate marketing on YouTube is to create a product review channel.
The reason why product review channels work so well is that, if someone is searching for a video review of a product, it’s a strong signal of buyer intent.
The viewers you’ll get are likely already considering buying the product you’re reviewing, so they’re much more likely to click your links, convert, and earn your commission compared to other types of traffic.
How to get started:
Sign up for a YouTube channel
Create your channel branding by uploading a banner, profile picture, etc.
Conduct keyword research to identify search terms related to your niche with high monthly search volumes and low competition. Focus on ‘review’, ‘alternatives’, ‘vs’, and ‘comparison’ keywords initially.
Create videos optimized around those keywords in which you discuss and promote your affiliate products
Make sure you add your affiliate links to the description
Start growing your subscribers and work on increasing the reach of your videos to get more eyes on your content
3. Grow an Instagram following
Another way to do affiliate marketing for free is to create an Instagram account and grow your following. Then, share promotional posts, Stories, and Reels with your audience to drive traffic.
How to get started:
Sign up for Instagram
Use a link-in-bio tool to create a landing page with all your affiliate links, then link to it from your Instagram bio.
Share engaging content regularly to grow your following
Engage with other users and tag your posts with popular hashtags to maximize your reach
Once you’ve grown your audience, start sharing posts promoting your affiliates, and always include a CTA in the caption inviting users to click the link in your bio.
4. Promote your affiliate offers on Facebook
Facebook is still the most popular social media platform in the world by number of monthly active users. So naturally, it’s another great place to start driving traffic to your affiliate offers for free.
How to get started:
Sign up for Facebook
Create a branded Facebook page
Start a Facebook group
Grow your Facebook Page’s audience by regularly sharing engaging, shareable content
Grow your Facebook group community
Join other groups and start networking to further grow your audience
Create and share posts around your affiliate product (e.g. reviews, how-to guides, etc.) to drive traffic to your links
5. Share your links on X (Twitter)
X (formerly Twitter) is especially well-suited to affiliate marketing as it’s one of the few platforms that lets you add links to your posts. Other platforms like Instagram and TikTok only let you add links to your bio.
Here’s how to use it to drive traffic to your affiliate links.
How to get started:
Create an X profile.
Grow your following by commenting on popular Tweets, following other accounts in your niche, re-sharing popular content in your niche, etc.
Once you have a decent number of followers, monetize by sharing posts about your affiliate offers including the link.
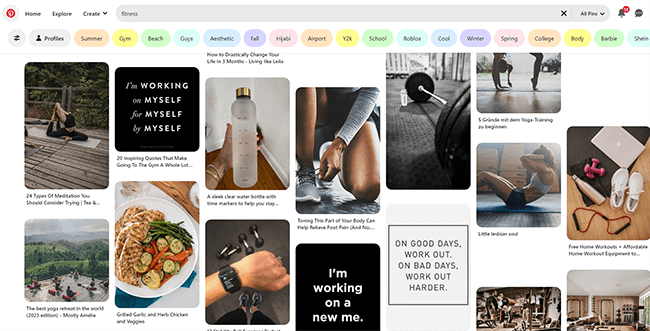
6. Drive traffic from Pinterest
Pin
Pinterest is a great place to promote affiliate products that have a lot of visual appeal. It’s a ‘visual discovery engine’ where users go to find inspiration and ideas, which is exactly the kind of traffic you want clicking your affiliate links.
How to get started:
Sign up for a Pinterest for Business account (it’s free)
Create eye-catching pins (graphics) that showcase the products you’re promoting in their best light. You can use online graphic design tools like Visme for this
Upload your pins to Pinterest. Make sure you include some relevant keywords in the title and description to make it easier for users to discover
Repeat the process regularly to keep your pins visible
7. Drive traffic from Reddit
It’s a little harder to make affiliate marketing work on Reddit compared to other social media platforms, as most subreddits have strict guidelines about promotional/marketing content, and don’t often allow users to share affiliate links.
But if you can overcome that hurdle, the traffic you can drive from Reddit is some of the best around.
How to get started:
Create a Reddit account for free
Join some niche-relevant communities (subreddits that are likely to be full of people in your target market)
Engage in communities by leaving helpful comments and posts in the subreddit
Build your Reddit Karma by collecting upvotes
Add your affiliate link to your Reddit profile
Subtly start promoting your affiliate links (or even better, links to valuable content that contain your affiliate links) in posts on the subreddit.
Make sure you do this in a way that’s helpful and provides real value to the community, and try not to look like you’re doing affiliate marketing at all.
8. Submit guest posts
As I briefly mentioned earlier, the best way to do affiliate marketing is by creating your own blog and publishing blog posts optimized around valuable, niche-relevant keywords (like product reviews, buyer guides, etc.)
The only problem is that creating your own website costs money.
As a workaround, you can publish those blog posts to somebody else’s website instead, for free. This is called guest posting.
It’s important to note that some site owners or editors will not accept posts with affiliate links in them. Naturally, this will cut down on potential opportunities.
You could submit a post and hope they don’t notice the affiliate link or you can be upfront with them. I’d go with the latter. Honesty is always the best policy.
How to get started:
Search Google to find popular sites in your niche. You can use Google Search operators like this: “guest post”+”food”
Find the email addresses of key contacts on those sites (check the Contact Us page) and add them to a spreadsheet.
Reach out to all the contacts on your spreadsheet asking if they accept guest posts. Make sure you explain what’s in it for them (e.g. a well-written post about a topic their audience would appreciate, a keyword-optimized blog post that’ll drive traffic to their site, etc.)
If someone emails back confirming that they accept guest posts, pitch your idea to them and ask if you can write it. Make sure you clarify that it’s okay to include your affiliate link in the post.
Submit your post to the site for publishing.
Repeat the process with more blog posts targeting other relevant keywords.
Note: You can speed up the process and make managing everything easier with a blogger outreach tool like BuzzStream. You can even use it to send emails, track links, and manage responses, etc.
9. Start a free blog
I said a moment ago that, although the best way to start affiliate marketing is to create your own blog, that’s something you can’t do for free.
Well, that’s not technically true.
While starting your own blog usually means paying for web hosting and purchasing a domain name, there are a few sites that let you create a blog for free.
The catch is your blog will be hosted on their domain, not yours, and you’ll have much less control.
Your options for creating a free blog include WordPress and Wix. But we’d recommend using Medium as it’s an authoritative domain that ranks well, so posts have a good chance of getting lots of traffic.
How to get started:
Sign up for a free Medium account.
Write posts/stories to be published on your Medium page (content must adhere to Medium’s guidelines and rules).
Include affiliate links in your posts, but try to be subtle about it. Medium doesn’t allow overt marketing and affiliate sales content.
Add an affiliate disclosure to your posts.
Optimize your posts around target keywords that potential buyers might search for (product reviews, tutorials, etc.)
Drive traffic to your Medium stories by sharing them on your socials.
How to start affiliate marketing with a little money
Before we wrap up, I want to share a few more affiliate marketing methods that require just a little bit of spending but allow you to get much more value out of your affiliate marketing efforts.
Don’t worry, we’re talking less than 50 bucks here—nothing that’ll break the bank.
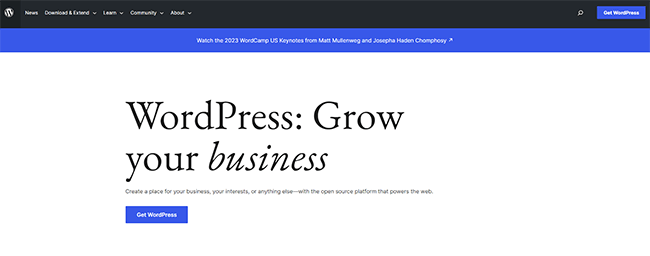
Start a niche affiliate blog
Pin
This is hands-down the best way to do affiliate marketing.
The idea is to create your own WordPress website and use it to publish niche-relevant blog posts.
These blog posts should be optimized for search engine optimization (SEO) in order to give them the best chance of ranking for keywords that potential buyers might search for.
If you can get your blog posts to rank on Google, you can get thousands of organic visitors to your site every month. And if those visitors click the affiliate links in your post and make a purchase, you get paid.
The great thing about this method is that eventually, it becomes fairly passive. Once you’re ranking for a bunch of high-volume keywords, traffic will keep coming in. You don’t have to keep creating new posts like you would if you focused on social media.
How to get started:
Sign up for WordPress hosting. We’d recommend WPX Hosting as it has everything you need, offers excellent performance, and only costs $24.99 a month. However, on the more affordable end of the spectrum, try DreamHost instead.
Use WordPress (this will usually come pre-installed with your hosting package) to create your site. You can install a free theme for the WordPress theme library, and any plugins you need to get started.
Customize your site and create key pages like a home page, an about page, a contact page, a privacy policy, etc.
Conduct keyword research to find search terms potential buyers of your affiliate products might search for. Look for low-competition keywords that you think you can rank for.
Create blog posts around those keywords and post them to your site. Learn about SEO to optimize them and your website at large to improve your chances of ranking.
Continue to optimize your site for traffic and conversions to get more clicks to your affiliate links.
Run an email marketing campaign
Pin
Once you have your affiliate blog, you can also use opt-in forms to start building an email list.
Then, you can regularly email your subscribers to notify them of new offers and discounts. This will help you to drive even more traffic to your affiliate links.
How to get started:
Sign up for an email marketing platform like MailerLite. They have an amazing free plan with lots of features and it supports up to 1,000 subscribers.
Create opt-in forms and publish them to your site.
Encourage people to sign up for your mailing list by creating a lead magnet
Use your email marketing software to create automated campaigns such as welcome sequences, etc. that nurture your subscribers and send them affiliate offers
Send out individual broadcasts as needed to promote new deals
A quick word about disclosure
Regardless of the platforms and tools you use for affiliate marketing, you need to disclose your use of these links.
It doesn’t matter whether you’re sharing offers on Reddit or including them in your email newsletter. You need to disclose the relationship and let your readers know that you may earn a commission.
Sure, some people will avoid clicking on your link once they know it’s an affiliate link. But you’ll earn more credibility and avoid the potential risk of platforms banning your accounts. And it’s also a legal requirement in certain parts of the world.
Final thoughts
Starting affiliate marketing is time consuming and requires patience, however, we’ve shown that you don’t need money to run a successful affiliate marketing business.
All you need is time and a solid strategy to drive traffic to your affiliate links.
But if you’re serious about affiliate marketing, I’d nonetheless recommend saving up to purchase web hosting.
For the very small cost of a monthly subscription, it’ll make it significantly easier for you to drive traffic and earn commissions.
Aside from managing editorial here at Blogging Wizard, Nicola runs Your Creative Aura where she teaches people how to write music. Nicola has the rare ability to take inspiration from the most mundane objects and turn it into catchy, and memorable lyrics. And, she is rather fond of penguins.
Blogging is still one of the best opportunities to make money online as you can build an engaged audience and then sell products, services, or sponsorships.
Yet, the prospect of building a blog that will generate thousands of dollars can feel daunting if you’re just starting your journey as a blogger.
The blogging landscape is more competitive than ever, and the strategies that used to work even just a few years ago no longer work today.
While getting started might feel overwhelming, set aside just thirty minutes or an hour per day for blogging, and by implementing the tips outlined in this blog post, you’ll be well on your way to success.
Whether you’re blogging about your travel adventures or striving to attract customers for your business, these are the simple beginner blogging tips that will help you achieve your goals.
1. Define A Specific Niche
If you publish a blog article about dogs one week and gardening the next, it will be difficult to build a loyal audience of avid readers because people interested in dogs may not be interested in gardening.
Selecting a specific niche and only publishing content relevant to a specific topic solves this problem.
You’ll also find ranking in search engines like Google easier if you specialize in a specific niche. This is because search engines want to ensure they’re showing accurate information to their users, and one way search engines determine the credibility of a blog is by analysing the different topics it covers.
This concept is known as topical authority. By showing search engines that you’re an authority on a specific topic, you’re more likely to rank well for your target keywords.
How do you select a specific niche to blog about?
If you’re blogging for business, the answer is clear – write about your business’s niche.
However, if you’re starting a blog to build an audience that you’ll later monetize through sponsorships or affiliate products, your niche options are limitless (i.e., a travel blogger, a food blogger, etc.).
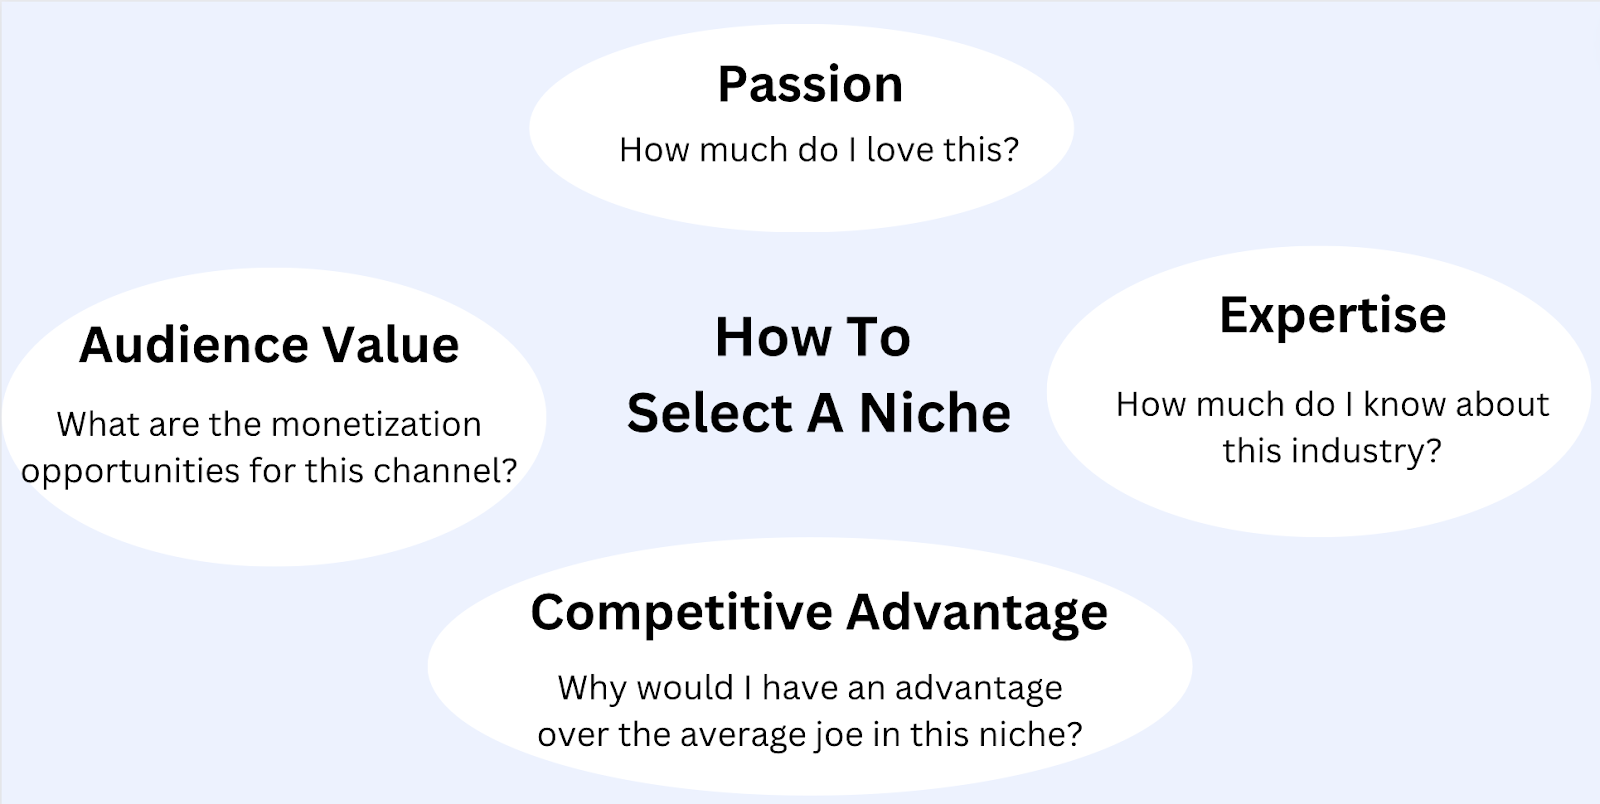
To help you select a niche, write down all of your interests and passions on a sheet of paper. You can also notate your level of passion for each niche.
To further narrow down your list, here are three other criteria to consider:
Your expertise: If you’re highly knowledgeable about that particular niche, it will be easier to write the content as you won’t have to do much research beforehand.
Your competitive advantage: Is there a reason why your lifestyle or industry access might give you an advantage in this niche? For example, if you’re a flight attendant and travel frequently for work, you’ll have a unique advantage in writing a travel blog because you already travel much more frequently than the average person. You could also discuss unknown tips on airports and flight deals.
The value of the audience: Some niches are much more valuable than others. For example, if you have a successful blog about camera gear, you’ll likely make more money than someone with a blog about baking simply because the average order value of a camera is significantly higher than the average order value of baking supplies. So whether you end up selling your own products through the blog or making money through sponsorships or affiliates, you’ll make more money if the end product has a higher profit margin.
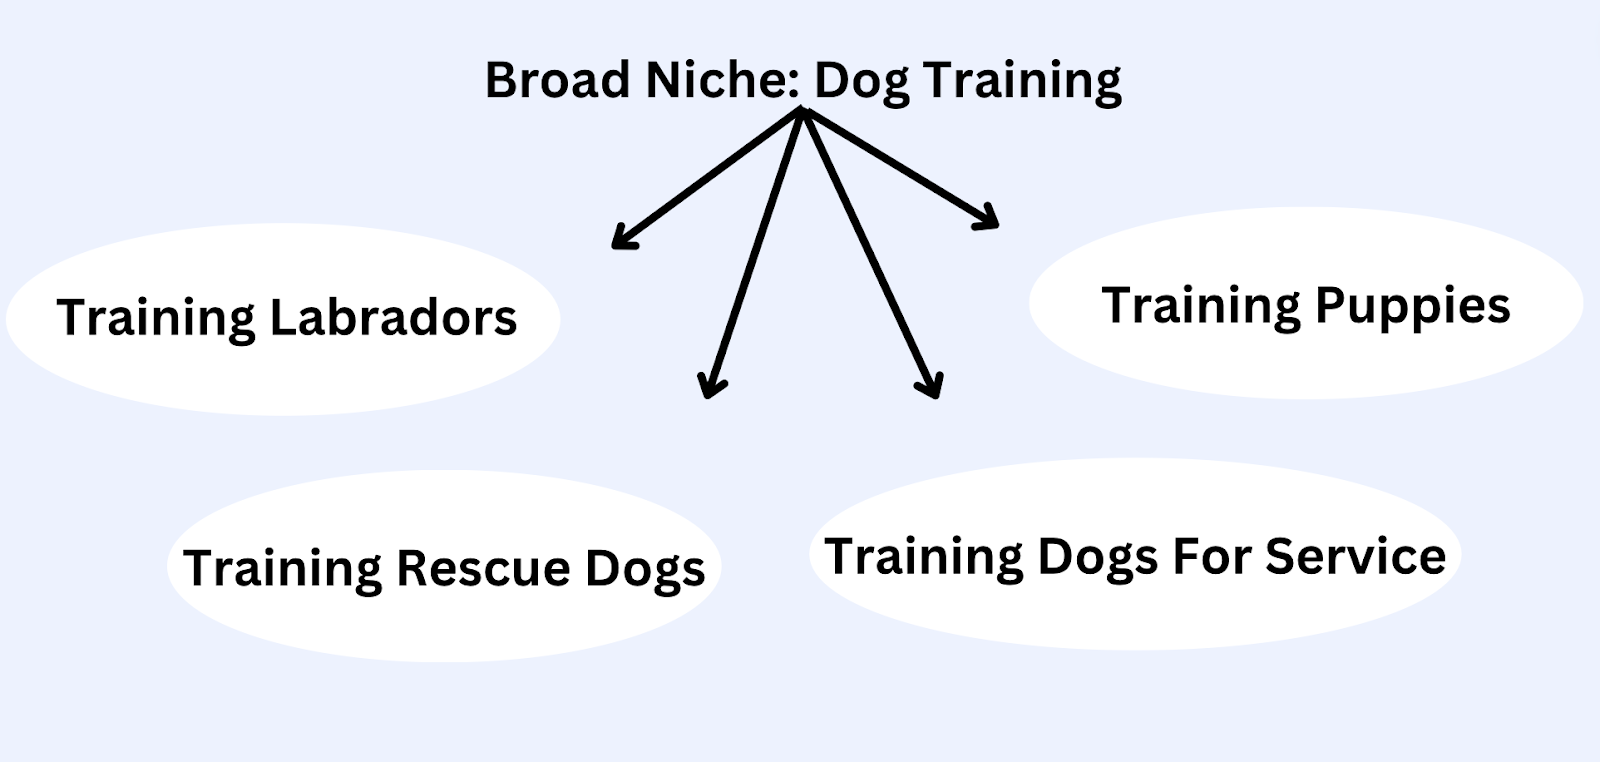
One of the downsides of blogging is that it’s very competitive – especially if you’re targeting a high-value audience.
You can solve this problem by niching down and targeting only a specific subset of that niche.
For example, the “dog training” niche is very broad and competitive. However, you can stand out by becoming “the dog trainer for Labradors” or “the dog trainer for older dogs.”
This will help you stand out because someone with an older dog will be more inclined to talk to a specialist who works exclusively with older dogs rather than a generalist who works with any dogs.
2. Engage With Your Target Audience
One of the biggest mistakes beginner bloggers make is choosing topics based on what they want to write about. While there’s nothing wrong with writing for your own pure enjoyment, it’s essential to provide content that interests the reader if your goal is building a loyal following.
If you selected a niche you’re passionate about, there should be plenty of topics that both you and your readers enjoy.
However, the best way to determine what topics your readers want information about is to engage with them directly.
You can do this by joining Facebook groups, Slack groups, Reddit threads, and industry forums. Then, make a list of the most commonly discussed topics as these will become your first content ideas. You’ll also learn the general industry terminology, which is helpful as you begin writing your blog posts.
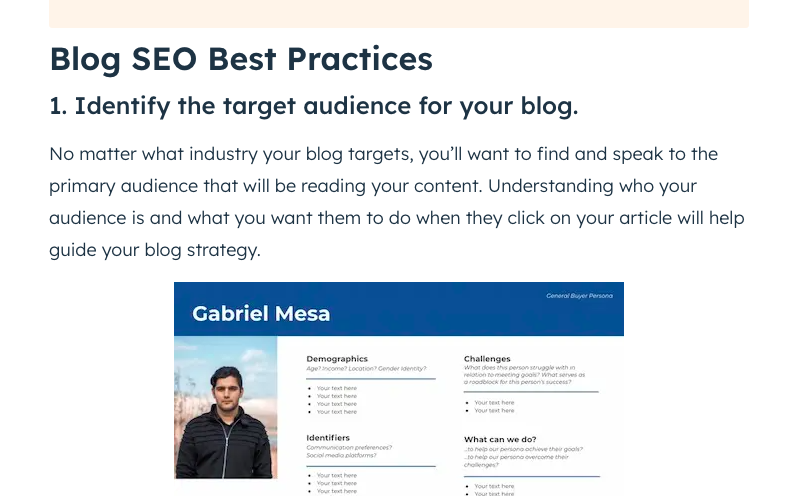
For example, if you have a web design agency for real estate agents, consider joining a group like the one below to learn about common marketing questions real estate agents ask. You can also provide helpful answers to questions about marketing, which can help you earn your first few readers and develop genuine relationships with industry experts.
3. Select Relevant Low Difficulty Keywords
Unfortunately, people don’t magically find your blog post as soon as you hit publish – especially as a new blogger.
While there are plenty of different ways to promote a blog post after it’s published, Google is perhaps the best (free!) opportunity to get your blog post in front of new readers. The process of optimizing your blog posts to appear in search results like Google is called SEO (search engine optimization).
For example, if you just wrote a blog post about “how to train a dog to sit,” you want Google to show it to people who search for terms related to training a dog to sit.
These phrases that people commonly search in Google are referred to as keywords.
While keyword research is an entire topic in its own right, here are two basic keyword research tips:
Only target keywords relevant to your audience: As we discussed in the tip above, your audience should be interested in the topic. If you’re blogging for business, the topic should also be a problem that your product or service solves (e.g., topics related to generating more real estate clients would be great for a web design service to target because the service solves that problem of earning real estate clients).
Choose keywords with low difficulty scores: Remember when we discussed earlier during niche selection that it’s important to select a low competition niche? This is because it’s more difficult to rank for a keyword with many blog posts targeting it. This is especially true if you’re competing against a highly authoritative website like Forbes. Since search engines tend to favour websites with well established credibility, it can be difficult for a new blogger to outrank them in the search results. Unfortunately, if your website doesn’t rank in search engines, it will be difficult for you as a blogger to earn new readers.
So how do you check the difficulty of a specific keyword?
There are plenty of SEO tools that make this easy, and Ahrefs and SEMrush are among the two most popular.
These tools analyse the search result pages (SERPs) for a particular keyword and then assign it a difficulty score based on the authority of the other websites ranking for that keyword.
These tools consider plenty of factors when creating their difficulty scores, but the only thing you need to know is that lower difficulty keywords (keywords that are easy for new bloggers to rank for) have lower difficulty numbers, whereas more competitive keywords that new blogs likely won’t rank for have higher difficulty numbers.
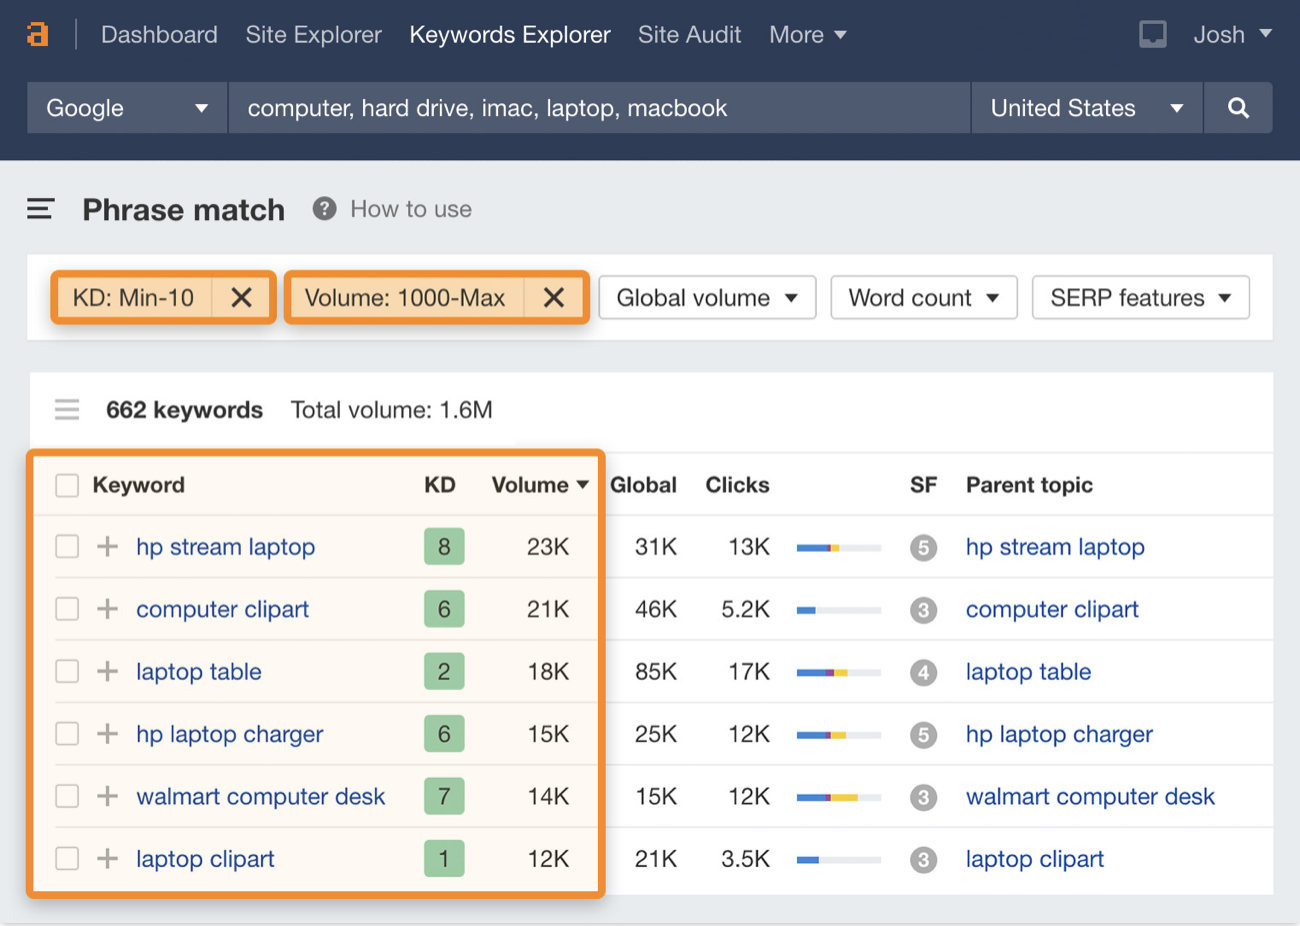
So list topics you might want to cover on your blog, and then type each into a keyword research tool like Ahrefs or SEMrush. You’ll likely see different variations of that keyword as well as its difficulty scores.
As a beginner blogger with a brand new website, only select keywords with a difficulty score of 15 or less. As your website earns more authority, you can target increasingly competitive keywords.
You’ll also see a volume metric. This is the estimated number of searches for that keyword each month, so the higher the search volume metric, the better.
You’ll probably have a long list of similar keywords for each topic, so select the keyword with the lowest difficulty and highest volume.
Once you select a keyword, what should you do with it? How do you optimize your blog post to rank for it?
To get started, just include it in the title of your blog post.
These next few tips will discuss how you can optimize your blog post to rank for your target keyword.
4. Deliver The Most Effective Advice
There are usually tens or even hundreds of helpful blog posts covering any content idea.
And most of the information in these blog posts is accurate and helpful. So why should someone read your blog post over the other blog posts? In other words, what makes your blog post the best on that topic?
One way to do this is to provide the most effective solution to their problem.
This may sound obvious, but let me illustrate this with an example.
Earning backlinks is a major challenge for SEO professionals, so it’s no surprise that there are hundreds, if not thousands, of blog posts on building backlinks.
Yet building backlinks is a popular content idea because it’s so challenging, meaning that most of the solutions mentioned in these blog posts are only minimally effective.
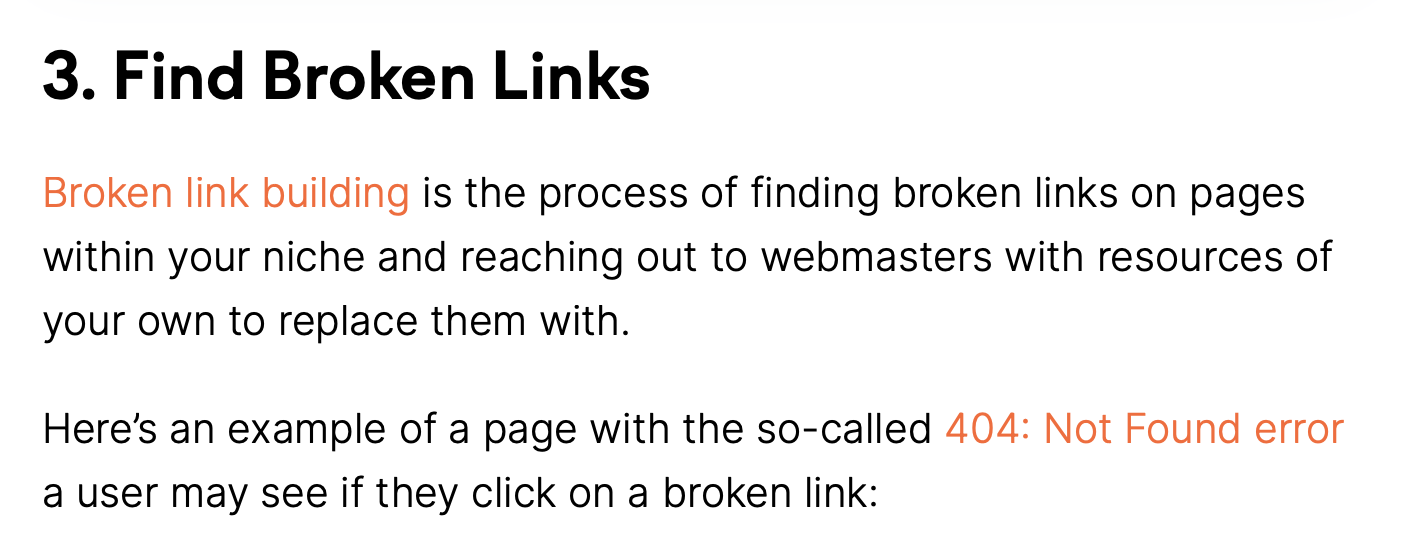
For example, broken link building is a common link building technique that might require about five hours of work to earn one link:
On a scale of one to ten, broken link building is probably about a 5/10 strategy, as you might spend several hours to get one quality link.
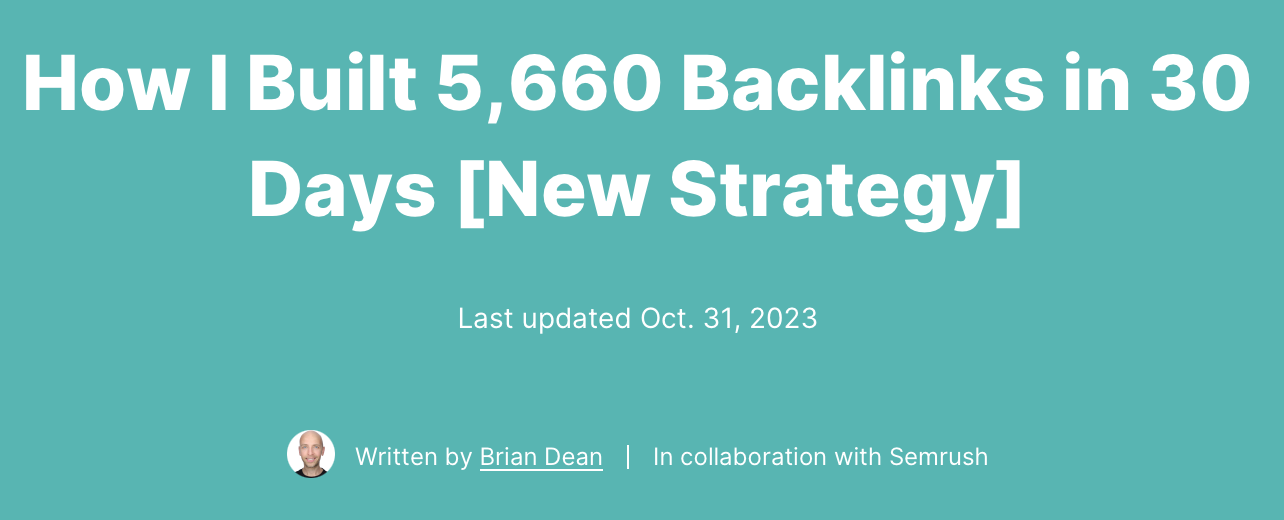
On the other hand, Brian Dean recently shared a case study of a new backlink strategy that allowed him to build over 5,000 backlinks (many of which are high quality links) in 30 days. As a result, his strategy is probably a 9/10 solution to the problem as it requires minimal effort and produces high results.
Therefore, Brian Dean’s blog post is much higher quality simply because the solution is much more effective.
While it may take some time for search engines like Google to realize that your content provides the best solution, they will pick up on positive user engagement signals, like a long average time on page, many organic mentions and backlinks from people who found your ideas remarkable and reshared them, and other signs.
Of course, thinking of the mosteffective solution to a real problem that many people face is challenging.
To identify the best solution to a problem, experiment with multiple tactics or talk to people who have experienced these challenges and ask what worked and didn’t work for them.
Real experience will make your content more helpful than content written by bloggers who have never personally experimented with the theories they’re writing about, as they won’t be able to articulate the drawbacks and downsides of various “best practices.”
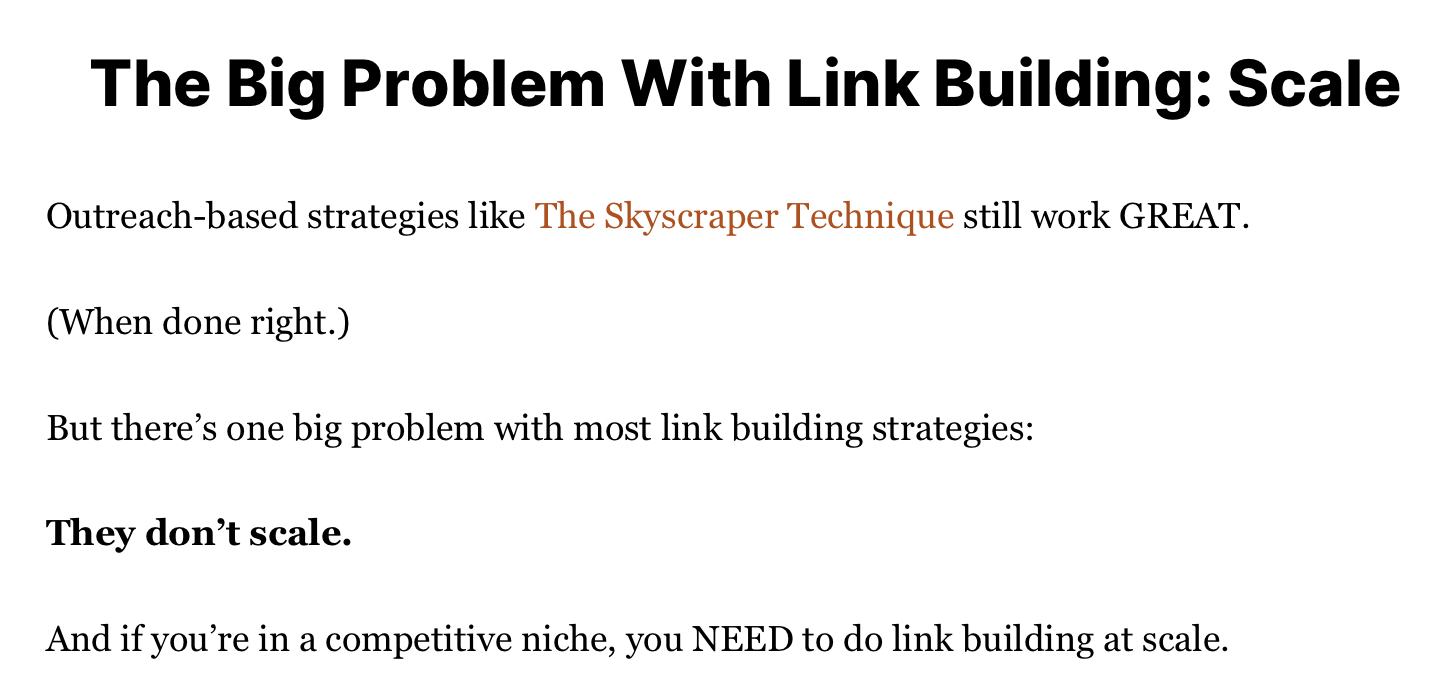
In fact, you’ll notice that this is exactly what Brian Dean did when writing the post on link building. He called out the challenges he experienced with traditional link building tactics and then used that as the launchpad to show how he created a more effective solution.
Search engines also recognize that people with real experience tend to produce better content, so they often optimize their algorithms to recognize expertise and experience within content and tend to rank those blog posts higher. In fact, Google released the acronym “EEAT” which stands for:
Experience
Expertise
Authority
Trust
So the more you can focus on finding the absolute best solution to a problem, the better your content will perform and the more loyal readers you’ll earn.
Of course, this means that the real work begins long before you ever begin typing a word of the blog post, but the essence of great content marketing is solving a reader’s problem.
5. Package Your Advice As Simply As Possible
Scientific papers and textbooks provide excellent expert advice, so why do people turn to TikTok creators and other less credible sources for information?
Most scientific papers and textbooks are boring and difficult to understand, whereas many viral creators package their information in interesting stories.
The lesson?
If your content is difficult to comprehend, you’ll struggle to build a loyal following – regardless of how effective your advice is.
Therefore, optimize your content to be easy to understand and fun to read.
The first tactical strategy for making your content easy to understand is to write at a fifth or sixth-grade reading level. This rule applies even to sophisticated niches, like tech gurus and healthcare professionals.
That doesn’t mean you can’t use industry terminology or that you must dumb down the information. Instead, just think about keeping your sentences simple. Here are a few specific tips:
Write in the active voice
Keep your sentences short
Use an app like Grammarly or Hemingway and aim for a fifth or sixth grade reading level
Get directly to the point
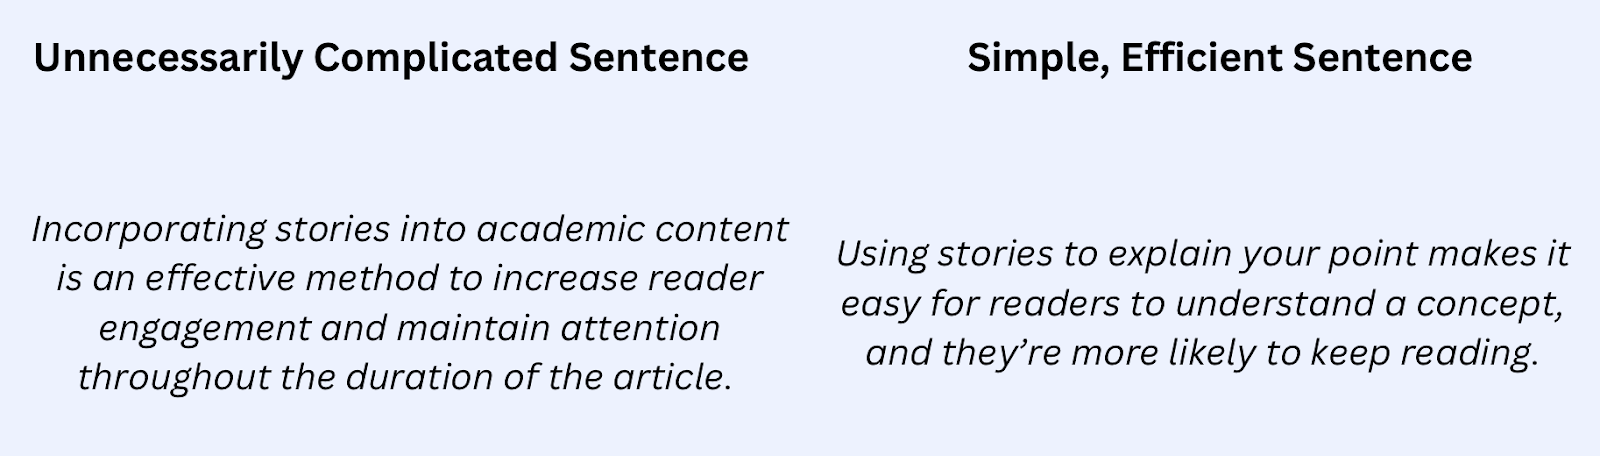
Here’s a great example of how you can simplify language to communicate the same point:
In addition to optimizing the sentence structure for simplicity, you can also make your blog post easier and more enjoyable to read by including stories and real examples.
Stories and examples make it easier for people to understand your point, and they make the content more memorable.
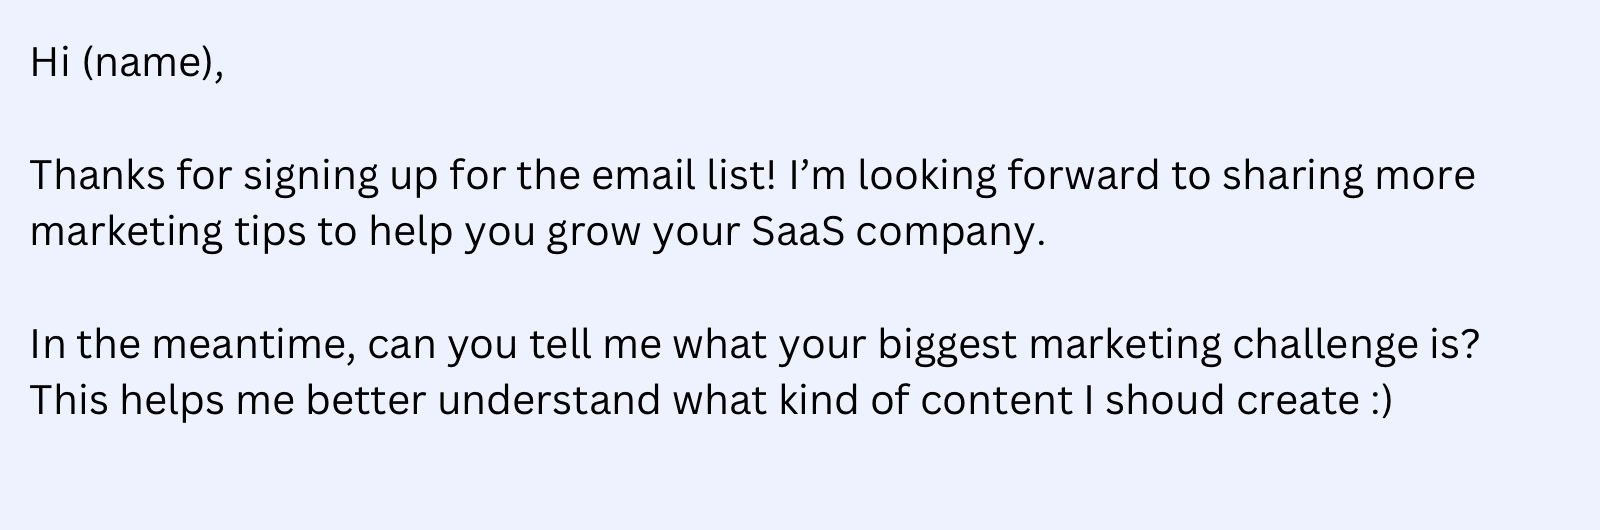
Here’s a great example of storytelling copywriting:
Instead of stating the point directly, the copywriter used a story to communicate his point – it’s important to take breaks. The story makes his content memorable and more enjoyable to read.
6. Optimize For Scannability
When you’re researching a topic, you want to learn the most important information as quickly as possible. If you glance at the two screenshots below, which blog post are you more likely to read?
Article 1:
Article 2:
While both articles contain the same information, the first one is much easier to scan because it uses bullet points, bold, short sentences, and headers.
Readers will likely skim through the first article and read the important parts, whereas they’re more likely to immediately hit the “back” button on the second article, which is a wall of text.
It’s also worth noting that the more scannable text (the first screenshot) ranks first in Google. This is likely because search engines noticed that people were staying on the first page for more time, indicating that it delivers a better user experience than the other posts.
The takeaway? Make your content easy to scan.
To make your content scannable, here are a few tips:
Use screenshots and graphics whenever possible to communicate your point
Use bullet points
Bold and italicize important points
Limit paragraphs to four lines or less
If you want to write in a flow state, write in long paragraphs as you’re drafting, and then use this checklist as you’re editing to optimize for scannability.
7. Follow SEO Best Practices
Including a primary keyword in your blog post’s title is a great start to optimizing it for SEO, but there are a handful of other SEO best practices that all bloggers should follow to maximize reach.
Here’s a quick checklist you can use to optimize your blog post for SEO:
Properly format each post: Use H2s and H3s for each subheader.
Include internal links: An internal link directs readers to another helpful blog post on your website. For example, rather than providing a detailed explanation of internal links, I’m simply linking to another blog post we’ve written about internal links. This ensures you don’t have to go on a side tangent to explain a subtopic, yet readers that want more information can go to that link to learn more. From an SEO perspective, internal links help search engines crawl your website more efficiently, translating to better rankings.
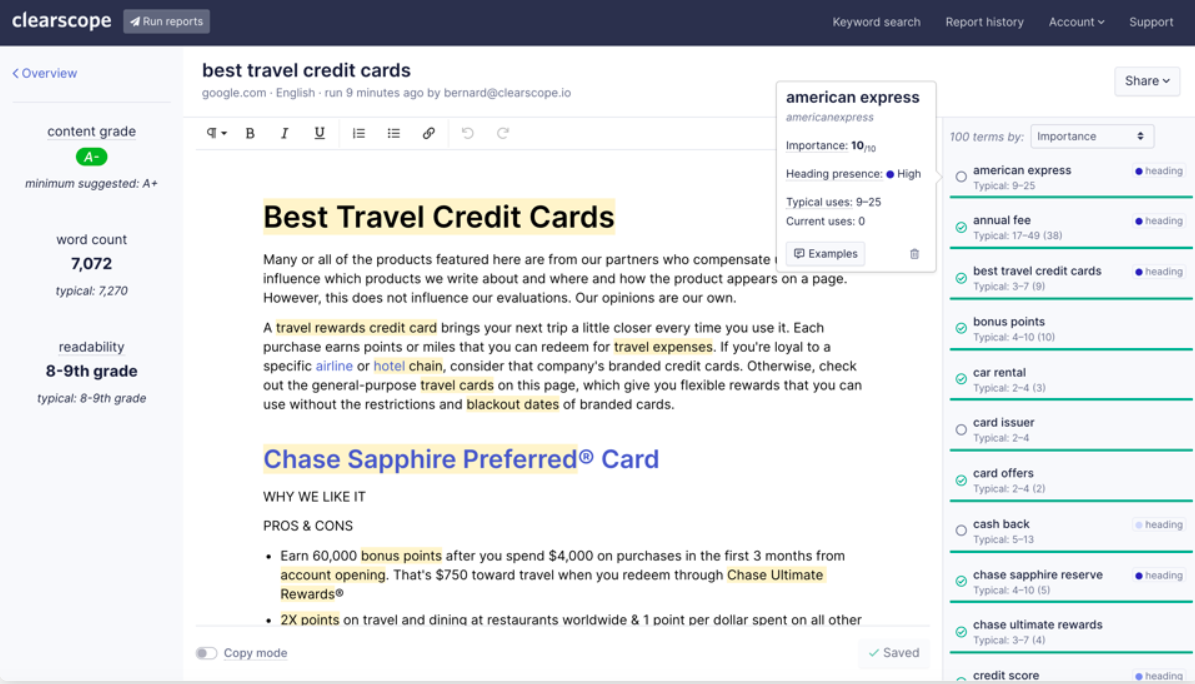
Include related keywords: You can use a tool like Clearscope to identify keywords related to your primary keyword. Including related keywords helps search engines understand what your blog post is about and ultimately helps you rank higher in search results. For example, you can see that some keywords related to “best travel credit cards” include “car rental,” “card offers,” and “cash back.” Including those keywords in your article helps search engines like Google realize that your blog post is about travel credit cards, which can help your blog post rank higher in the search results for keywords like “best travel credit cards.”
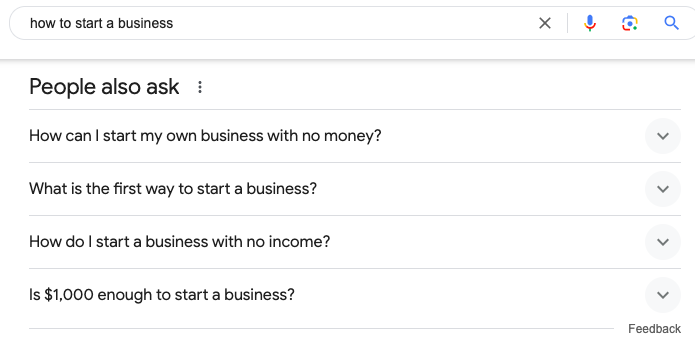
Include FAQs: Another strategy to earn more real estate in the search results is to look at the frequently asked questions that pop up for the primary keyword. For example, if you’re writing a blog post on “how to start a business,” these are some great FAQs to include in your article:
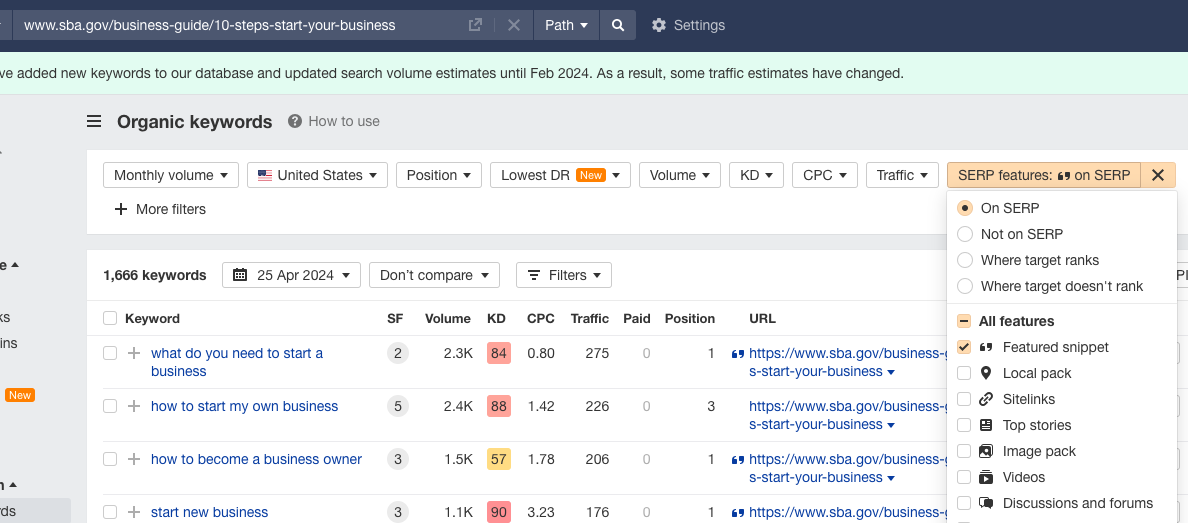
Target Featured Snippet Opportunities: Featured snippets are the answer boxes that sometimes appear at the top of the search results. You can identify these opportunities by pasting the top ranking blog post’s URL for your target keyword in a tool like Ahrefs. Then, sort by “SERP feature” and check “Featured snippet.” From there you’ll find a list of different keywords with featured snippets.
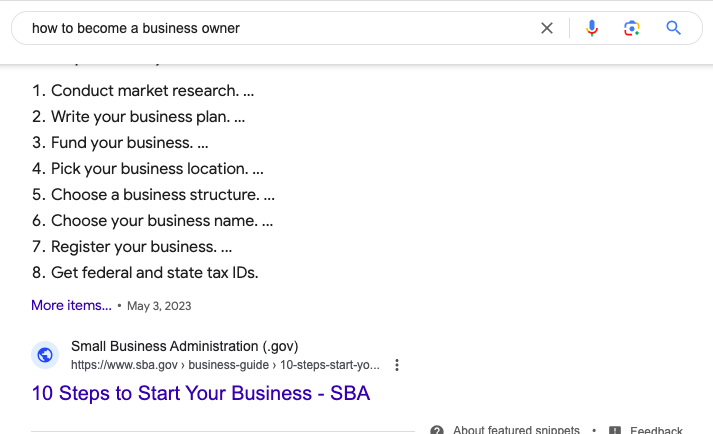
Then, optimize your blog post to rank for those featured snippets. You can do that by searching the current featured snippet and then format your blog post to match it. For example, if the featured snippet opportunity is “how to become a business owner,” be sure to structure your blog post as a list:
In addition to following on-page best practice tips, here are a few technical SEO tips that you can apply to all of your blog posts:
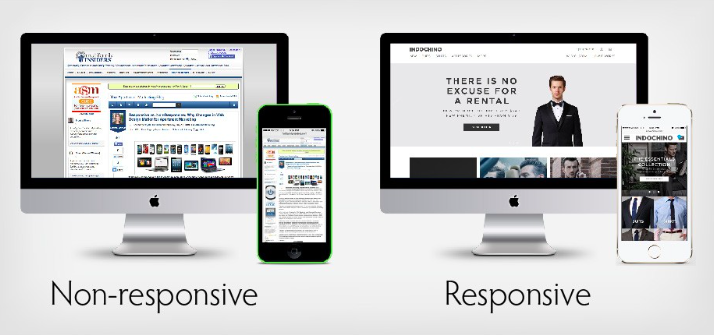
Optimize for mobile: Most people access blog posts on mobile devices, so make sure that the blog post is easy to read on a mobile device. Today, most websites are mobile friendly. Otherwise, try a different website theme.
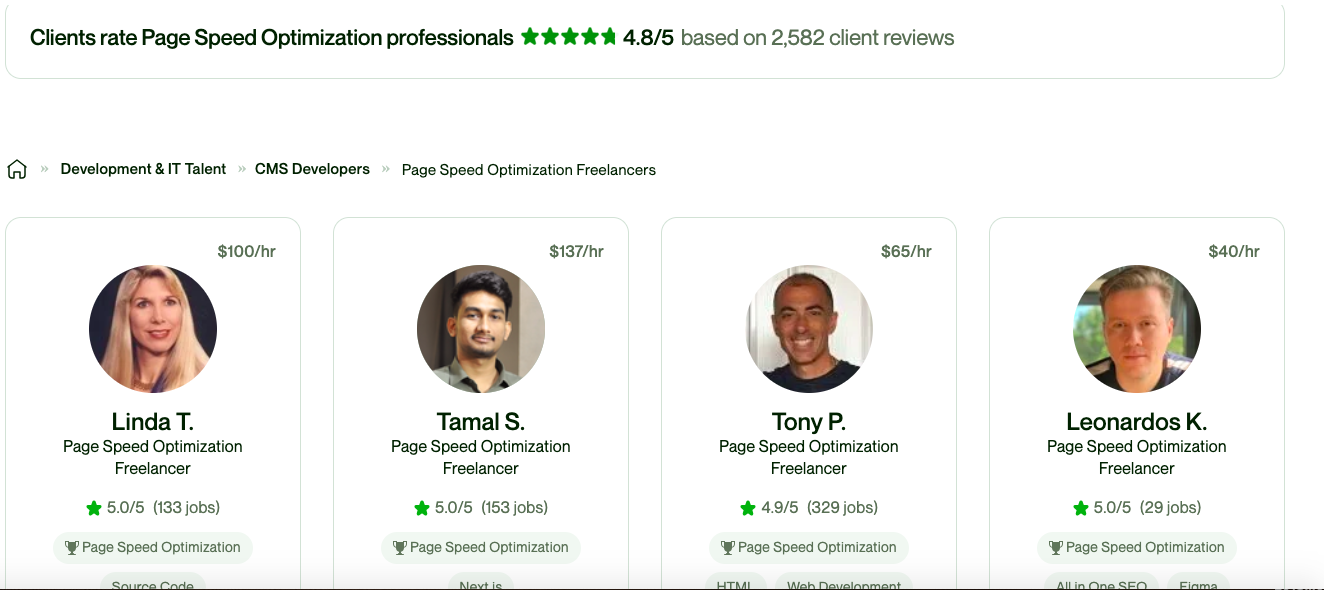
Improve your site speed: If your website takes too much time to load, people will click the back button, and then use a tool like PageSpeed Insights to test your site speed, and if it isn’t up to scratch, consider hiring someone on Upwork to fix it:
8. Collaborate With Influencers
As a beginner blogger, you probably won’t receive any organic traffic to your website when you first start publishing blog posts, as search engines like Google tend to favour ranking more established websites.
An easy solution to quickly earn readers is to collaborate with influencers.
The only problem is that, as a new blog with zero followers, there isn’t a strong incentive for influencers to work with you if you can’t send them any new readers. The solution to this problem is to offer them another form of value.
For example, if you’re a brand new travel blogger, you could reach out to a resort with a significant following and offer to create a promotional video of them (perhaps involving an interview with the owner). In exchange, ask them to share it on their social media profiles.
This is beneficial for them because they get high quality, free marketing materials, and it’s also beneficial for you because they’re sharing your content.
Here’s a great example of a vacation resort that reshared the video of a travel blogger:
If you consistently collaborate with influencers, you’ll eventually earn readers and develop genuine industry relationships, which will ultimately set you up for excellent long term growth.
The key to landing influencer collaborations is to always ask the question: How will this collaboration benefit the influencer?
9. Establish A Consistent Content Calendar
The more high quality content you publish, the faster you’ll grow.
However, many beginner bloggers are overly ambitious and try publishing multiple blog posts per week. Unfortunately, the ultimately become overwhelmed and give up.
Instead, set a goal of publishing just one blog post per week. By publishing once per week, you’ll still grow at a reasonable rate, but it won’t be so overwhelming that you give up.
This will help you develop the habit of writing blog posts, and over time, you can either increase your publishing rate or hire other writers to help you.
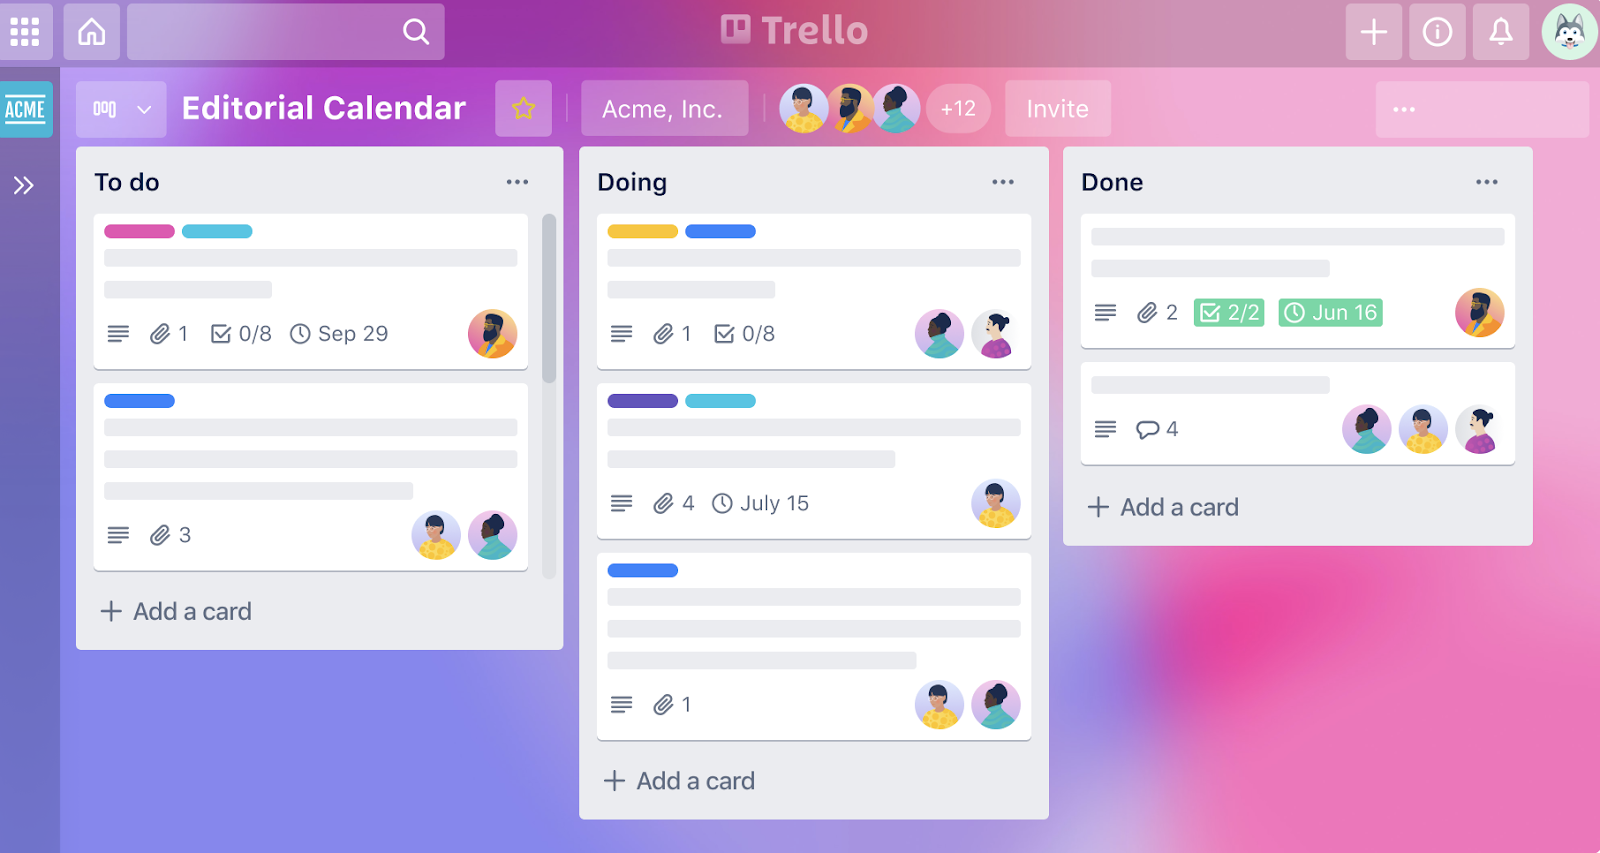
To stay organized, create a content calendar. This way, you can establish all of your content ideas for the month and set milestone goals throughout the week to stay on track. For example, you can set a goal to have the draft written by Wednesday, edited by Thursday, and published on Friday.
Trello offers several editorial calendars you can use for free.
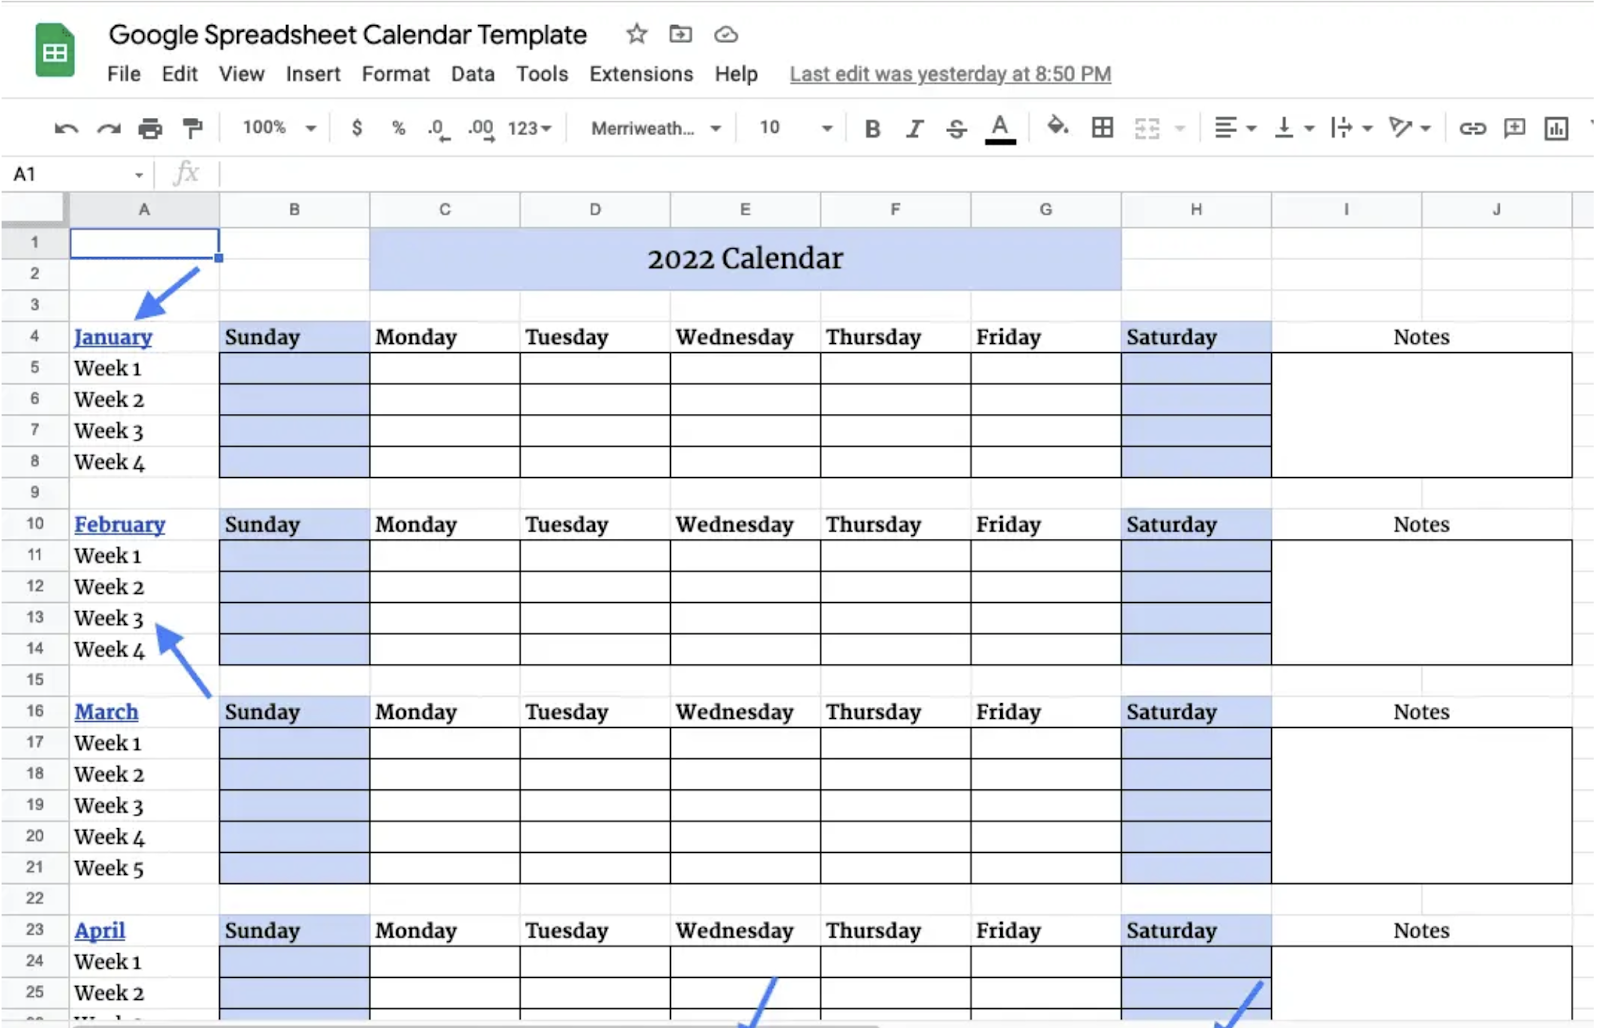
Alternatively, here’s an example of simple Google spreadsheet content calendar:
10. Establish A Content Repurposing Strategy
Once you write a blog post, you can extract snippets from it to publish on other platforms, like Twitter, LinkedIn, and even your email list.
You’ve already done the hard work of creating the initial content, so extracting a few snippets from it should only take a few extra minutes, yet it will help more people discover your brand.
For example, this travel blogger wrote a post on visiting Florida Keys:
Then, she repurposed the content into Instagram and Facebook posts. While these were both sponsored posts, it’s an excellent example of how bloggers can repurpose their content:
In fact, content repurposing was a key reason Alex Hormozi grew from 180,000 to over 1.2 million followers in just one year.
He only spent about two days per month creating content, and therefore only published a few long form pieces of content per month. However, he then had a team that repurposed snippets from those long form pieces of content across different social media platforms which allowed him to publish 80 total pieces of content per month.
As you grow, you can also hire a freelancer to repurpose the content for you.
11. Measure Progress And Seek Feedback
Starting a blog can feel overwhelming. There’s a lot to learn, and even advanced bloggers are always learning and improving. Instead of trying to make your first blog post perfect, just get started and then make one improvement to each blog post you write.
Over time, your blog posts will become better and better and you’ll earn more readers.
Once you start to build an audience, you can also ask for their qualitative feedback on your blog posts. A key mistake many larger bloggers make is failing to interact with their audience.
However, interacting with your audience will help you understand their pain points, which will help you think of better topic ideas and improve your writing. Direct communication with your audience will also help you build a deeper relationship with readers, which will help you monetize your blog in the future.
From a tactical standpoint, you can interact with your audience by responding to their comments. This is what we do here at Copyblogger:
You can also send them an email asking for feedback on your content. Or, you can just ask them about their biggest challenges.
You can also measure success based on traditional content marketing metrics, like traffic and social shares.
Start Your Blog Today
Starting a blog is just like starting a business – it might be hard to get traction in those first few weeks, but you’ll eventually grow if you just stay consistent.
Nevertheless, we realize that the initial stage can be overwhelming. That’s why we built the Copyblogger Academy, a community of entrepreneurs and marketers who earn money through writing.
Inside the Academy, you’ll have access to eight different courses on various marketing topics, including email marketing, copywriting, and SEO. You’ll also connect with like-minded peers and can ask seven-figure entrepreneur and Copyblogger founder Tim Stoddart for direct feedback in the community. You can sign up today risk-free. If you aren’t 100% satisfied, we’ll give you a full refund within the first 30 days.
Not sure what to sell on Amazon? We’ve got you covered.
As the most popular ecommerce marketplace in the world, Amazon is a great place to open up shop. But if you want to make consistent sales and turn a profit, you’ll need to choose the right items to sell.
The goal is to find products with high margins, low competition, and plenty of demand.
And that’s precisely what we’re going to be helping you with in this post.
First, we’ll show you 7 ways to discover profitable products to sell on Amazon. Then, we’ll show you how to source products, and we’ll share some examples of trending products that are selling like hotcakes on Amazon right now.
And finally, we’ll wrap up with the answers to some of the FAQs that new Amazon sellers need to know.
7 ways to find profitable products
Below, we’ve shared 7 of our favourite methods for finding profitable products to sell on Amazon.
Note: Keep in mind that these are just ways to generate product ideas. You’ll need to crunch the numbers yourself in order to validate those ideas and determine whether or not a particular product could be profitable. For example, you’ll need to look at the average sale price of a given product, and then subtract your costs and selling fees from it to work out your profit margins.
1. Browse the Best Sellers list
Amazon’s Best Sellers list is the best place to start when you’re searching for products.
It shows you a ranking of the most popular products on the marketplace in different product categories, based on sales figures.
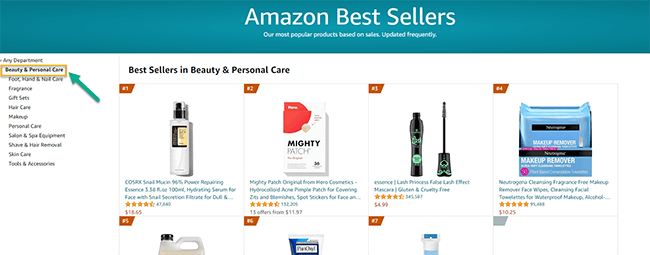
Start by opening up the web page, then select a department (niche/category). For example, if you want to sell health & beauty products, you might select the Beauty & Personal Care department.
Pin
If you wanted, you could then select sub-categories within that department. For example, Skin Care > Face.
Pin
You’ll be able to see the 100 top selling items within that department/category, which can help you find products that are guaranteed to be in demand in your niche.
Obviously, the only downside to this method is that while products on the best sellers list are in high demand, they also tend to have lots of competition. You’ll need a strong listing with competitive prices and great SEO optimization to compete.
Bonus tip: You can also see if a given product is ranking on any best-seller lists from the product listing. Just scroll down to the product information section of the page and look at the BSR (Best Seller Rating).
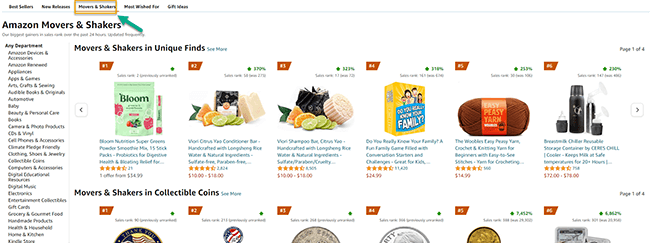
2. Check out Movers & Shakers
At the top of the Best Sellers page, you should see a tab that says Movers and Shakers
Click this, and you’ll see a list that shows you the biggest gainers in sales rank over the last 24 hours within any product department or category.
Pin
This can be a really good way to spot trending items.
If something is featured on the Movers & Shakers list, there’s a good chance demand for that product is rising rapidly. If you move quickly, you can capitalize on that and make a ton of sales.
Bonus tip: If you’re focusing on trending products, make sure the rise in demand isn’t a ‘flash in the pan’ before you go all-in. Some products will trend upwards following a viral social media trend for a week, then suddenly plummet.
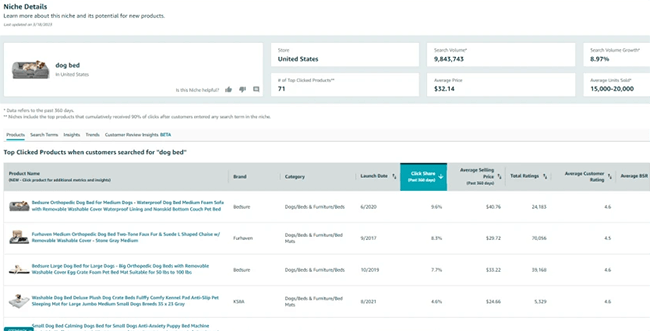
3. Use Product Opportunity Explorer
Product Opportunity Explorer is a free product research tool for Amazon sellers. It provides insights into what Amazon shoppers are searching for and purchasing.
Pin
You can access Product Opportunity Explorer through Seller Central once you’ve logged in to your Amazon seller account.
From there, you can explore detailed reports for trending products in any niche, with data such as:
Search volume
Average units sold
Average price
Number of sellers
Seasonality
Customer reviews & ratings
Purchasing behaviour
You can use these metrics to analyse opportunities and assess the competition and demand.
4. Use a third-party Amazon research tool
Aside from the Product Opportunity Explorer, there are also a bunch of other third-party tools that can help you find profitable products to sell on Amazon.
For example, the AMZScout Chrome extension surfaces data to help you analyze opportunities as you browse the marketplaces.
Pin
It can show you data on the number of sales, average sales prices, FBA fees, and the number of other sellers for each product in a niche.
Plus, it can also show you the net profit margin for that product, so you can easily pick out the most profitable items. And surface historical performance data, so you can see whether sales are trending up or down over time.
AMZScout is a paid platform but you can get some around 15 searches with their trial.
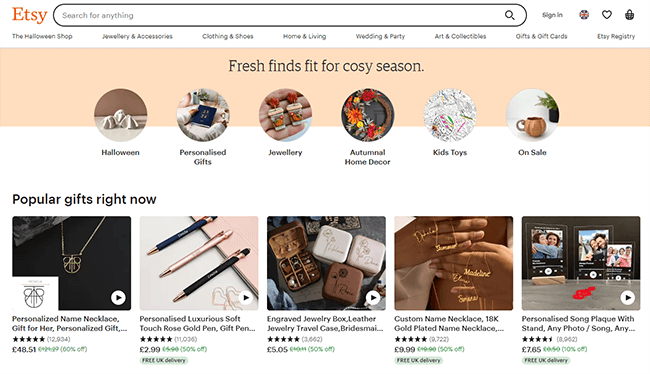
5. Look at what’s selling on other platforms
So far, we’ve looked at ways you can find profitable products by looking at what’s already being sold successfully on Amazon.
But another method is to look at what’s being sold on other online marketplaces/ecommerce platforms, like:
Ebay
Etsy
Shein
Temu
AliExpress
If you find a product that’s sold thousands of units on one of these platforms, there’s a good chance it will sell really well on Amazon too.
Pin
Even better, if that product isn’t listed for sale anywhere on Amazon, it could be a fantastic gap in the market for you to fill. Products with zero competition on Amazon but proven demand on other platforms are golden opportunities.
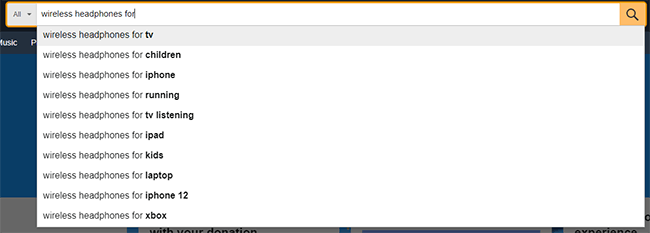
6. Conduct keyword research to find a gap in the market
Another way to find profitable products with low competition is to do careful keyword research.
One way to go about this is to use the autofill method.
Start by typing a broad product search query into Amazon, e.g. ‘wireless headphones’. Then, add a modifier word, e.g. ‘for’, ‘with’, or ‘without’:
Pin
You should see a bunch of pre-populated search suggestions full of long-string keywords. If something appears in these search suggestions, it’s a strong indicator that shoppers have searched for it before. In other words, it tells us there’s probably demand for it.
But because these long-string keywords tend to be for very specific products, there also tends to be low competition for them.
Try searching for different keywords that appear in the search suggestions after you use this method. Then, see if any other sellers have already created listings targeting those keywords.
If none have (or only a few have), this could be your gap in the market.
Bonus tip: There are tools out there that can help you to do keyword research more effectively. For example, some tools will show you the monthly search volume (a good metric to measure demand) and competition for each query. See our roundup of the best keyword research tools of the year.
7. Research the competition
Another easy way to find profitable products is to simply copy other successful sellers.
Start by choosing a niche, then look for the most successful Amazon sellers within that niche. These will usually be those rankings at the top of the page for popular products.
Click Visit the store to see what else they’re selling, and reverse engineer their strategy.
Don’t just make a carbon copy clone of their store, but look at which products they’re having the most success with and start there.
Bonus tip: Look at their customer reviews to see how you can differentiate your products/store to make them even better.
5 trending Amazon products to sell this year
The best way to figure out what to sell on Amazon is to use the methods above to research the market and find profitable products on your own.
However, in case that all seems like a lot of work, we’re also going to be sharing some specific recommendations of the best products to sell on Amazon this year. Here we go.
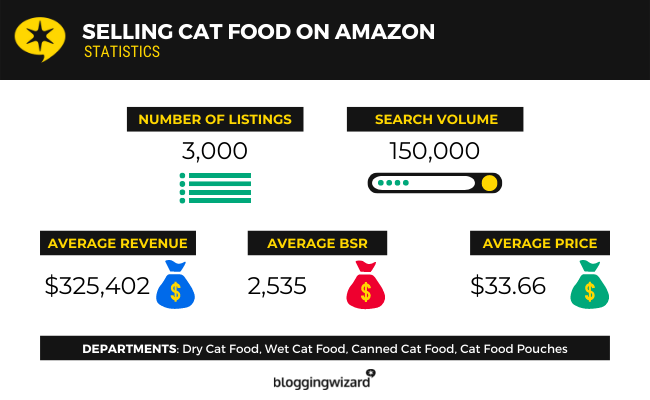
1. Alternative pet food
Pet food and pet supplies generally are great areas to focus on, as these product categories have a relatively low number of listings compared to their search volume, and profit margins are high.
Pin
For example, ‘cat food’ has a monthly search volume of 150,000, but there were only 3,000 ‘cat food’ products listed on Amazon as of our latest analysis of the data, so there should be plenty of room for new sellers.
To differentiate yourself from the competition, it might be worth focusing on new kinds of ‘alternative’ pet foods that appeal to the growing niche market segment of health-conscious pet owners.
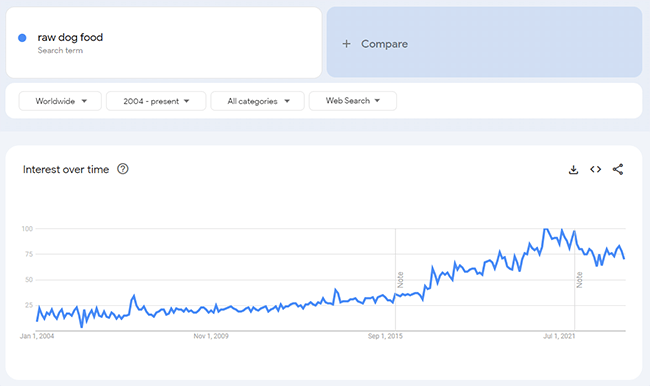
For example, searches for ‘raw dog food’ have been trending upwards, per Google Trends data.
Pin
Likewise, searches for ‘vegan dog food’ are up considerably compared to a decade ago.
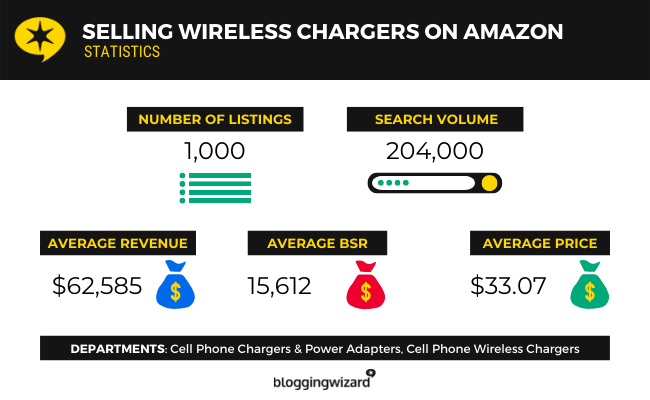
2. Wireless chargers
Wireless chargers are another great product for new Amazon sellers to sell.
They’re high in demand right now, with a monthly search volume of over 200,000. And there’s still a relatively low number of listings to compete with (around 1,000 at the time of our latest analysis).
Pin
Plus, wireless chargers should be relatively easy to source. You should be able to get them for less than a dollar a piece if you buy in bulk from wholesalers on sites like Alibaba. And the average sale price on Amazon is $33.07, so profit margins are fantastic.
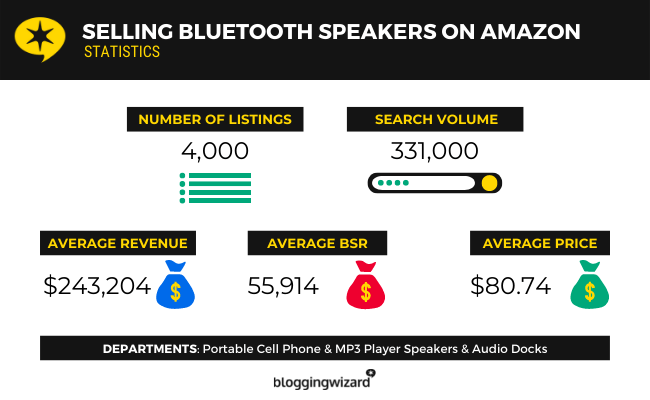
3. Bluetooth speakers
This is another product in the tech category that’s always in demand, with a monthly search volume of over 330,000.
Pin
There are over 4,000 listings on Amazon for Bluetooth speakers, which isn’t too competitive. And you can help differentiate yourself from the competition by focusing on a specific section of the market.
For example, you might focus specifically on waterproof, portable, or outdoor Bluetooth speakers.
The average annual revenue that each Amazon listing for a Bluetooth speaker earns is around $243,000.
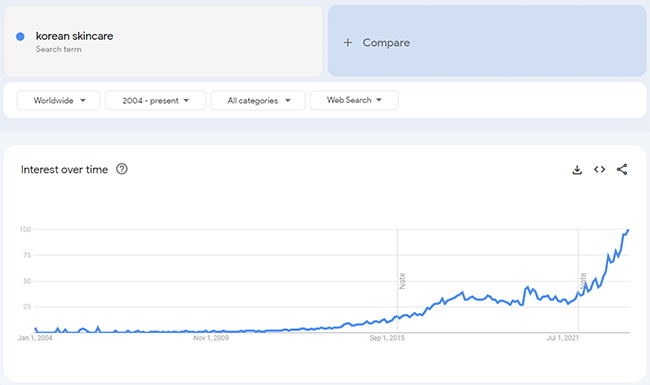
4. Korean skincare
Beauty & skincare products are some of the best products to sell on Amazon as they offer decent margins and are in high demand, but because the space is competitive, it helps to niche down.
As such, you might want to focus on ‘Korean skincare’. If we look at the Google trends data, it’s clear this is a segment of the market that’s really taking off.
Pin
Monthly searches have been trending upwards sharply over the last couple of years as Western consumers become increasingly interested in Korean culture, making now the perfect time to sell Korean skincare products before it gets too competitive.
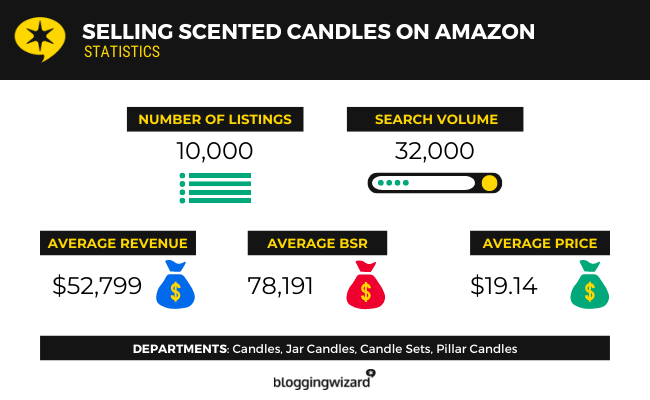
5. Scented candles
There are tons of scented candles on Etsy. But on Amazon, there isn’t as much competition as you might think.
There were around 10k listings as of our latest analysis, and the average revenue of each listing was over $52,000—that’s huge.
Pin
Plus, it’s fairly easy to start selling scented candles as they’re relatively inexpensive to buy and widely available from suppliers. You could even make your own if you were so inclined.
Again, it’ll help to niche down and focus on a specific type of scented candle. For example, wood-wick candles, or candles made with soy wax.
How to source products to sell on Amazon
So you’ve found some products you want to sell on Amazon—but how do you actually get them?
Well, you have a few different options. Let’s take a look at each of them
Drop shipping
One way to source products to sell on Amazon is to work with a drop shipping supplier.
With drop shipping, you don’t have to buy any stock upfront, and you don’t have to worry about shipping/fulfilment.
All you have to do is pick the products you want to sell and add them to your Amazon store. When a customer places an order with you, you place the order with your drop shipping supplier and enter the customer’s details for fulfilment. Your supplier ships the product directly to the customer for you.
The great thing about this method is it’s super easy to get started with, and almost completely risk-free as you don’t pay for anything until your customer has already paid you.
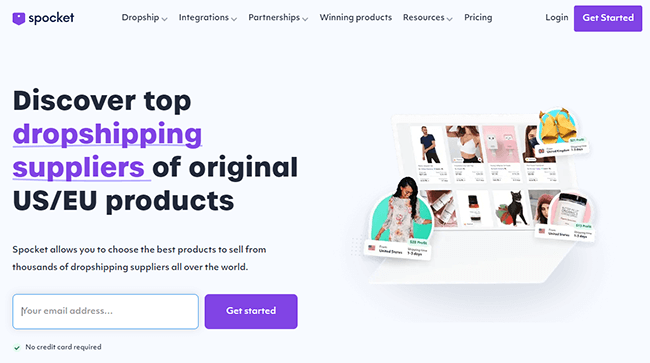
To get started, you’ll need to sign up for a dropshipping platform. We’d recommend Spocket—it gives you access to thousands of products from drop shipping suppliers in the EU and US.
Pin
Then, you can import products to your Amazon store and start selling. If you’d rather source products for drop shipping manually, you can browse AliExpress for tens of thousands of products suitable for drop shipping from suppliers in China.
Print on demand
Print on demand is another risk-free way of sourcing products without having to purchase any stock upfront, much like drop shipping.
There are lots of print on demand sites that provide a catalogue of blank, white-label products for sellers to customize. You can upload your own original designs to these products to create custom merchandise, then sell that merch through your Amazon store.
When you make a sale, the order gets sent through to the print on demand site. They produce the order and ship it straight to the customer, and you only pay for what you sell.
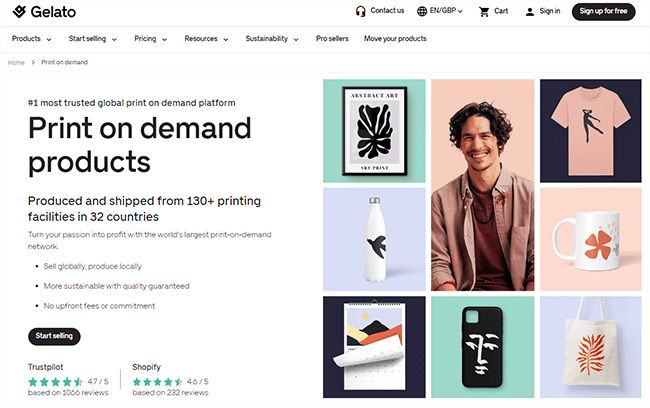
We’d recommend using Gelato as it has a huge catalogue of print on demand products for you to choose from including apparel, phone cases, wall art, mugs, phone cases, and more.
Pin
Note: Gelato doesn’t offer direct Amazon integration, but it’s possible to send the orders you receive on your Amazon store to Gelato via Shopify.
Wholesale
Another way to get products to sell on Amazon is to buy them from wholesalers.
This tends to offer better margins than drop shipping but it’s also more hands-on. So, you’ll have to handle inventory management and order fulfilment yourself.
You can find wholesale suppliers on sites like Alibaba. You’ll usually need to buy their products in bulk to access wholesale prices, as most wholesale suppliers have minimum order quantities.
Pin
Obviously, you’ll also need somewhere to store your inventory. If you don’t have a warehouse space of your own, you can use Amazon’s FBA (fulfilled by Amazon) service.
With FBA, you source the products from suppliers but Amazon stores them for you and handles shipping, customer service, and returns.
You’ll need to factor in the cost of FBA when determining your selling price.
Private label
Another way to source products is to work with a private-label manufacturer.
With private label manufacturing, you outsource the production of the products you sell to a third-party manufacturer but sell them under your own brand. It’s a little like print on demand but you have more control over your supply chain and the production process.
Depending on the manufacturer you work with, you may be able to direct them in terms of things like the materials and ingredients used, the size, colour, and length, the production rate, etc.
You’ll also have full control over things like packaging and branding.
To find a private label manufacturer, you can look in your local area, speak to other retailers that stock similar products to find out who they work with, or search online.
Bonus tip: Depending on how much money you have available to invest, you might even want to work with a private-label manufacturer to produce a completely new product of your invention. Check out our guide on how to come up with new product ideas for advice on getting started.
Retail arbitrage
With retail arbitrage, you buy products from other retailers (rather than suppliers) and then resell them on Amazon at a mark-up for a profit.
An example might be buying a $10 product from Walmart and then listing it for sale at $40 on your Amazon store.
If you want to go down the retail arbitrage route, some good places to source products include flea markets, garage sales, off-price stores (i.e. T.J. Maxx), charity shops, etc.
DIY ecommerce
One final way to get products to sell on Amazon is to make them yourself from scratch.
This is perfect for products that can be hand-made, like soaps, candles, bath bombs, jewellery, etc. But obviously, it’s not going to be suitable for products that require a more complex manufacturing process.
According to a recent survey, the large majority of Amazon sellers make at least $1,000 per month in online sales. What’s more, the top 26% of sellers make over $25,000 per month in sales.
Can you sell stuff directly to Amazon?
Wholesalers can sell directly to Amazon through the Amazon Vendor Central program. However, it’s invite-only, so you’d have to have an existing relationship with Amazon in order to become a first-party seller.
Other than that, regular merchants can sell their products on Amazon, but not directly to Amazon.
What percent does Amazon take from sellers?
It depends on the category of the product sold. Amazon can charge anywhere from 8% to 45% of each sale in referral fees, depending on the product category (but often, it’ll be around 15%). In addition, there may be other fees such as listing fees, closing fees, etc.
If you’d rather not have to deal with Amazon’s referral fees, and you want to keep all of your profit for yourself, it might be a better idea to start selling products through your own online store instead.
You’ll need an ecommerce platform to build your store and start selling online. Check out our roundup of the 11 best ecommerce platforms to explore your options. Then, take a look at our data-driven roundup of the best products to sell online for ideas on what to sell through it.
Final thoughts
That concludes our in-depth guide to what to sell on Amazon.
Hopefully, you now know how to find profitable products to sell online, and how to source them.
Just remember: It’s not all about what you sell. The success of your store will also largely depend on things like your pricing, positioning, marketing strategy, SEO, etc.
Aside from managing editorial here at Blogging Wizard, Nicola runs Your Creative Aura where she teaches people how to write music. Nicola has the rare ability to take inspiration from the most mundane objects and turn it into catchy, and memorable lyrics. And, she is rather fond of penguins.
And all major browsers support it, so there is no need for fallback images of .jpg or .png.
That’s super important, as formats like WebP do still require fallback images, even though most major browsers support that format.
Keep in mind that when you upload an image, your theme dictates what size thumbnails to create – and there are at least 3 of them.
So, for every image you upload, there are 4 versions of it.
And if fallback images also have to be generated, you could be carrying 8 images for every one that you upload.
That takes up a LOT of disk space and makes your backups huge too.
So, you definitely want to start saving images in the AVIF format after you update to WP 6.5.
Do a Test First
NOTE: Site owners on Iridium Hosting do not need to do this test, as this host supports AVIF.
The WP dev team states that all hosts may not support AVIF images.
(And WP does not support them until after you update to 6.5.)
So, after you update, create an image in AVIF format, upload it, and then embed it on a page using various sizes offered by your theme.
Check to ensure that each one is the AVIF format.
Use Squoosh for Image Optimization
Squoosh is an online image optimizer that allows you to create the perfect display size and file size for your images prior to upload.
And it has the AVIF format available too.
I’ll be updating my Squoosh tutorial for you before I give the all clear to update to WP 6.5.
Block Improvements
WP introduced Gutenberg Blocks back in version 5.0. And let’s face it, they had zero styling features whatsoever.
We all had to use other specialty block plugins to easily add styling.
But, in the last couple of years, WP has steadily been adding more styling options to the most popular blocks.
Border and Shadow
I’m very excited about the new styling options in the Styles tab!!
In WP 6.5 there is anew Border & Shadow set of styling options for the following blocks:
Image
Columns
Buttons
You can add either independently. And you can set the width of the border as well as the colour.
These 2 styles are the main reason I had special CSS added to my theme and/or used a specialty block plugin. I’m delighted that I can now do both with just native WP blocks and styling.
When you add a link, then click to see it, all you can currently see is the URL.
In WP 6.5 you’ll be able to see the page/post title and the URL.
Auto Overlay Colour
One of the super features of the Cover Block is that you can assign an overlay to it and put text on it.
And while you could choose any colour you wanted, doing so was a nit-picky process to find just the right colour.
In WP 6.5, the overlay colour will now be auto generated based on the background colour of the image. And you can adjust it from there.
But in my tests, it chose a colour that was so close to the image that it didn’t offer enough contrast for the text to get good ADA compliance.
Maybe how well it works depends entirely on the image you are using and the predominant colour.
Block List View Improvements
I don’t really use the List view of blocks much, do you?
I honestly don’t find it that helpful just to see the name of blocks, especially with nested blocks.
Rename
WP 6.5 will now allow you to rename blocks, but only in the List view.
See Settings
And you’ll be able to alt-click (right-click for most of you) to see the settings of a block, or copy or duplicate or such.
Is this a feature you think you will use?
Dynamic Gallery
In the Gallery block, you’ll be able to set the display order to random, which will show a different order of images on every page load/refresh.
Add Favicon Via Settings
There is a new section on the General Settings page for Site Icon.
Now it’s super easy to upload it instead of doing it through your theme or via a plugin.
Fully Block Based Theme Improvements
To my knowledge, the following features will only be available on themes that have full block support (including areas outside of the content editor).
Fonts Library
Pulling in Google Fonts from Google has become a GDPR compliance issue. So, many site owners have switched to hosting their fonts locally, meaning on their own hosting.
But, getting those fonts installed for the theme to use has been a bit of a tech bear.
You may need to check with your theme’s developer to see how to make use of it in your theme and/or if your theme has a native way to upload your fonts locally before you do it through this new WordPress feature.
FYI, I have multiple sites and on those with themes created over the last couple of years, I’ve gone back to using standard web fonts. They look just fine and I don’t have to store or bring in any font to use them.
If you designed your own theme, you most definitely want to read up on this change, as it is not without issues on some themes.
And you’ll want to know about where WP will be storing the fonts and ensure that directory can be written to.
Otherwise, you’ll have to use the plugin they suggest if you don’t know how to add them to the theme files for storing and preloading.
This is just one more case where hiring a webmaster designer is worth every penny.
Better Template and Pattern Management
You can now see all of your templates and Patterns in a grid layout.
Plugin Check
Many plugin developers make both a free and paid version of their plugin.
And, it’s customary for the free plugin to be installed for the paid version to work.
In WP 6.5, plugin devs can add a check to ensure that the free version is installed and active, else it will throw an error message to install it.
Many devs already have their own requirement check, but now they can allow WP to do that check for them, if they like.
Revisions
As you edit a post or page, WP auto saves it, and now you’ll be able to see your revision changes better.
However, smart site owners have code to do overwrites of revisions after a certain number so they don’t clog up the database with 50-100 auto saves for every post.
That will likely impact how much history you can see in this new revision feature.
Synced Patterns Improvements
Synced Patterns replaced Reusable Blocks in WP 6.4.
But with both of them, editing the individual or original one was a little tricky.
In WP 6.5 they wanted to include an overhaul of synced patterns, but ultimately decided to punt it to WP 6.6 as there are some bugs with it.
Advanced Features
There are a few improvements in WP 6.5 that will excite developers and advanced users.
Custom Fields
Gutenberg Blocks will now natively support custom field association for block attributes.
This means that 3rd party sources can provide dynamic data for that block.
And it also means that custom metadata can be added to the block as well.
A good example of this would be for a news site or one that shows the weather.
New Interactivity API
If developers wanted to add some type of dynamic interaction on their site, they had to create their on JS code.
But this lead to a LOT of inconsistency, especially among different plugins.
WP 6.5 now fully supports an Interactivity API that will do the following:
“Blocks can share data, actions, and call-backs between them. This makes communication between blocks simpler and less error-prone. For example, clicking on an “add to cart” block can seamlessly update a separate “cart” block.”
So it’s obvious that this has implications for e-comm sites.
The lightbox effect on images will also benefit from this new API.
Be sure to check the changelog on your plugins to see if they have been refactored to make use of this new API.
MaAnna is a geek who can still speak in plain English. She helps DIY site owners plus webmasters and designers create sites that are secure, perform well, and get noticed by search engines and readers.
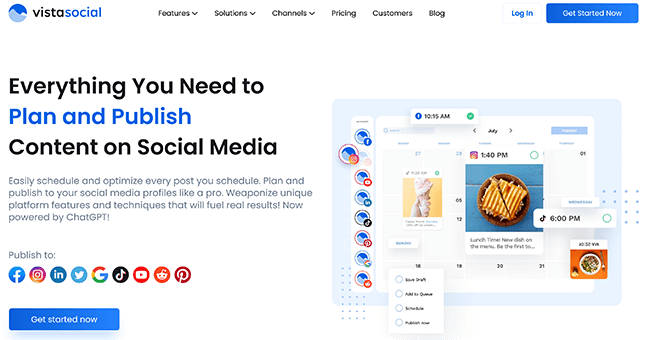
Vista Social is an all-in-one social media management tool.
The platform offers analytics, an AI assistant, and powerful publishing tools.
But is it any good?
By the end of this review, you’ll know the answer, including whether it suits your specific needs.
We’ll dive into Vista Social’s capabilities, explore the plans available, and detail what we think are the software’s main pros and cons.
You’ll also find a video version of the review below.
Read on to check out our written-version of the review.
What is Vista Social?
Pin
Vista Social is a social media management platform that gives you access to a range of tools to help grow your brand. It was founded in 2022 by Brittany Garlin.
Garlin wanted to create a modern management solution for present-day social media channels.
The result of that vision? They’ve connected 1.9 million social profiles and publish over 2.92 million posts every month.
That said, with so many others out there, is it enough to become your social media tool of choice?
Continue reading for our full review of Vista Social. I’ll discuss the pros and cons and a few alternatives, too.
Vista Social is a popular platform. The key features worth knowing about include:
Publishing tools
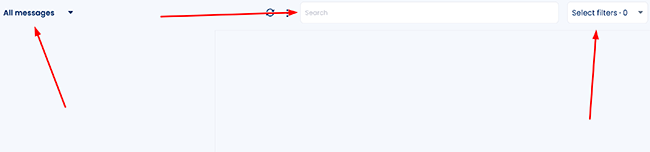
Inbox
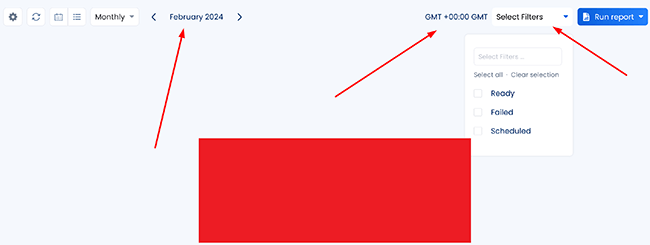
Reports
Calendar
Customer support
Integrations
We’ll explore these features and give you a first-hand look at the tool.
Please note: Some of Vista Social’s features are only available in specific pricing plans.
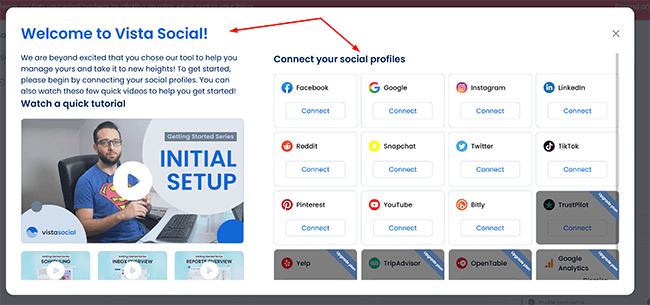
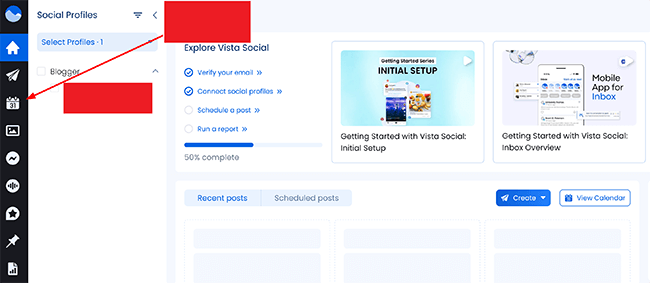
Getting started
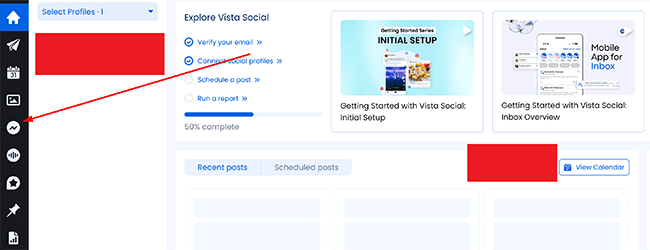
When you log into Vista Social, you’ll be taken to a screen that looks like this:
Pin
Here, you can connect your social media profiles, whether that’s X, Reddit, or Facebook. Connecting is as simple as logging into your social media account and verifying your email.
Once you’re done connecting your favourite accounts, Vista Social is ready to use.
Publishing tools
Vista Social offers a range of publishing tools that allow you to take your social media promotion to the next level.
The platform enables brands to schedule social media posts in advance, meaning you can post content at optimal times without having to be online at that precise moment.
Users can also access a library of stock images and videos, as well as a dedicated design tool, so you can create engaging social media content without needing top-of-the-line graphic design or photography skills.
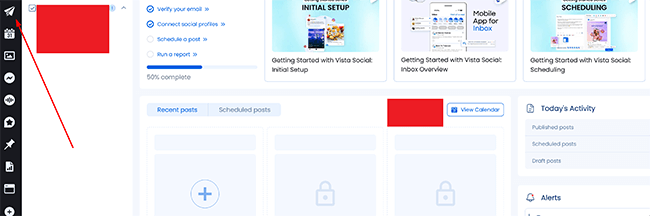
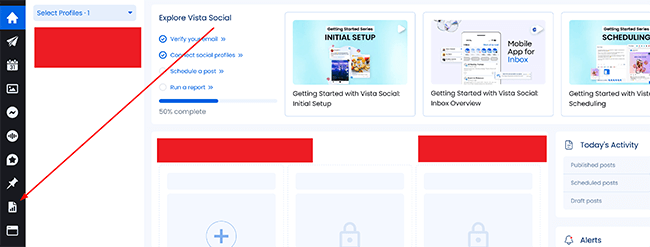
You access these tools and more straight from the central dashboard. To do so, click where it says Create and then New post like so:
Pin
Note the text won’t appear at first, but hovering over the symbol of the paper plane will do the trick.
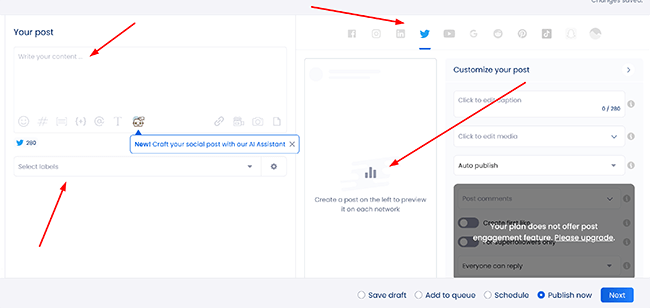
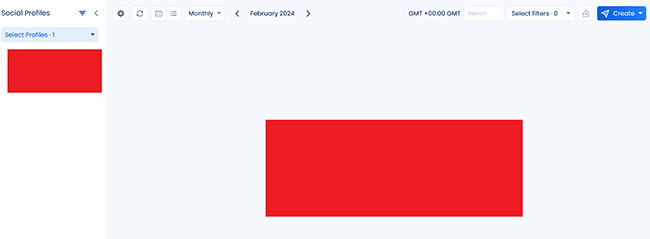
From there, you’ll be taken to a new screen that looks like this:
Pin
On this page, we’re able to control a lot of different aspects of our social media channels, all in one place. We can write out the content, add videos and images to it, use AI to help with the post, and even preview what the post itself will look like across all of our linked channels.
We’re also able to schedule this content well in advance, add it to a queue, and decide if we think the content suits each social media channel. If not, we can deactivate that channel in a single click.
Once we’re happy with our content, we need to click where it says Next. This will take you to the calendar view, which we’ll cover later in the review. The final step is to click Publish now when you’re ready. Vista Social will not send out your content to all of the social channels you selected.
Elsewhere, we have the ability to bulk publish (and schedule) our content. Bulk publishing can be found under the paper plane symbol again, but this time, you need to click where it says Bulk publishing. You’ll be taken to a new screen that looks like this:
Pin
This really shows us what Vista Social can do. We have the option to import a CSV file containing prepared posts, as well as the ability to import a blog directly. Importing a blog means Vista Social will pick the latest articles from your blog and is most suitable if you’re providing an RSS feed.
I particularly like the option to import images, videos, and documents, and I have the power to schedule them all at once. A great solution for those who work with a variety of different multimedia content.
That said, as useful as bulk publishing is, it’s not available at all on the standard plan. In fact, several features are locked behind the higher plans, so it’s best to decide what you need from the platform before jumping in.
All of that is without mentioning the Smart Publishing functionality, which allows you to share third-party content such as articles, blogs, or videos by simply listing related keywords or adding an RSS feed.
There’s more than enough here for you to create a comprehensive social media plan and grow your business.
Inbox
Vista Social offers a handy Inbox tool that allows you to manage all your social media messages from a single place.
Using the tool, you can respond to messages (and comments) across all of your linked channels. Not only does this mean you don’t have to log into various different sites to achieve the same result, but you also have added features on top.
For example, using the tool, I’m able to quickly assign tasks to team members so they can work together to manage messages and respond to customers as required. I can also filter messages based on different criteria, such as message type (or sender), making it easier to prioritize and manage my inbox.
It’s a highly convenient tool that will help you free up time.
Getting started with it couldn’t be easier. From our central dashboard, all we need to do is click here:
Pin
Doing so will take you to a new screen that looks like this:
Pin
Here, we’re able to filter our messages, search for ones that may have been lost in the pile, and can quickly reply to messages as needed. If we don’t want messages to show for a specific channel, we can simply hit the toggle at the side. Vista Social will then display the rest of your messages from your selected channels only.
There are no locked features, and the inbox tool is available from the standard plan onwards.
It’s a great showing overall, and it’s another area that Vista Social more than holds its own.
Reports
Vista Social’s Reports tool allows you to track key metrics across your social media platforms and generate reports that can be customized as and when needed.
It’s here you can visualize your social data through the use of charts, graphs, and additional visual aids, enabling you to quickly and easily identify trends (and patterns) in your social media performance.
You’re also able to share your social media performance data, including with clients and internal teams, and can do so in a few clicks.
While there’s nothing about the reports that are especially innovative compared with competitors, what you do get is a well-polished offering that gives you everything you need to stay on top of your socials.
You can access the reporting functionality straight from the dashboard. To do so, click the following graph icon like so:
Pin
You’ll be taken to a new screen that looks like this:
Pin
Here, we can choose the channel we want to view reports for, filter them as required, and can choose whether to schedule new reports at a specific time.
In the top right-hand corner is a blue Run report button:
Clicking this allows us to run reports, build custom reports, and schedule new ones for automatic delivery. Once ready, we can share any of our reports in a few clicks.
Overall, it’s a solid offering that most businesses will find useful.
Calendar
The Calendar is a useful tool for businesses to plan (and schedule) their social media content.
Similar to how reports work, you’ll be able to organize social media posts for different platforms, such as Facebook, X, Instagram, and LinkedIn, and then schedule them to be published at specific dates.
The feature allows you to better maintain a consistent social media presence and, crucially, save time on content creation, as well as ensure that content gets posted at the best possible times.
You’ll be able to collaborate with team members (and clients) to plan and approve social media content with relative ease.
To access the calendar from the dashboard, we need to click on the calendar icon like so:
Pin
You’ll be taken to the following screen:
Pin
On this screen, we can set up new content to post across our channels, as well as view what we have lined up for each calendar month. Setting up new content is as easy as clicking the blue Create button located in the top right corner of the screen.
Clicking the Create button also allows you to quickly find content, make notes for ideas you may have, and make use of a dedicated X thread maker.
It’s simple but also highly functional and gets the job done in a few clicks.
Customer support
Vista Social’s customer support team is largely considered to be very good at what they do, and you can reach them via email (or across social media). There’s little in the way of live chat functionality, with more of a focus on following a series of generated questions to get the help you need.
You can also contact the support team via phone, video call, and Skype, and there are a series of FAQs provided should you need them. I was impressed that you can suggest features outright to the team should you think you have a good enough idea that’s worth implementing.
Accessing the customer support is relatively simple. To do so, on the central dashboard, click the question mark icon like so:
Pin
You’ll be presented with a few choices of the type of help you want to receive. Options here include the Help Center, as well as the Quick Start and FAQ sections. Clicking the Help Center will take you to the following page
Clicking the Get in touch text will take you to this page where you can write out your request:
All in all, there’s good enough support here, if not quite as good as those competitors that allow you to speak to the team directly and quickly via live chat–most users expect to see that option by default today.
Integrations
Vista Social integrates with a variety of tools and platforms, including all of the primary social media channels, as well as offering integration with Canva, a graphic design and video editing tool, and Make.com, top-notch automation software for your workflows.
Zapier integration, which allows you to connect the webinar platform to over 2,000 different apps, is also available and significantly expands your toolset. It’s a decent line-up of integrations overall, if not leading.
Vista Social comes in four main tiers: Standard, Professional, Advanced, and Enterprise. Of course, each plan includes differing features, benefits, and usage limits, with the key limit being the number of active social profiles you’re allowed.
Here’s an overview of Vista Social’s plans and prices:
Standard: This plan allows you to publish content and make use of analytics as well as the engagement tools. An AI assistant is available on this plan, as is the mobile app. You’re limited to 8 social profiles in total. It’s a good starting package for one user at $39 per month who wants to manage various social media platforms.
Professional: This plan allows you to publish content and make use of analytics as well as the social media management tools as above, but you also get report scheduling and listening tools. You’re limited to 15 social profiles in total, although that should be more than enough for most at $79 per month for five users. It’s the most well-rounded plan that Vista Social offers.
Advanced: The Advanced plan is aimed more at teams and agencies with 30 social profiles in total and up to 10 users. For most, the Zapier and Make integration will be the key benefit here. It comes in at a less affordable $149 per month, although other social media management platforms can be far more.
Enterprise: This plan is only for the largest needs, with 80 social profiles in total and an unlimited number of users. The dedicated social media managers and the onboarding and training are key perks here. Enterprises can expect to pay $379 per month.
Impressively, all plans come with a 14-day free trial.
Vista Social is a great social media tool, but it also has its weaknesses. Here’s a brief round-up of what we thought were the biggest pros and cons.
Pros
Range of publishing tools. There’s more than enough here for you to create a comprehensive social media plan and grow your business with the use of bulk publishing, scheduling functionality, and a smart design tool. Manage multiple social media platforms with ease.
Inbox functionality. Quickly enables you to manage all your social media messages from a single place as well as search for ones that may have been lost in the pile.
Reports. Track key metrics across your social media accounts and generate reports that can be customized as and when needed in a few clicks. You can build custom reports and schedule new ones for automatic delivery, too.
Integrations. There’s enough to work with here if not the widest range compared to some competitors.
Customer support. We’ve spoken with customer support on a few occasions and they were extremely helpful and responsive each time.
Cons
Content discovery. Most competitors don’t offer any sort of content discovery feature. For the most part, this is a solid feature but when we searched for content from news and Instagram, we got a lot of results that weren’t relevant. I’m sure we’ll see Vista Social improve this feature in the future.
Hashtag suggestions. This is a nice feature but some suggestions we got weren’t too relevant.
Vista Social alternatives
Need to look at some alternatives? Check out our recommended social media tools before we head to our Vista Social review conclusion:
Sendible | Our review— One of the most comprehensive social media tools and far more affordable for teams compared to most tools. There’s even a library of images inside the image editor to keep things moving and content curation tools.
Pallyy | Our review— Great for beginners, freelancers and agencies alike, with a very easy-to-use interface and plenty of team collaboration tools built-in. It also comes with plenty of sophisticated features that its competitors lack, like a powerful comment management solution.
SocialBee | Our review— Designed around scheduling, SocialBee’s content categories and advanced publishing functionality will help you save time. You can view analytics and engage with your audience via social streams. In addition, they have an AI tool that can build out your entire social strategy.
Final thoughts
That concludes our Vista Social review.
Overall, Vista Social enables you to manage all of your key social media channels in one place, and it more than lives up to it.
With a comprehensive range of publishing tools, inbox functionality, and custom reports with automatic delivery, there’s plenty here to grow your brand. Most importantly of all, it works seamlessly.
While it’s true we’d like to see a quicker way to reach the team, this isn’t a deal breaker for what is otherwise a compelling solution.
We recommend you give the 14-day trial a go (on the plan of your choosing) to see if it’s the right social media management tool for you.
Jamie is an experienced digital marketer and writer with a Joint Bachelor of Arts (B.A.) in English and Journalism. He has created online guides and reviews for over eight years and loves helping people make better decisions. When he’s not researching, Jamie likes to complain about the weather, hike, and drink plentiful amounts of tea.
If you find yourself on a stage or in the spotlight, you had better take it seriously. People are watching, so don’t let them down. Open with confidence, deliver with passion, and close with a bang. There is no other way. But if you’re not sure how to begin preparing, this might seem like a mammoth task. Luckily, there’s time to learn.
These five public speaking experts have you covered, along with a little help from ChatGPT. Copy, paste and edit the square brackets in ChatGPT, and keep the same chat window open so the context carries through.
Wow your audience with your words: ChatGPT prompts for public speaking
Get ideas for keynotes
Keynote speaker, leadership performance coach, and host of the Compete Every Day podcast Jake Thompson uses ChatGPT to get ideas for keynotes, “as a baseline to start and then adjust the copy and tune.” He said it’s helpful if you’re “stuck generating a strong starting point.” Don’t let the blank page intimidate you. Give ChatGPT information about your audience and their goals, to get brand new ideas you can roll with in minutes. Prompt like a winner from the very start, following Thompson’s lead.
“You are an expert marketing copywriter. Create a list of five ideas for keynote speech titles for my talk for [describe your audience, e.g. new managers and leaders], aspiring to be [describe their goal, e.g. high performance in their role].”
Once you have options for ideas, choose your favourite and request a framework with examples tailored to your field of expertise.
“The talk will discuss the importance of [outline the key learning objectives, e.g. self-leadership, building rapport with team members, investing in your professional network]. Create a structure for the talk. Include titles and subtitles that incorporate examples and metaphors from [your signature topic, e.g. sports, business] to [outcome you want to achieve, e.g. inspire, motivate] the audience.”
Resonate with your audience
Keynote speaker, corporate facilitator and founder of Breakthrough Play, Gary Ware, has worked with some household name brands, including HPHP+1.3%, IntuitIntuit0.0% and GoFundMe, to improve the public speaking skills of their outward-facing team members. Ware is all about the audience. Use these prompts to make a speech you have already written super relevant to the people in the room. Don’t miss the mark by taking them in turn.
“The audience of my next talk consists of [describe your audience including their profession, typical age, and any other characteristics] and the theme of the [event, e.g. conference] is [describe the theme, e.g. marketing]. Based on this information, outline the key interests or concerns my speech should address to be most relevant to them.”
When you have your answer, incorporate the learning into your speech, then check it aligns.
“Based on your recommendations given, review my attached talk to ensure my message is aligned with this audience’s expectations and needs. [Paste speech]”
Balance warmth and competence
Vanessa Van Edwards is founder of The Science of People and bestselling author of books Captivate, unpacking the science behind succeeding with people, and Cues, mastering the secret language of charismatic communication. She delivers 50 keynote speeches every year and knows how to make a great impression that lasts long after her talk is over.
“The best presenters have the perfect blend of warmth and competence,” Van Edwards explained. “But most of us have an imbalance between the two.” To redress the balance, Van Edwards pastes her script into ChatGPT and asks for recommendations. Here’s a prompt you can try for yourself.
“Review the script for an upcoming keynote I’m delivering. Identify three sections that lack warmth, and suggest the most appropriate way to improve that (for example, with a story, joke, case study, example or warm words) being specific about what to add or remove. Then, identify three sections with the potential to signal more competence, and suggest what to add (for example data, facts, analytics or competent words), being specific. [Paste script]”
Breathe more often
Founder of Best Speech Mike Pacchione, a keynote coach who has worked with renowned speakers such as James Clear, Donald Miller, Amy Porterfield and Olympic gold medalist Scott Hamilton, wants you to focus on breathing. Sounds simple? There’s much more to it. “Speakers can speak with more power when they breathe frequently,” he explained. “But they write notes in paragraphs and long sentences. That leads to being out of breath by the time you hit a full stop.”
Pacchionne recommends that speakers write their scripts as if they’re song lyrics. In other words, format your keynote wording in such a way where you are reminded to take a breath. An ideal task for ChatGPT.
“Rewrite the following text with the exact same words, but add a line break every 7-10 words. The end product should resemble song lyrics instead of written paragraphs. [Paste your script]”
When you have your reworked speech, Pacchionne recommends you “go back and make sure the breathing breaks are in natural spots,” adding that “a speaker would be far better served with that format versus paragraphs.”
Make a backup plan
Entrepreneur, bestselling author, podcast host and keynote speaker Liz Bohannon is hired to give keynotes of different lengths, usually between 30 and 60 minutes. But the story is sometimes different on the day. “Often the event is running late, so I have less time than I’d planned for.” Bohannon uses ChatGPT to make a robust backup plan, so she’s prepared for any eventuality before she arrives.
“This speech is [duration]. I need to shorten it by [number] minutes but maintain [topic of speech, lesson or takeaway] as the main point. Make suggestions as to which parts I can cut while maintaining the powerful message: [Paste script]”
Stand out on stage: ChatGPT prompts to show up and wow
Give your audience everything they want and more when you prepare well using ChatGPT. Get ideas for talks with suitable examples, resonate with your audience whatever the event, and balance warmth and competence for charismatic delivery. Don’t forget to breathe by seeing your paragraphs as lyrics, and make a backup plan to fit in with questionable organizer timings.
Show up, stand tall, and say your words with pride. Secure raving fans and repeat bookings. The mic is yours, don’t let us down.
Founder of Coachvox AI – create an AI version of you. Forbes 30 under 30 class of 2017. Post-exit entrepreneur and author of Ten Year Career. Competitive powerlifter and digital nomad.
In the digital battleground for consumer attention, the expected demise of third-party cookies has accelerated the adoption of AI in creative personalization. Matthijs Schakenbos, Product Manager from KINESSO, underscores the imperative of adopting AI-driven creative personalization to not only survive but thrive in this new era.
In the current digital era, the competition for consumer attention is more intense than ever before. The deprecation of third-party cookies, which Google has already begun for 1% of Chrome users globally and plans to ramp up to 100% by the end of 2024, has forced brands into a pivotal moment: adapt by embracing new ways to engage consumers with personalization and privacy at the forefront, or risk falling behind.
While there may not be a singular replacement for cookies, Artificial Intelligence (AI) has emerged as a transformative force that enables brands to cut through the noise and connect with consumers on a deeply personal level. To avoid being left in the digital dust, your brand should prioritize six critical areas of AI-driven creative personalization: Content Creation, Contextual Adaptation, Creative Optimization, Dynamic Advertising, Accessibility, and Experimentation.
Failing to integrate these AI-driven initiatives in your approach could mean watching your brand’s digital engagements – and its competitive edge – diminish. The following sections will highlight how embracing these areas can revolutionize brand engagement, helping to ensure your marketing efforts are not only current but ahead of the curve.
Content Creation for Enhanced Efficiency
The integration of AI-driven technologies for generating images and videos has marked a pivotal shift in content creation, providing creative teams with the ability to produce visually compelling media and respond to market opportunities and personalization needs more quickly and effectively than traditionally required. These advancements, which include the generation of images and videos, are not replacements but enhancements, designed to augment the creative process. They empower creative teams with the capabilities to not only amplify the aesthetic appeal of content but also enable the delivery of visuals tailored to captivate target audiences more effectively.
Text-based content generation has also emerged as a powerful AI capability, enabling advertisers to produce consistently effective content across the digital landscape – landing pages, search ads, social media posts, etc. Generative AI continuously undergoes training and refinement, drawing upon a wealth of documentation and data sources. This process ensures that the content both adheres to the brand’s voice and resonates strongly with its intended audience. Emphasizing a collaborative relationship between AI technologies and creative talent, this approach highlights that the insights and creativity of human professionals are augmented, not replaced, by these innovations in technology.
Contextual Adaptation to Increase Relevance
AI’s ability to discern the context of creative consumption adds an additional layer of personalization, ensuring that the content delivered is not only tailored to the individual but also relevant to their current situation. By analysing contextual factors such as geographic location, time of day, and weather conditions, AI can adjust creative delivery in real-time, enhancing its relevance and impact. This could manifest in a variety of ways, from suggesting indoor activities on a rainy day to highlighting local events or promotions based on the user’s location.
Accessibility & Inclusive Marketing
Enhancing accessibility through personalization is a vital step toward creating a more inclusive digital environment. The automatic generation of alternative text for visuals helps explain the content to users with visual impairments, enriching their experience with media. Similarly, transcription services for audio and video ads ensure that individuals who are deaf or hard of hearing can understand the messages. Using AI to translate ads into multiple languages also breaks down language barriers, allowing brands to reach a global audience and ensuring that people from different linguistic backgrounds can understand and engage with their content. By making media accessible to people of all abilities, brands can broaden their reach and connect with a more diverse audience, helping everyone learn more about their offerings.
Dynamic & Personalized Advertising
Moreover, ingestion of a brand’s product feed data to automatically populate dynamic ads ensures that the latest products and offers are always showcased, keeping content fresh and directly aligned with inventory changes. This seamless integration means that personalized creatives can dynamically feature products that are most relevant to the individual consumer’s preferences and previous interactions, creating a highly targeted and effective marketing approach.
Content Optimization Across Platforms
In today’s fragmented digital landscape, it’s critical to optimize creative for the plethora of platforms where consumers spend their time. AI enhances this process by automating the adaptation of assets to meet the specific requirements of different channels, including the use of AI for resizing creative to meet platform requirements and AI for optimizing creative to adhere to platform best practices.
Whether it’s adjusting image dimensions for Instagram’s layout or fine-tuning video content for YouTube’s algorithms, AI ensures that each piece of content is not only dimensionally compatible but also optimized for visibility and engagement. This intelligent tailoring maximizes engagement and maintains a consistent brand experience across all digital touchpoints, optimizing content wherever it’s deployed.
Additionally, the application of machine learning to analyse commentary data, including social media comments and product reviews, facilitates suggested refinements of creative elements – providing recommendations for adjustments to imagery and copy – to better resonate with audiences.
Experimentation
Experimentation, facilitated by AI, plays a critical role in refining and optimizing content strategies. Through A/B testing and sophisticated data analysis, AI empowers brands to systematically evaluate different content variations, identifying those that most effectively engage and convert audiences. This ongoing process of experimentation and optimization is crucial for fine-tuning content strategies in real-time, enabling brands to continuously improve their engagement tactics based on evidence. By embracing AI-driven experimentation, brands can ensure that their content remains dynamic, relevant, highly engaging, and more likely to drive superior outcomes in terms of both engagement and ROI.
Looking ahead, the potential for AI to enhance creative personalization is vast and continues to expand. Emerging technologies, such as emotional AI, promise to unlock new dimensions of personalization, enabling brands to create content that not only meets the explicit needs of consumers but also resonates with their emotions and aspirations. These advancements will allow for even more sophisticated and nuanced personalization strategies, further elevating the effectiveness of digital marketing efforts and strengthening the bond between brands and their audiences.
Don’t let low-value accounts and promotional material bog down your time on X (formerly Twitter). Here are some strategies to curate content, engage with quality people and maximize your time.
For many entrepreneurs, social media is a double-edged sword. While platforms like X (or Twitter) offer the potential for valuable connections, insights and entertainment, they also become a significant distraction and time sink for many of us.
For professionals, you want to make sure that the content you’re posting is benefitting users and amplifying your social media presence. But finding ways to quantify that and using that to make decisions moving forward may not be obvious.
Anyone who has grappled with these challenges needs tools to ensure that their time spent on X is beneficial to their life and business. Having high-quality metrics can allow you to consistently evaluate your audience’s engagement with that content.
Why track the value of X?
We all know that social media in general and X in particular gives you the ability to present content to millions of people. But getting value out of X requires a strategy. Tracking the performance and behavioural metrics of my X account can give me actionable data about the reach of my X content and the level of engagement from both my followers and X’s users in general.
Tracking X’s value can also increase the visibility of your business and brand by giving you metrics you can use to increase the number of followers to your feed, which can also help you drive those followers to your other channels, be it a website or other social channels.
Analysing the X metrics of your audience, like trending hashtags, can help you stay up to date on trends you can leverage to drive traffic to your X presence. Finally, learning who the users are who are also leveraging X effectively can lead you to influencers in your industry who can help boost your brand.
Best metrics you can use to track the value of X
Metrics are important because they can take questions like “How popular is the information I’m putting on X?” or “Am I putting too much or not enough content on my feed?” and give you numeric values you can use for making decisions. Some of these metrics are easily available. Some require a deeper dive or use of X’s Analytics suite to find.
Gaining followers
The total number of followers an account has is an almost ubiquitous statistic. Every time you hear about a celebrity in an entertainment-related story, the number of social media followers they have often follows.
If I have a quick spike in followers, that can mean an individual tweet resonated with my audience, while a slow steady rise in followers may mean that my content has broad appeal and that the content is being shared with others.
Link clicks
Link click metrics measure the number of times users click on the URLs found in your tweets. If you supply links to external content regularly in your tweets, this is another metric that is very useful in gauging what content resonates with users.
This can also be useful when you are trying to drive traffic to your own website. Correlating link clicks from X as well as other channels (Facebook, email, etc.) with how long users stay engaged with the content on your website can help determine which channels drive the most traffic to your site.
Conversion rate
Conversions evaluate the impact of a post on a user’s action. That action could be going to a website to make a purchase, sign up for a newsletter or download a file. Metrics like these can also help identify areas that could be improved. For example, if a post drives traffic to a form, but users don’t fill it out or abandon it before hitting submit, then the posts are effective, but the form may need some optimizing.
Engagement
Engagement rate requires a little math to calculate. The engagement rate measures the impact of your posts by dividing the total number of engagements (comments, reposts, likes, etc.) by the number of views. A higher engagement rate indicates that your content triggers a reaction from your audience. A lower engagement rate can mean they read your posts and then move on.
Impressions
If your post shows up in someone else’s timeline, that’s an impression. Two important things to note about impressions: They do not necessarily imply interaction with the post as simply viewing a post counts as an impression. Also, multiple views from the same user count as multiple impressions.
Reach
Unlike impressions, reach counts unique views from different users. If one user sees one of my posts seven times and another user sees it twice, my reach will be shown as two.
Think of impressions as a view of how many times your posts are being shown to users. By contrast, reach shows how many people you’re reaching. Both metrics combined can give you a better understanding of how your X strategy is working.
Why does this matter long-term?
Having a decision-making strategy built around X metrics can benefit your business in several ways, beyond just increasing the number of followers you have.
1. You can evaluate long-term performance
Identifying the posts that perform well over time can single out content that your audience identifies with. Supplying your audience with similar content in the future can optimize your X stream with more consistently high-value content.
2. It helps you understand your audience
X’s analytics suite provides more about your audience than just their username. You can gain information about followers’ interests, geographic location, what language they speak and the time of day their activity level is at its peak. When you cater your content to the preferences of your audience, it leads to more frequent and more positive engagement.
3. You gain better control of your content strategy
Quality content isn’t just a question of what to post. When to post and how frequently are also considerations as X feeds update constantly. You want to make sure you post quality content when your audience is most active on X.
If you don’t post enough content, users may look elsewhere for content they want or simply be shown someone else’s material. If you post too much you may saturate your audience with noise that will also drive them to other feeds. Analysing engagement will show when your users are most active and craving your content. Concentrate on posting at these times.
Increasing value over time
As you use X strategically, you may notice that the percentage of valuable experiences on the platform grows over time. By refining your feed and analyzing your audience’s interactions with your content, you can increase the value your audience and your business derive from X.
As you refine your analysis, your X network expands, exposing you to an ever-growing pool of knowledge and opportunities. This snowball effect of value demonstrates that strategic use of X metrics could become increasingly beneficial for you and your company.
Write me an essay plan, a revision guide, and tell me what to eat for the week. Emily Lowes of Raptor says that understanding how gen Z uses – and feels about – AI is key to marketing it successfully to them.
AI is a topic at the forefront of marketers’ minds, with new developments leading to a mass adoption of technology to influence efficiency, creativity, and outputs across the industry. However, where many are missing the mark is understanding the everyday ways AI is influencing, and changing, the next generation’s approach to technology.
At Raptor, we interviewed a selection of students to find out what gen Z really thinks about AI developments, how it is being used in everyday life, and their perspectives on the future. We compared this insight with our national student survey to identify three core areas of development that marketers should be aware of when it comes to gen Z and AI in the year ahead.
Majority of students pay for AI
Gen Z is actively using AI in their everyday lives and is excited by its possibilities, in contrast to what they view as an adverse reaction by older generations. Chat GPT (OpenAI) and Gemini (formerly Bard, Google) are the leading generative AI platforms that students are using to aid their day-to-day lives with 70% of students paying for a premium version of the services to enhance their experience.
Coursework and education is a core reason for this, with universities introducing AI detection tools alongside plagiarism checks in their feedback due to the number of students using generative AI software to support their studies.
What does this mass adoption of AI among gen Z mean for marketers? Most importantly, that AI will be coming to an office near you whether you like it or not. As the next generation of employees, generation Z will be leading the charge regarding the use of AI to improve efficiency in workflows, generate creativity, and plan ahead.
While AI use cases in education are seeing a spike, gen Z’s use of AI is now expanding into everyday life. Generative AI is being molded by students to help them become efficient in their extracurriculars, hobbies, and even their health and wellbeing.
Zenae, a final-year student at the University of Manchester, noted “Chat is good at revision plans but also at gym plans and meal plans. I plan my week using ChatGPT and always use it for my creative hobbies and tasks”. The term “Chat” has now entered gen Z vocabulary as a slang term for the platform due to its mass adoption. If you’re not using ‘Chat’, then you aren’t in the know.
The second core area of development for gen Z is that AI is impacting almost every area of students’ lives – not merely educationally but also creatively and in their passions. Marketers should take note of this significant technological shift and see the opportunity for emerging tech developments to establish a new normal when it comes to young relationships with technology.
Is privacy a thing of the past?
When asked what the drawbacks of AI might be, our subject group was full of contradictions. While students brought up a variety of issues that generative AI may have including biased learning models, untrustworthy information, and privacy concerns – they weren’t put off from using the platforms.
Ava, a second-year student at Leeds University, noted: “I’m at a point where I feel like my data is so out there that I don’t care. I had a lecture recently that said anything that you use that’s free, you’re paying for with your data. We’re the workers of the big corporations by using their stuff. We have no control of data and what it’s being used for, it doesn’t really bother me”. A lack of care for data and privacy was a concurrent theme among our findings, however improving mass adoption of AI was a topic for which gen Z was full of recommendations.
Education was at the forefront of student minds when it came to AI. The majority of participants noted that they taught themselves to use generative AI, and that they’d like to see a wider educational drive for society as a whole to learn about the benefits, drawbacks, and use cases of AI to help the technology have a wider positive impact.
What does this mean for marketers? Gen Z isn’t afraid of AI, and therefore the marketing industry will need to become comfortable with understanding, educating, and contextualizing use cases of AI for consumers. A great example of this in practice is the Google Pixel 8: AI in Your Hands campaign which shows its AI features in the context of everyday usage – removing barriers to entry for those interested in exploring their products.
AI is here to stay, and while the headlines might seem gloomy – gen Z is envisaging a better future through the adoption of the technology. To keep up with the next generation marketers must be willing to implement AI into their organizations to improve their working style, harness the consumer opportunity of AI impacting a variety of areas of life alongside realizing the power of education in advertising use cases for AI technology.